If you’re using Bitdefender VPN on your Mac and want to enjoy unlimited traffic and access content from anywhere in the world, you can upgrade to Bitdefender Premium VPN.
Note: The Premium VPN subscription and the Bitdefender Antivirus for Mac subscription are separate. This means you can use the VPN for the duration of its validity, no matter if your antivirus subscription is still active or not. If your Premium VPN subscription expires while your Bitdefender security solution is still active, the VPN will switch back to the free plan.
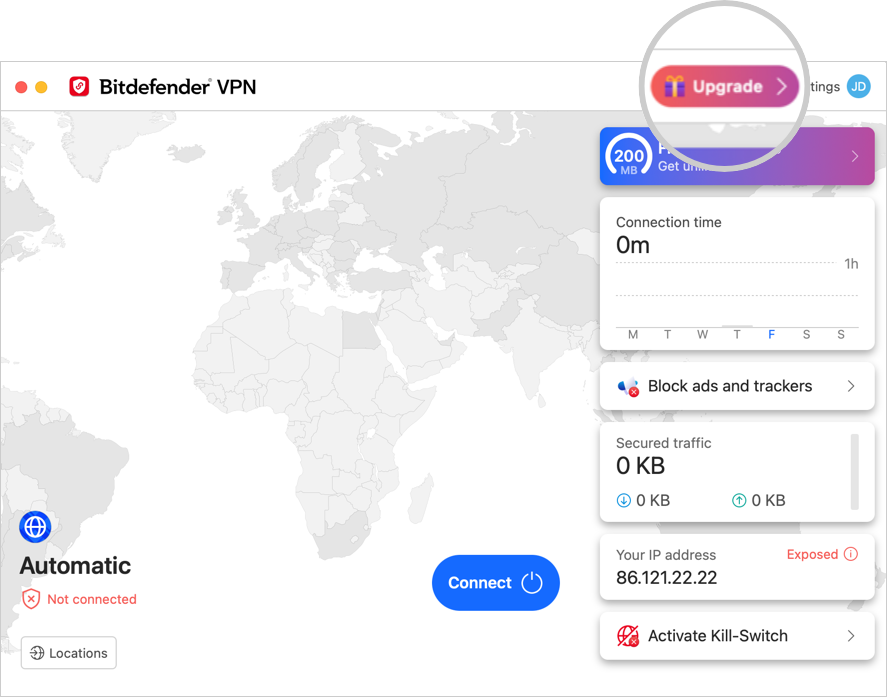
Step 1: Open Bitdefender VPN
To start the upgrade process, open Bitdefender VPN on your Mac using any of the methods mentioned in this article.
Step 2: Click the Upgrade button
Next, click the Upgrade button located in the top right hand corner of the Bitdefender VPN window.
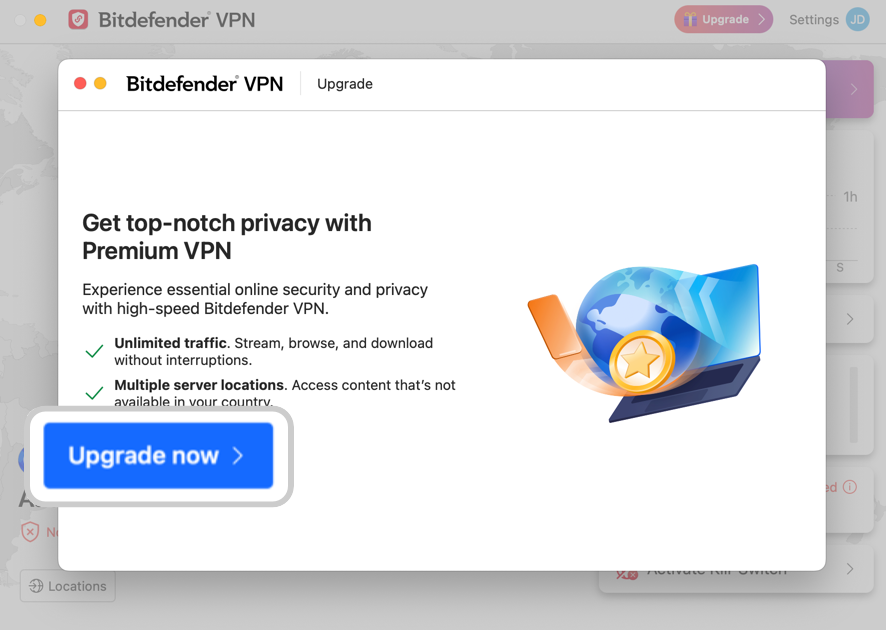
Step 3: Choose Premium VPN
A window will appear showing the Premium VPN benefits. Click on the Upgrade now button to move forward.
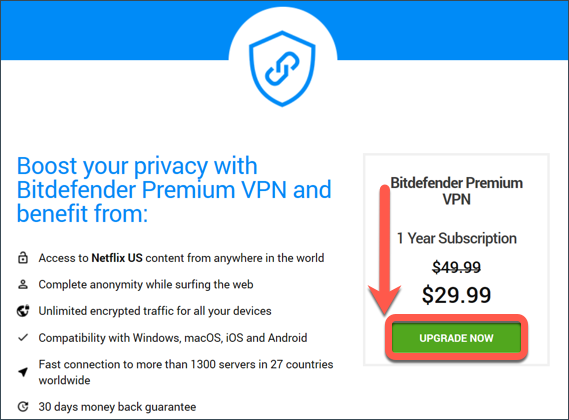
Step 4: Add to Shopping Cart
Your web browser will open, taking you to the shopping cart. Click UPGRADE NOW to add Bitdefender Premium VPN to your cart.
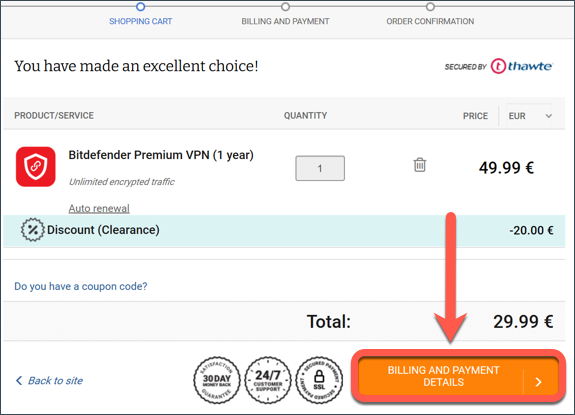
Step 5: Billing & Payment Details
Check if all the information displayed is correct, then click on BILLING & PAYMENT DETAILS.
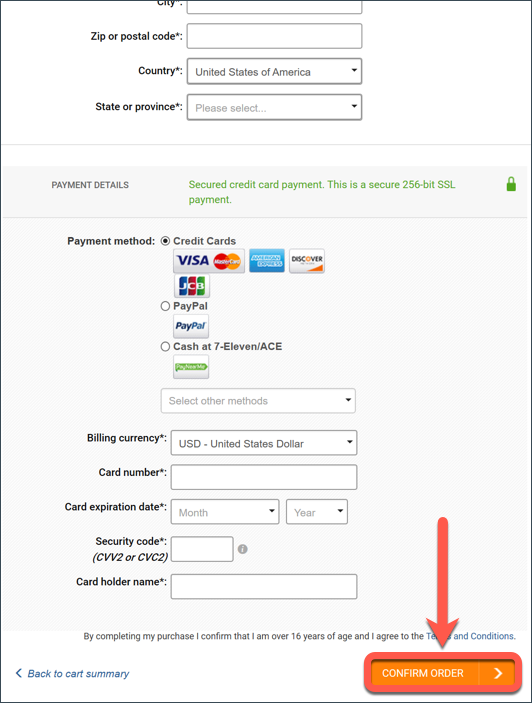
Step 6: Confirm Order
Enter your payment details, then click on CONFIRM ORDER to proceed.
Tip: Use the email address associated with your Bitdefender Central account for the best experience.
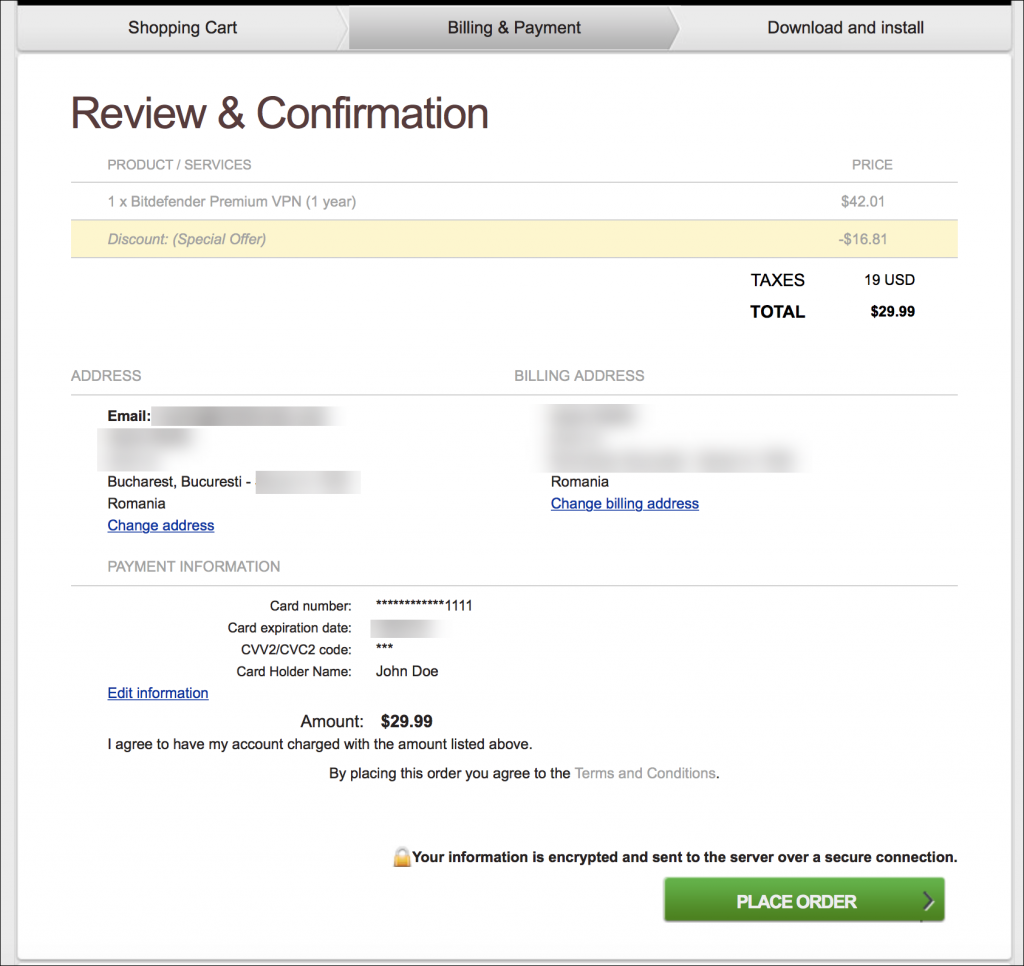
Step 7: Review & Place Order
Double-check all the data and then click on PLACE ORDER to finalize your purchase.
Congratulations! You’ve successfully purchased Bitdefender Premium VPN. Now let’s move on to the activation process.
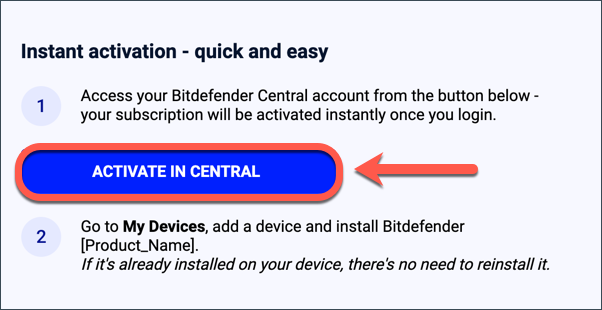
Step 8: Activate Bitdefender Premium VPN
To activate your new Bitdefender Premium VPN subscription, open the confirmation email received from Bitdefender after payment and click the ACTIVATE IN CENTRAL button. Your subscription will be instantly activated.
For step-by-step instructions, please refer to the article – How to activate the Bitdefender subscription.
Once you’ve completed the activation process, you can open the Bitdefender VPN interface on your Mac, and you’ll see that all the premium features are unlocked. Any references to upgrades will be removed, and you can now enjoy all the benefits of Bitdefender Premium VPN.