This article will guide you stepwise to install Bitdefender VPN on a Mac. You can install the Bitdefender VPN app on the product page, via Bitdefender Central, or through Bitdefender Antivirus for Mac. macOS Sierra (10.12) or a newer version is required.
Select one of the following installation methods to learn more:
Install Bitdefender VPN on Mac from the product page
1. Go to the Mac on which you want to install Bitdefender VPN and visit https://www.bitdefender.com/solutions/vpn/download/ in your browser.
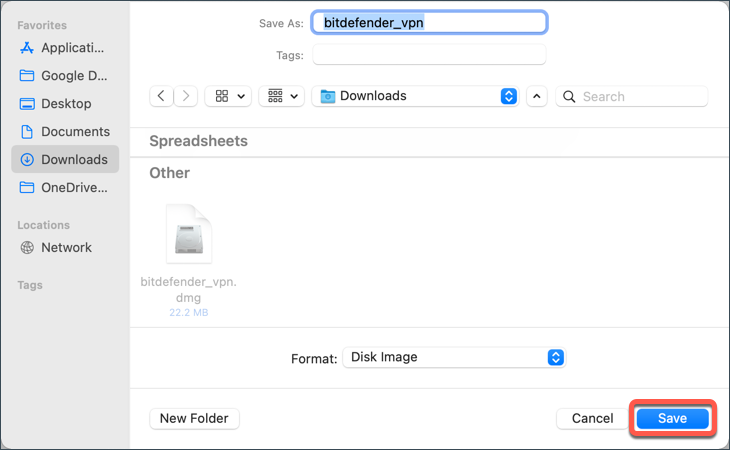
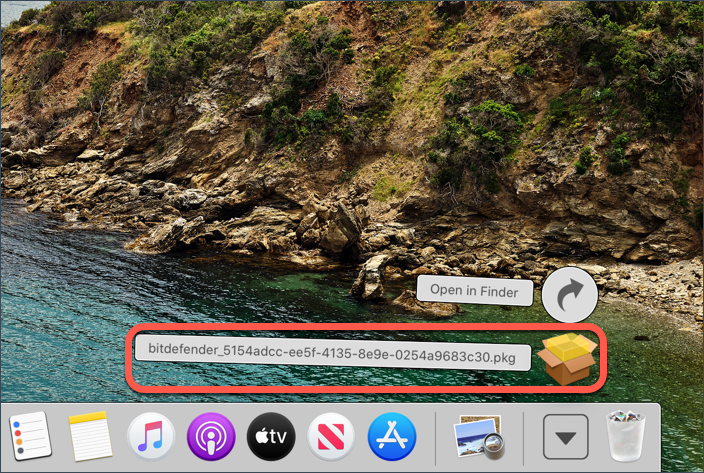
2. Save the bitdefender_vpn file on your Mac when prompted.
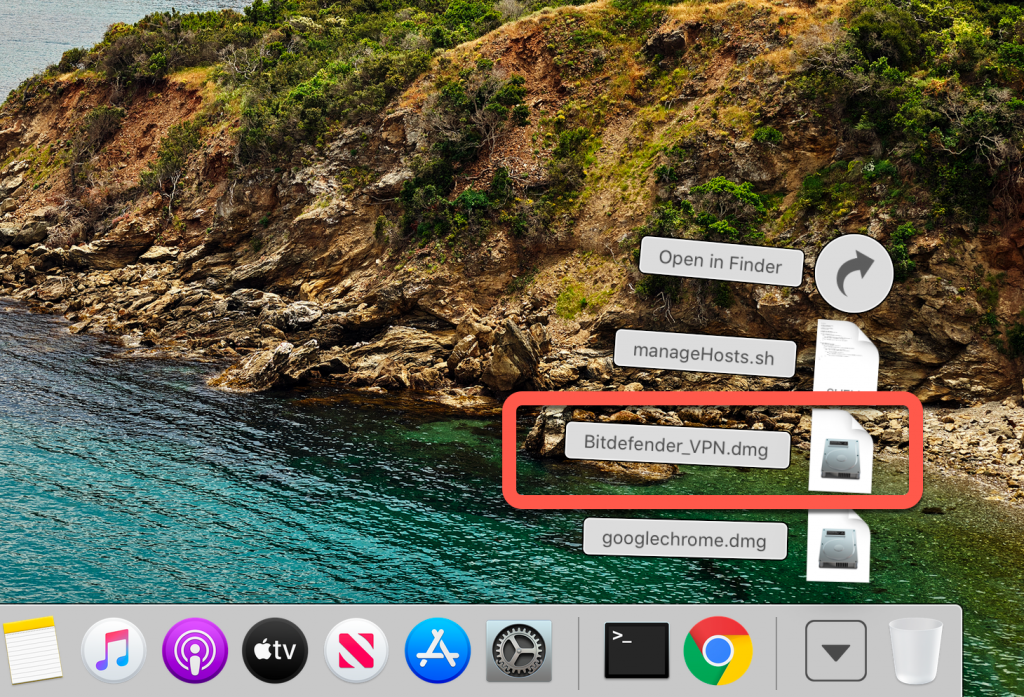
3. Once the download is ready, double-click the bitdefender_vpn file you’ve just saved to begin the installation.
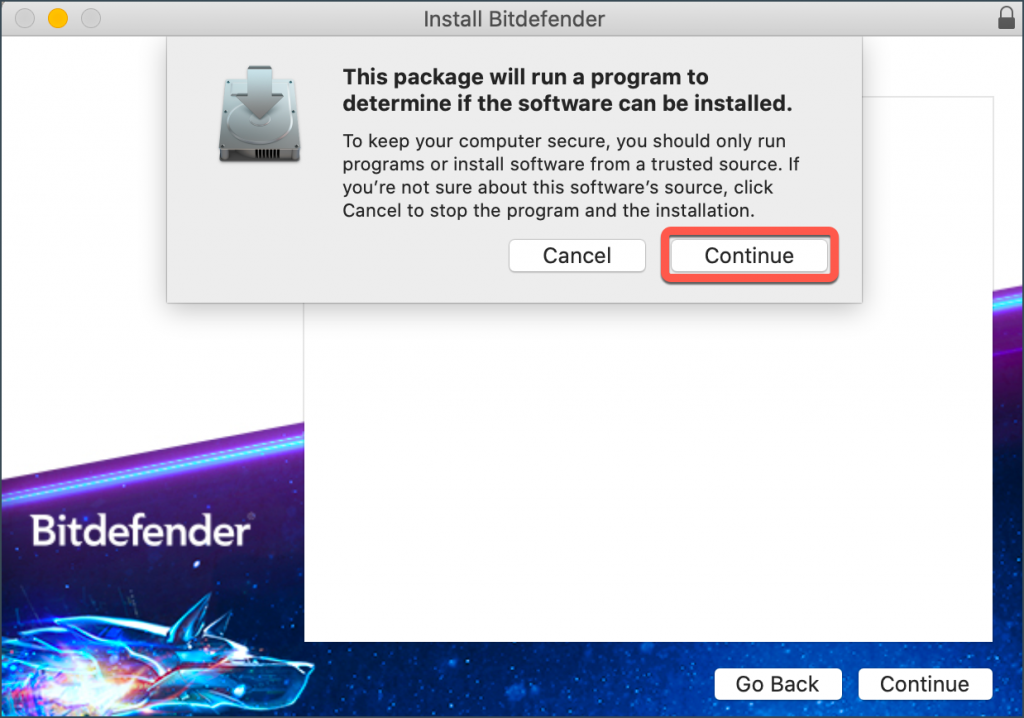
4. Follow the on-screen instructions to install Bitdefender VPN on your Mac. Click the ‘Continue’ button.
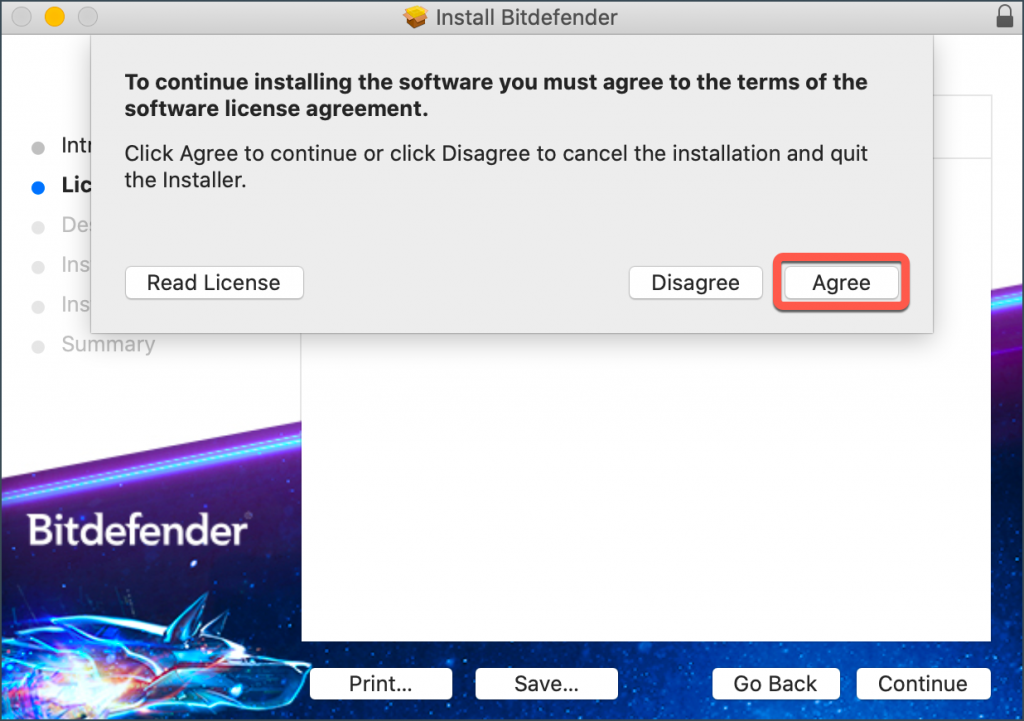
5. Click ‘Agree’ after you read and agree to the terms of the software license agreement.
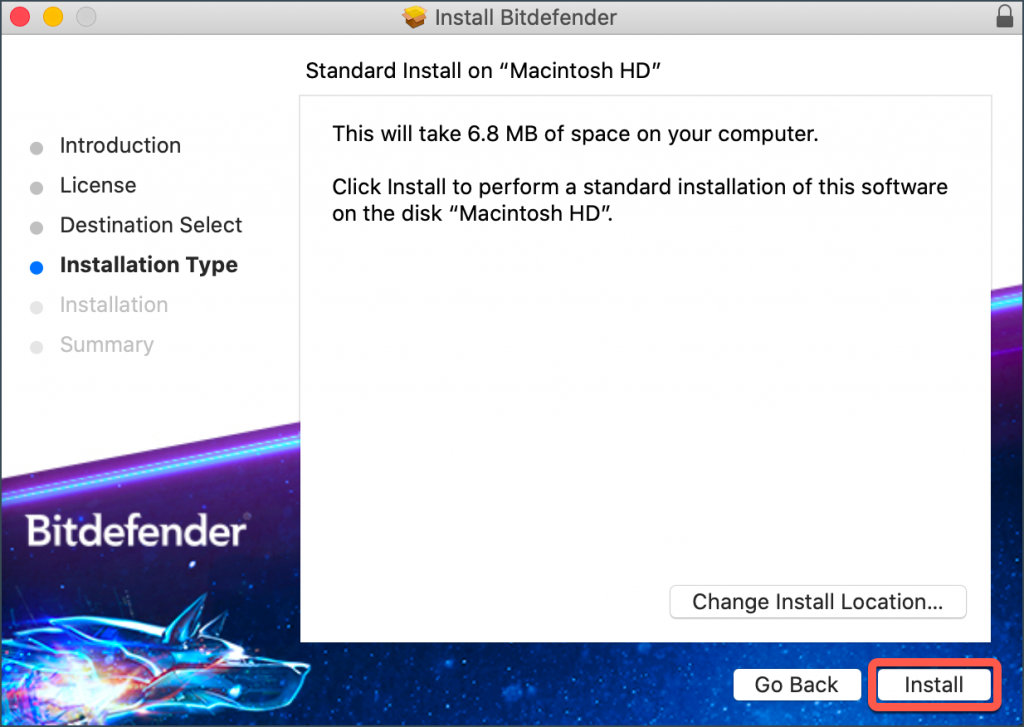
6. Next, click the ‘Install’ button.
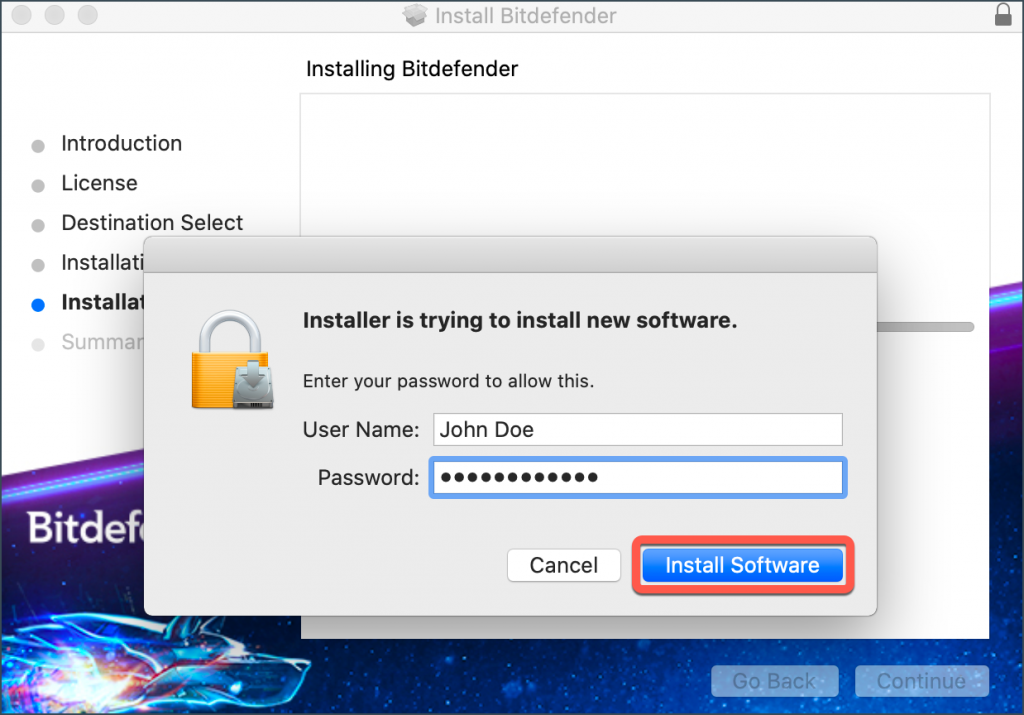
7. Enter an administrator username and password, then click ‘Install Software’ and wait until the installation completes.
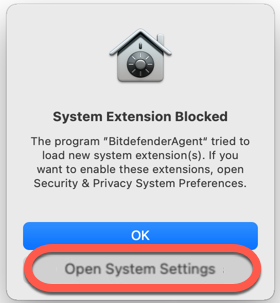
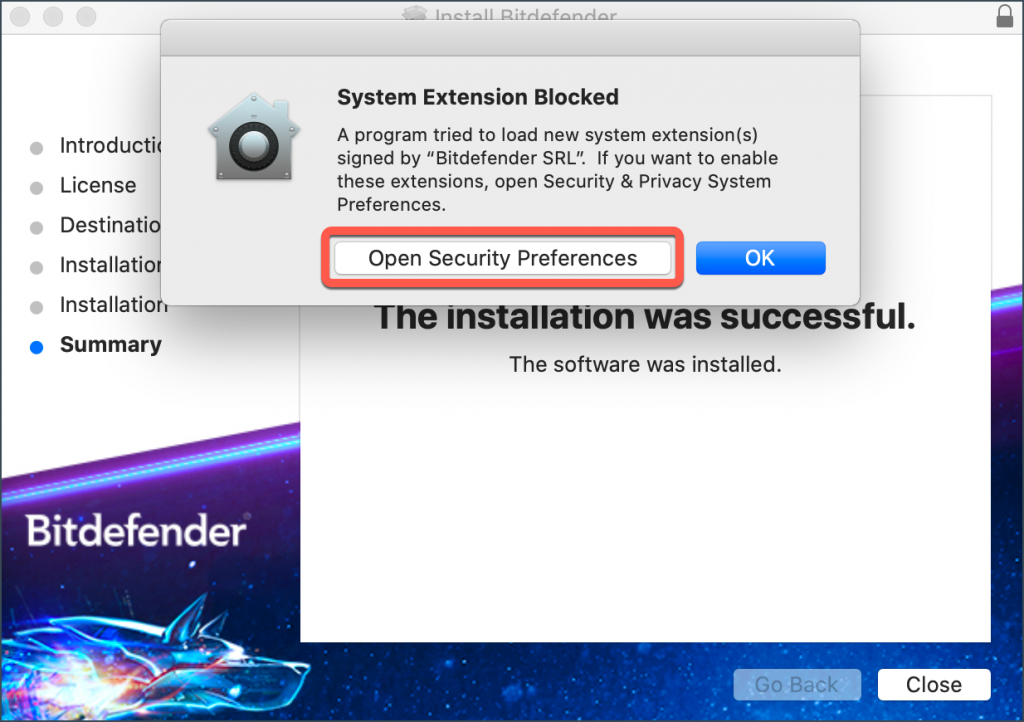
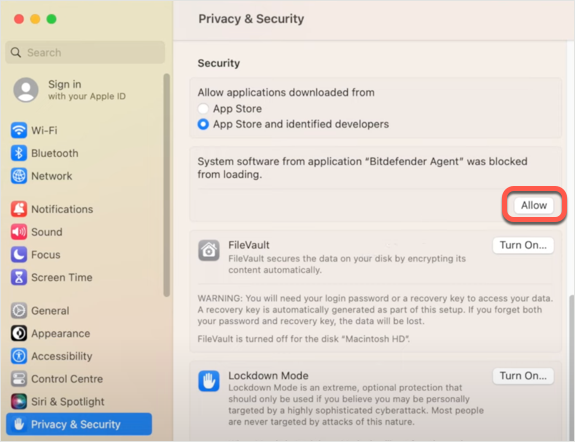
8. Wait until you receive a pop-up indicating that a system extension has been blocked. Click the Open System Settings button (or Open Security Preferences on earlier macOS versions).
9. Click the Allow button in the window that appears on the screen, then input an administrator name and password to unlock settings.
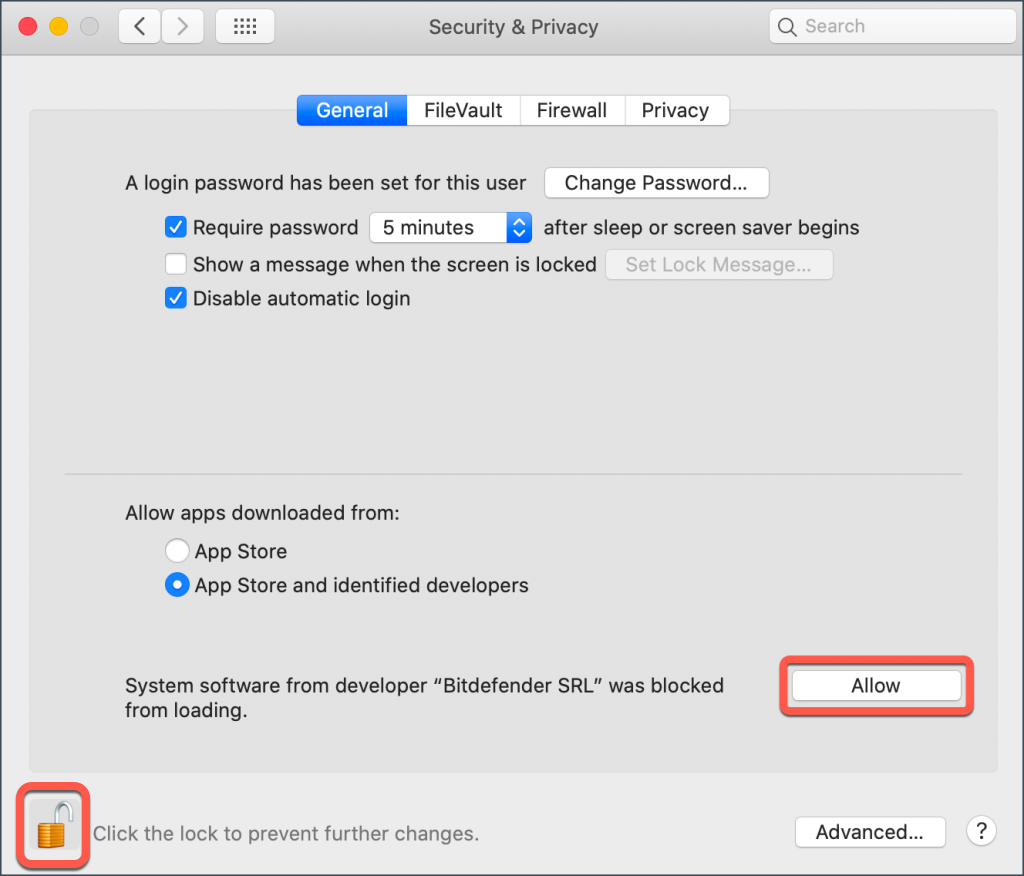
ⓘ On earlier versions of macOS (High Sierra 10.13 to Monterey 12), first click the padlock in the bottom left corner of the Security & Privacy window, enter an administrator name and password, then click the Allow button.
10. Launch Bitdefender VPN using the small shield-shaped icon ![]() located in the upper-right corner of your Mac’s screen.
located in the upper-right corner of your Mac’s screen.
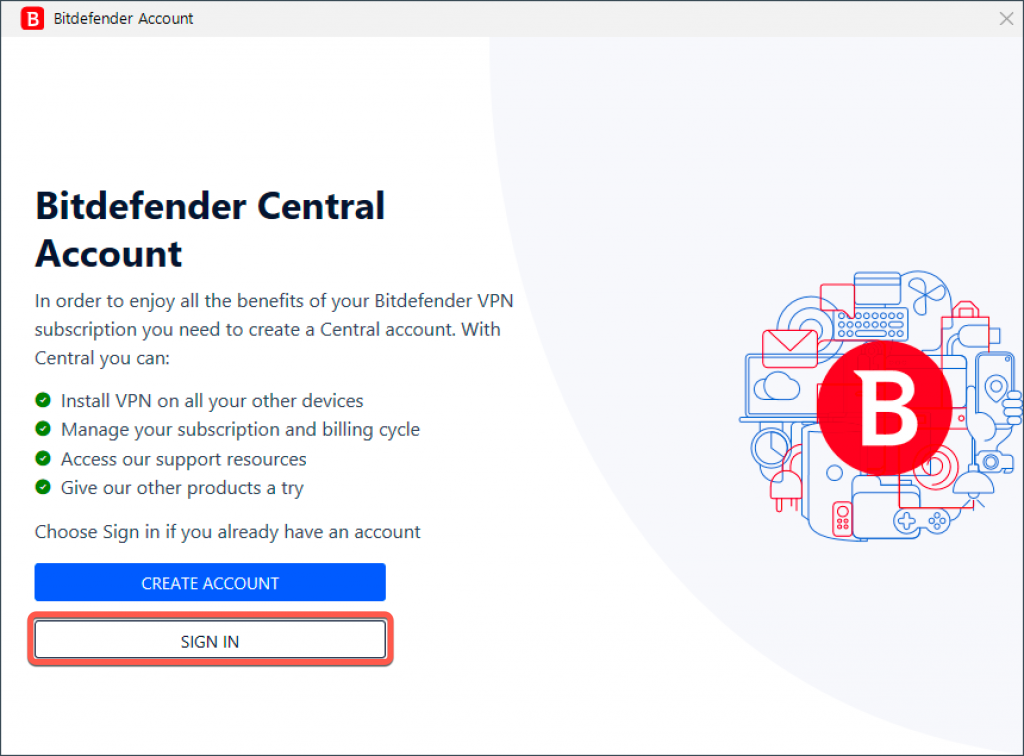
Upon launching the application for the first time, you’ll be prompted to either sign in or create a Bitdefender account if you don’t have one.
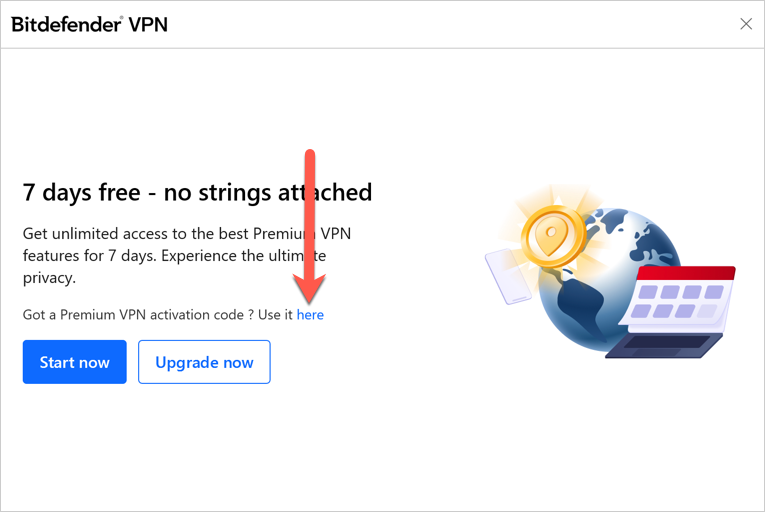
11. At this point, if you don’t have a Bitdefender Premium VPN subscription active in your Bitdefender account, you have three options:
- A. You can click on Start now to begin a 7-day trial of Bitdefender VPN that gives you access to all the premium features.
- B. You can choose Upgrade now to purchase Bitdefender Premium VPN. Learn how to upgrade to Bitdefender Premium VPN on macOS.
- C. You can click on Use it here > enter the code you got in your purchase email > click on Activate code to start using your Bitdefender Premium VPN subscription.
After a short wait, Bitdefender VPN is installed and ready to be used.
Install Bitdefender VPN on Mac via Bitdefender Central
The easiest way to install Bitdefender VPN on a Mac is to get it on the product page. You can also install the Bitdefender VPN app through Bitdefender Central, your user account. Here’s how:
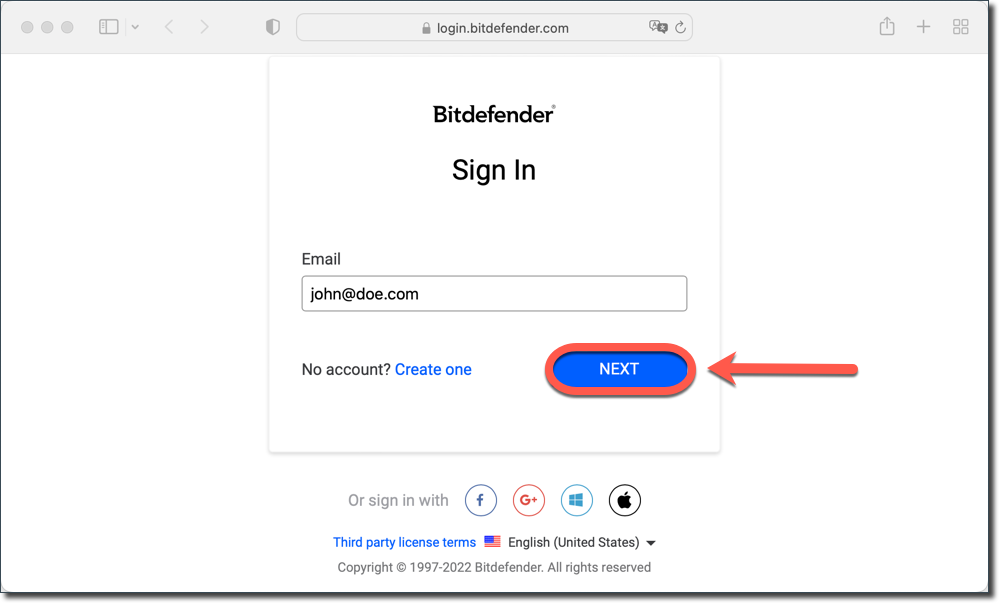
1. On the Mac on which you want to install Bitdefender VPN, visit https://central.bitdefender.com and sign in to your Central account.
If you don’t have an account already, please create one.
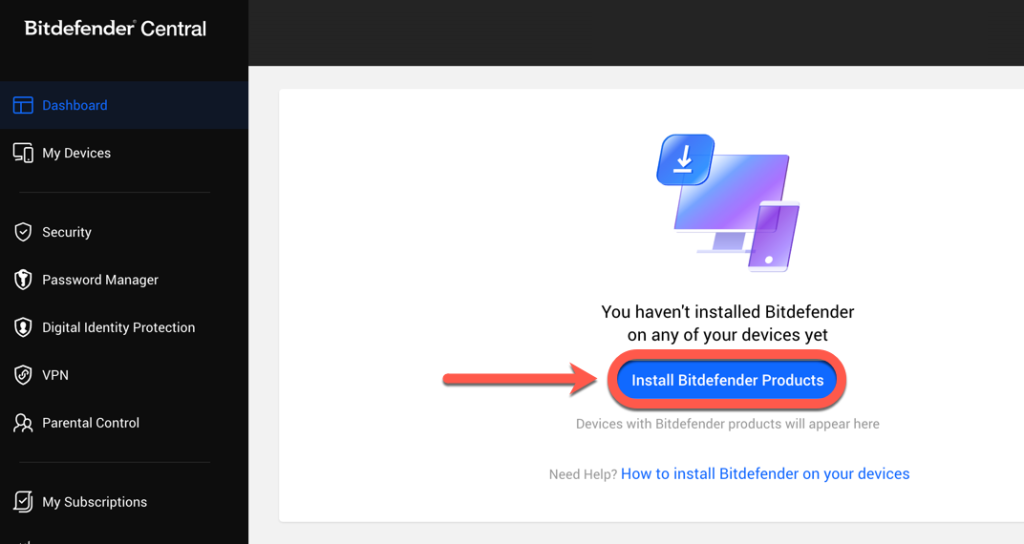
2. On the Bitdefender Central homepage, click the Install Bitdefender Products button.
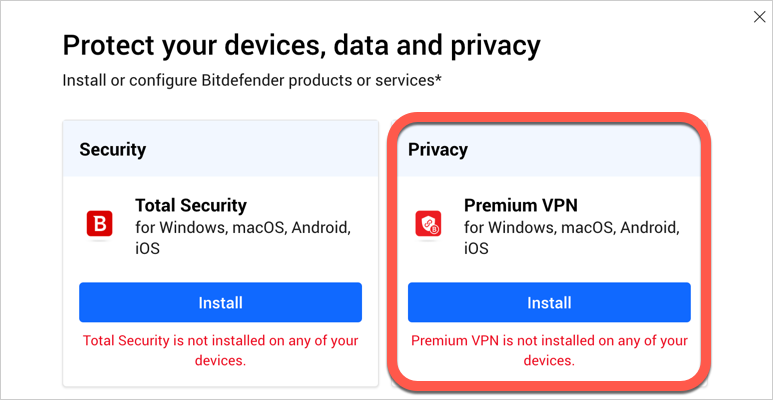
3. A new window will appear, displaying your Bitdefender subscription products. Within this window, press the Install button located in the VPN panel.
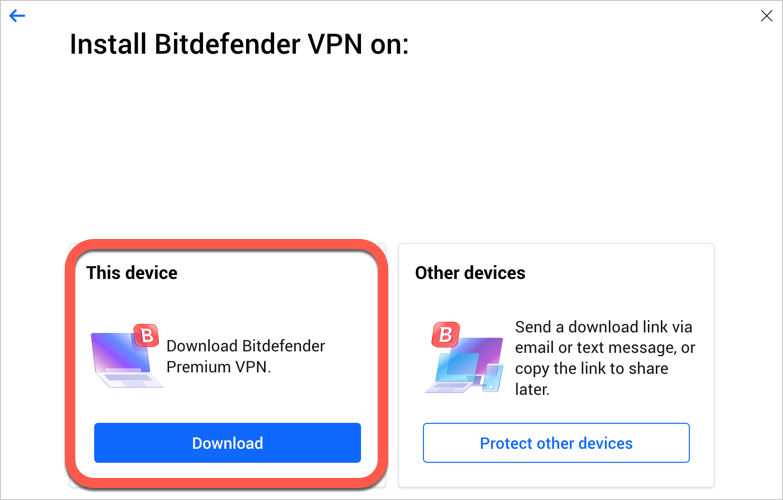
4. Then choose Download to save the Bitdefender installer to your computer.
5. When the download is ready, double-click the file with the name bitdefender_[…] to start the installation.
6. Follow the on-screen instructions to install Bitdefender VPN on your Mac. Click the ‘Continue’ button.
7. Click ‘Agree’ after you read and agree to the terms of the software license agreement.
8. Next, click the ‘Install’ button.
9. Enter an administrator username and password, then click ‘Install Software’ and wait until the installation completes.
10. Wait until you receive a pop-up indicating that a system extension has been blocked. Click the Open System Settings button (or Open Security Preferences on earlier macOS versions).
11. Click the Allow button in the window that appears on the screen, then input an administrator name and password to unlock settings.
ⓘ On earlier versions of macOS (High Sierra 10.13 to Monterey 12), first click the padlock in the bottom left corner of the Security & Privacy window, enter an administrator name and password, then click the Allow button.
12. Launch Bitdefender VPN using the small shield-shaped icon ![]() located in the upper-right corner of your Mac’s screen.
located in the upper-right corner of your Mac’s screen.
Upon launching the application for the first time, you may be prompted to sign in with your existing Bitdefender account.
13. At this point, if you don’t have a Bitdefender Premium VPN subscription active in your Bitdefender account, you have three options:
- A. You can click on Start now to begin a 7-day trial of Bitdefender VPN that gives you access to all the premium features.
- B. You can choose Upgrade now to purchase Bitdefender Premium VPN. Learn how to upgrade to Bitdefender Premium VPN on macOS.
- C. You can click on Use it here > enter the code you got in your purchase email > click on Activate code to start using your Bitdefender Premium VPN subscription.
After a short wait, Bitdefender VPN is installed and ready to be used.
Install Bitdefender VPN using Bitdefender Antivirus for Mac
If your Mac is already protected by Bitdefender Antivirus for Mac, then Bitdefender VPN can be installed using the security solution:
- Click the Privacy icon on the left sidebar of the Bitdefender interface.
- In the VPN tab, click Install.
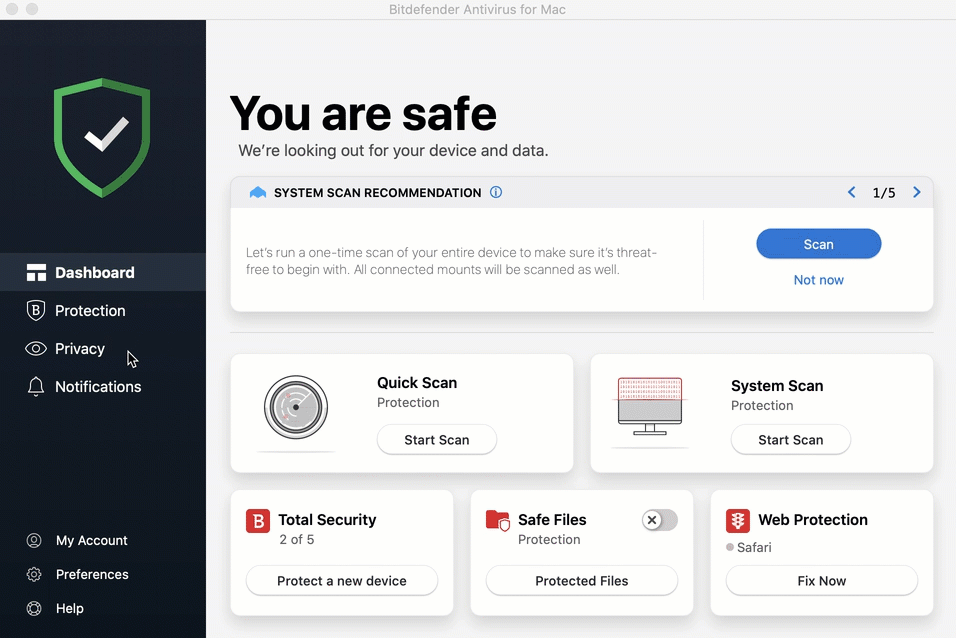
After a short wait, Bitdefender VPN is installed and ready to be used on your Mac.
After completing the steps in this guide, Bitdefender VPN will be installed on your Mac. Check out this article to learn more about the app – How to use Bitdefender VPN for Mac: Connection, Settings, Subscriptions.