Bitdefender Antivirus for Mac offers complete protection against Mac-related threats. If you’re unsure whether your Mac is currently protected by Bitdefender Antivirus for Mac, you can easily check by following the steps below.
1. Find out if Bitdefender is installed
Start by checking if Bitdefender Antivirus for Mac is installed on your Mac. The name of the software should be visible in your Applications folder, and the “B” icon should appear in the menu bar at the top of your screen.
- Click the B icon from the menu bar at the top right of the screen.
- Select the Open Antivirus interface option.
- Bitdefender Antivirus for Mac should appear on your screen.

You can also follow these steps to find out if Bitdefender is installed on your Mac:
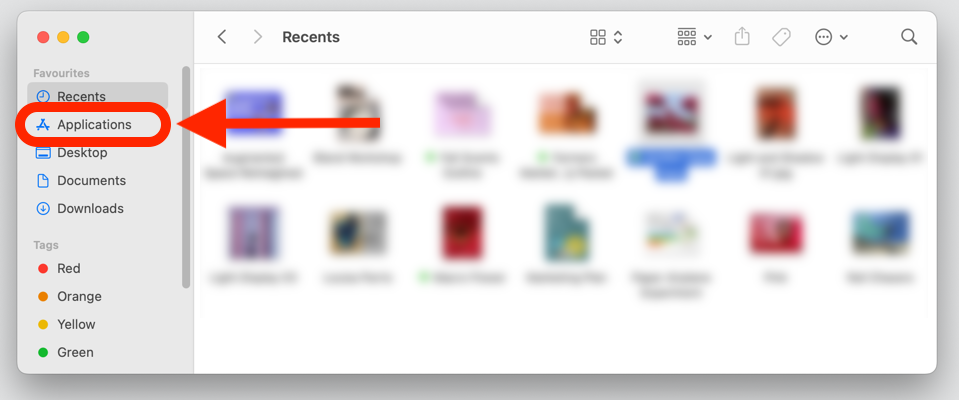
- Click the “Finder”
 icon at the far left of the Dock. Finder is the icon that looks like a blue square with a smiley face.

- Click on “Applications” in the sidebar of the window that will pop up.
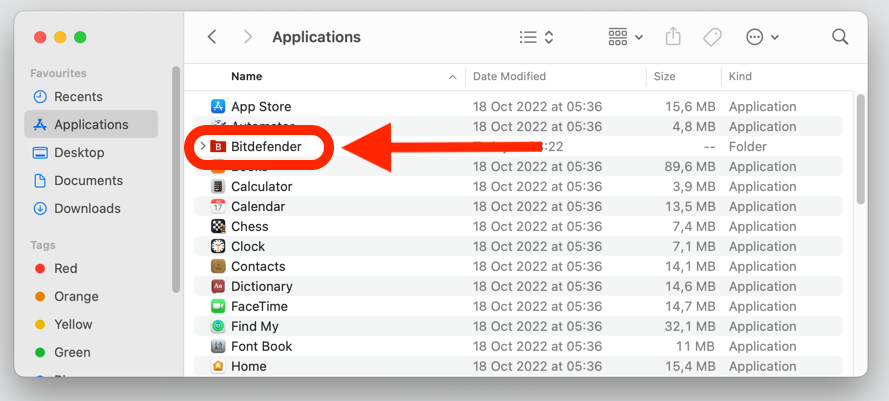
- Within the Applications folder, you will find every app you’ve ever installed on your Mac. Double-click on Bitdefender in the list of installed applications.
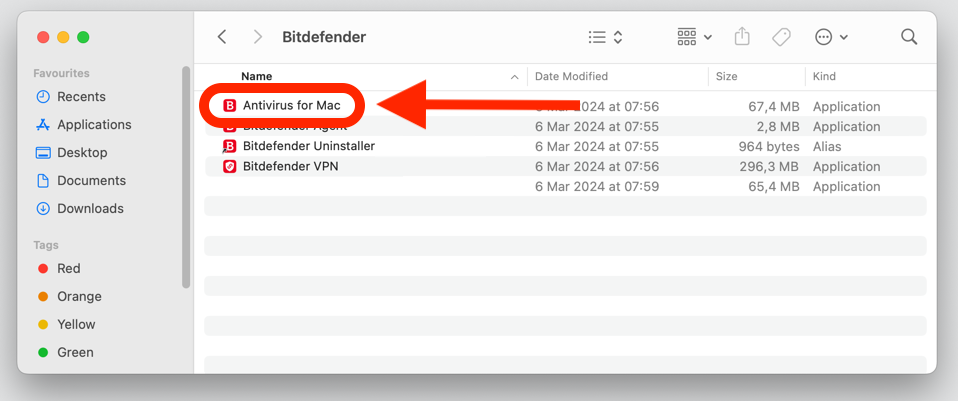
- In the Bitdefender folder, double-click on “Antivirus for Mac”. Bitdefender Antivirus for Mac should appear on your screen.
If Bitdefender is missing from the list of installed apps, learn how to install Bitdefender Antivirus for Mac.
2. Check the Dashboard
Once the Bitdefender Antivirus for Mac interface is open, look for a green shield or a message indicating that you are safe. This information appears on the main dashboard.
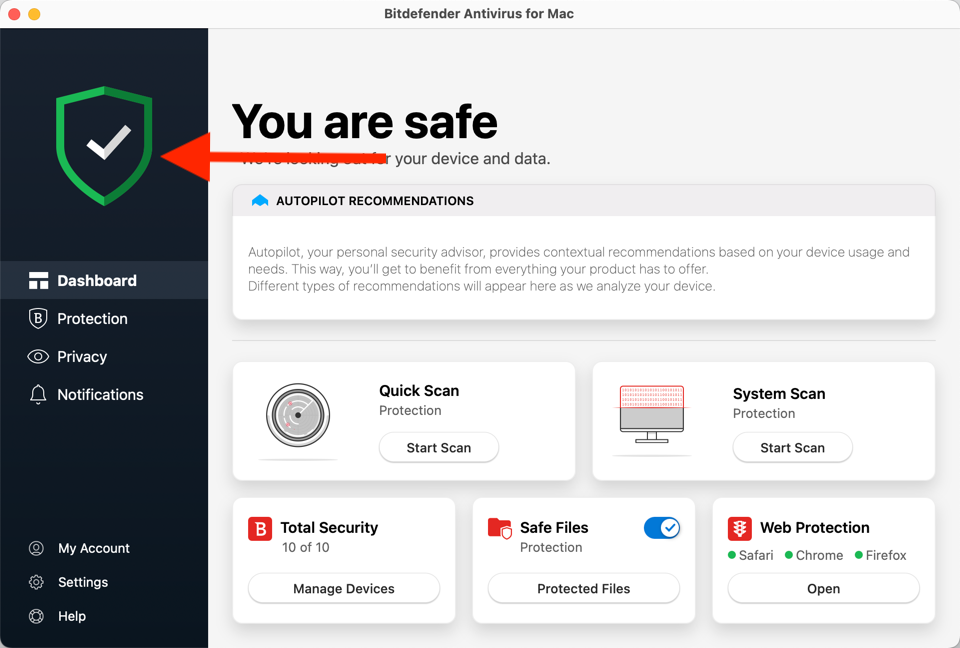
If the shield is red and the dashboard indicates that your device is at risk, follow the recommendation at the top of the window to fix the issue.
3. Perform the EICAR test
The European Institute for Computer Antivirus Research (EICAR) has developed a test file to help test antivirus programs. The EICAR test file is not actually malicious, but by industry-wide agreement it is detected as malicious by mainstream products with antivirus functionality so that people can verify that their security solutions are configured correctly. When Bitdefender is working properly, it should detect the EICAR test as if it were cyberthreat.
To simulate an infection and check how Bitdefender Antivirus for Mac would react to it:
- Visit the page https://www.eicar.org/download/eicar_com-zip/
- Click on the “Download” button.
If Bitdefender detects and blocks the EICAR test file upon saving, it confirms that your Mac is protected and the antivirus software is functioning properly. No further action is required.
On the other hand, if you’re able to download the EICAR file without receiving any alerts from Bitdefender, it indicates that your Mac is not adequately protected. We recommend you:
- Verify Web Protection: To ensure your browser’s security, make sure that web protection is enabled in your Internet browser. You can find Web Protection in the Protection menu > Web Protection tab. This browser extension blocks dangerous websites in Safari, Chrome, and Firefox. Learn to install Bitdefender TrafficLight on macOS.
- Verify real-time protection: Bitdefender Antivirus for Mac provides real-time protection against cyberthreats. Make sure that real-time protection is enabled. You can find this option in the Settings (or Preferences) menu > Protection tab > Bitdefender Shield. Learn to enable Bitdefender Shield in Antivirus for Mac. This will help detect any potential threats that may have evaded web protection.
By following these steps, you can verify that your Mac is adequately protected by Bitdefender Antivirus for Mac. Remember that cybersecurity is an ongoing process, so it’s important to stay vigilant and proactive in defending your Mac against evolving threats.