In this article, we’ll explain how to change your DNS settings on any Windows computer. DNS stands for Domain Name System. Think of DNS as a phone book for the internet that translates domain names (like “bitdefender.com”) into numeric IP addresses (like “101.18.169.222”), allowing you to visit websites without having to remember their IP. By changing DNS, you can direct your internet connection to use a more reliable DNS server. This can help if you’re having trouble connecting to certain websites or applications, encountering Bitdefender update errors, VPN errors, or if your internet speed is slow.
We’ve got a short video that shows you how to easily change the DNS server, or you can read the steps below.
VIDEO – Changing the DNS server on Windows
Step 1: Open the Control Panel
Click on the Windows Start ⊞ menu and type control panel in the search bar. Click on the “Control Panel” application that appears.
Step 2: Open Network and Sharing Center
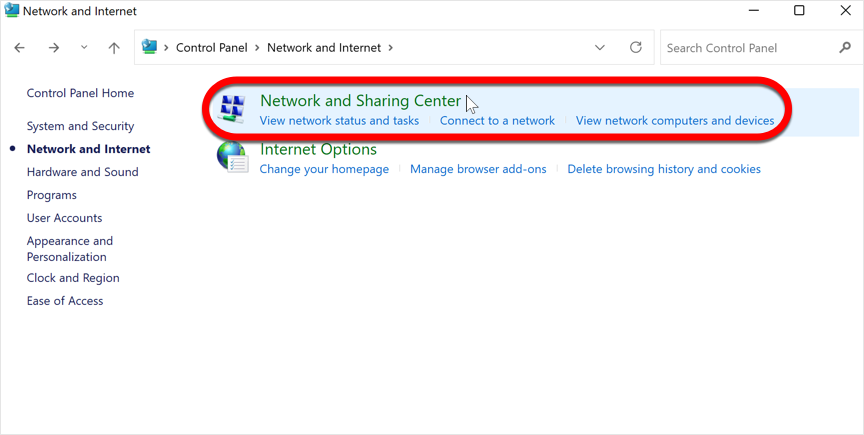
In Control Panel, click on “Network and Internet”…

… and then “Network and Sharing Center”.
Step 3: Choose the connection
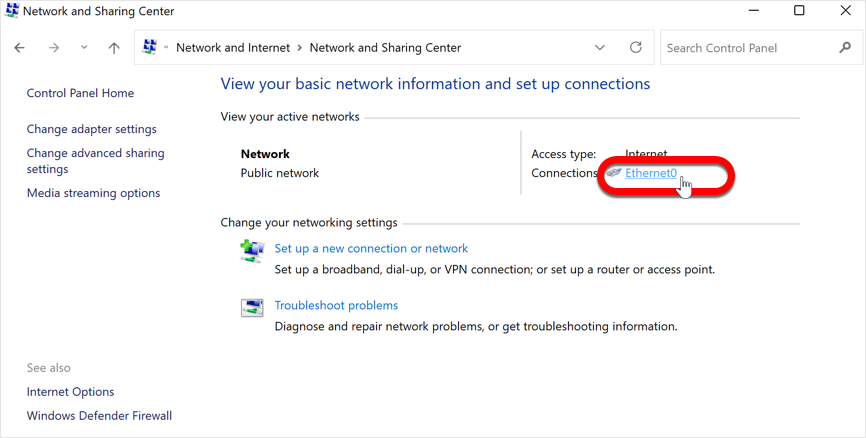
In the Network and Sharing Center, choose the internet connection you want to change the DNS settings for. Your active connection is usually named “Wi-Fi” or “Ethernet” and is located on the right-hand side of the window.
Step 4: Change adapter settings
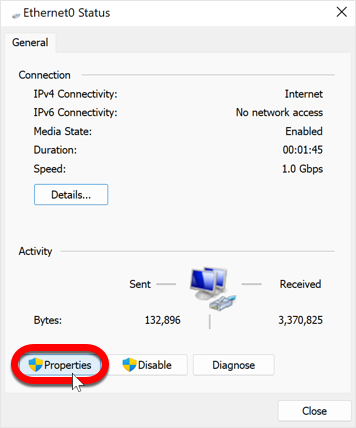
In the new window, you will see general information about your connection. Click on the “Properties” button.
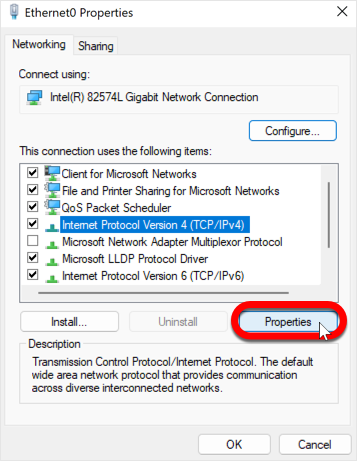
Step 5: Choose Internet Protocol Version 4 (TCP/IPv4)
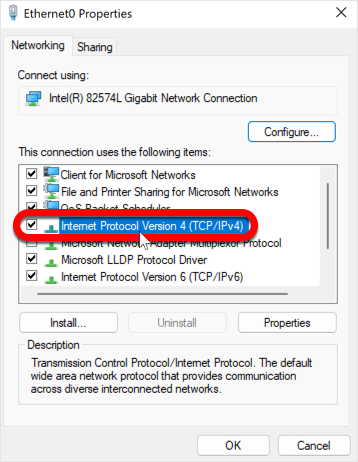
In the “Properties” window, scroll down to find “Internet Protocol Version 4 (TCP/IPv4)” and click on it to highlight it.
Step 6: Click on Properties
Click on the “Properties” button located below the list of network protocols.
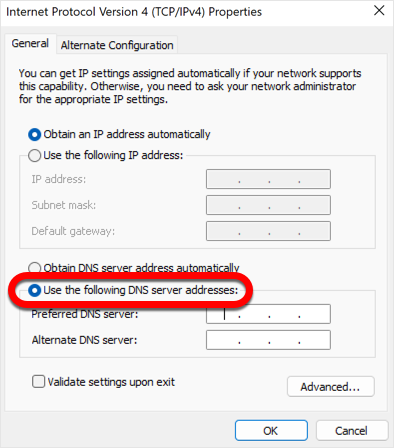
Step 7: Choose “Use the following DNS server addresses”
In the Internet Protocol Version 4 (TCP/IPv4) Properties window, click on the radio button next to “Use the following DNS server addresses”.
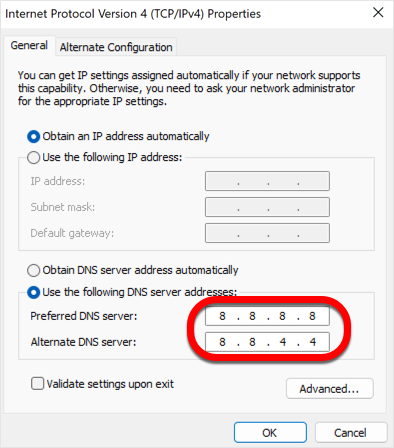
Step 8: Input the DNS server
Enter the preferred DNS server address. For example, for Google DNS:
- In the “Preferred DNS server” field, enter: 8.8.8.8
- In the “Alternate DNS server” field, enter: 8.8.4.4
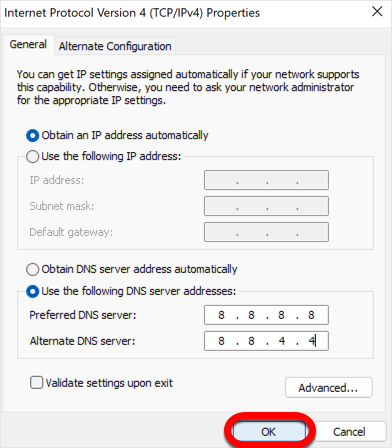
Step 9: Save the changes
Click on the “OK” button to save the changes you made to the DNS settings.
Step 10: Restart Windows
Restart your computer for the changes to take immediate effect: click the Windows Start ⊞ menu, click the ⏻ power button, and then select Restart.
If you’re not happy with the new DNS server, you can always undo the changes or try a different server. To undo the changes, select the option “Obtain DNS server address automatically” at step 7. This action reverts your settings back to your Internet Provider’s default DNS server.