Follow the steps below to uninstall Bitdefender App from your Windows 10 or Windows 11 computer. If you decide to reinstall it later, you can easily do so by following our guide – How to Install and Set Up Bitdefender App on Windows.
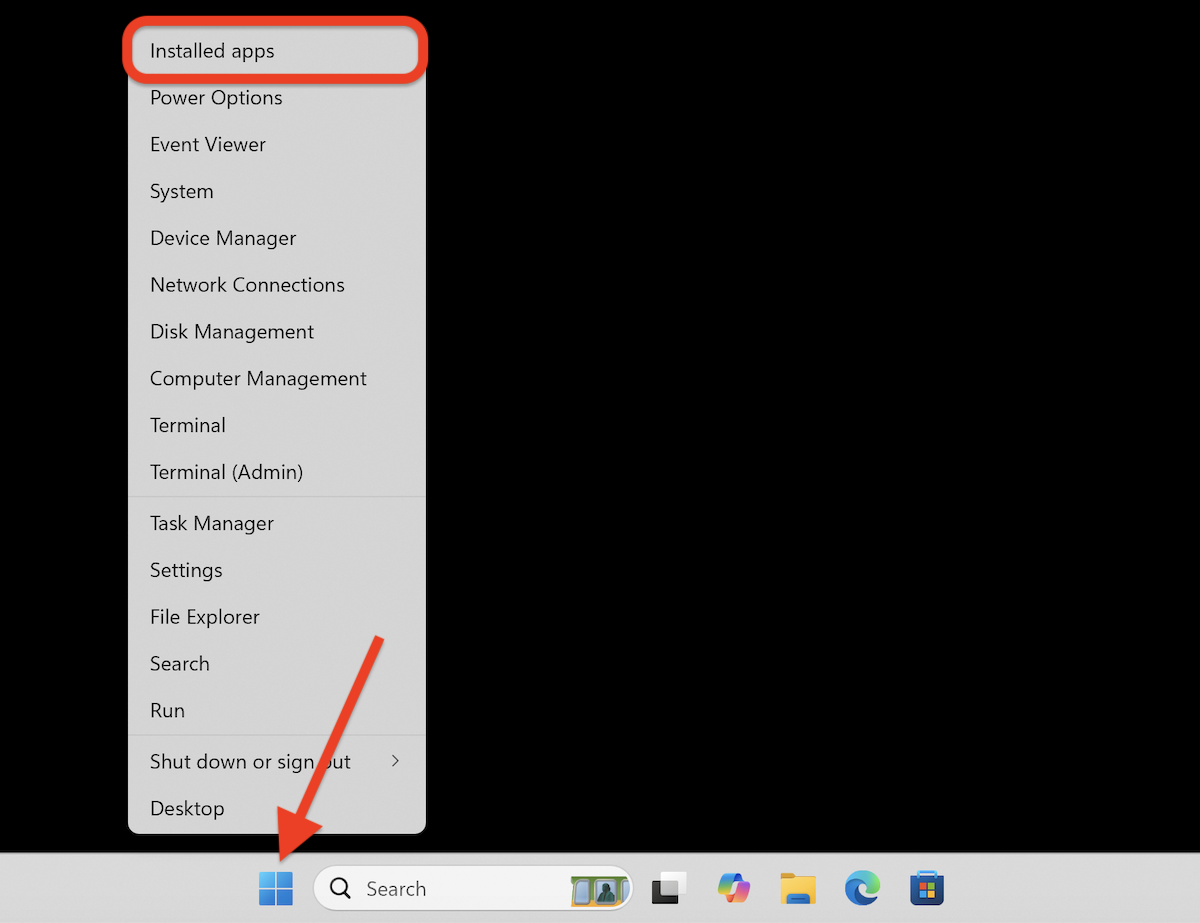
1. Open Installed Apps
- Right-click the Start button (represented by the Windows logo icon) on your taskbar.
- Click on Installed apps from the menu.
2. Start the Uninstall Process
- In the list of installed applications click the three dots (⋯) next to the Bitdefender entry.
- Click the Uninstall button that appears.
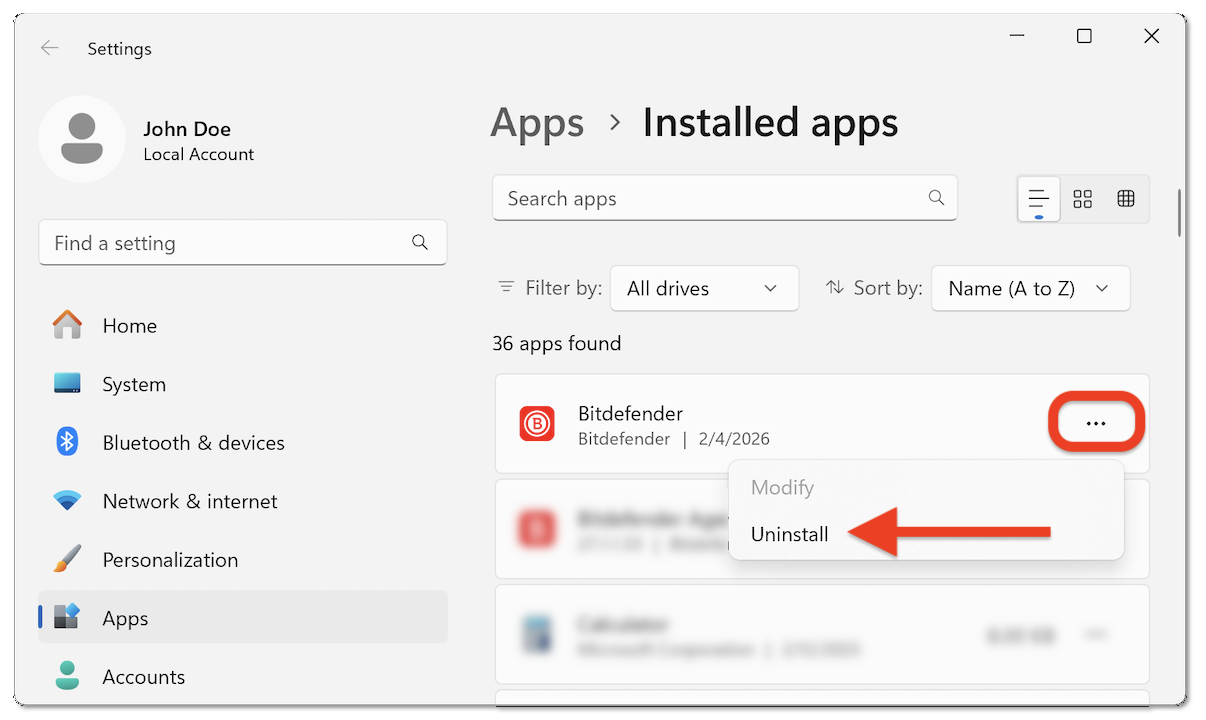
- When prompted that this app and its related info will be uninstalled, click Uninstall again to confirm.
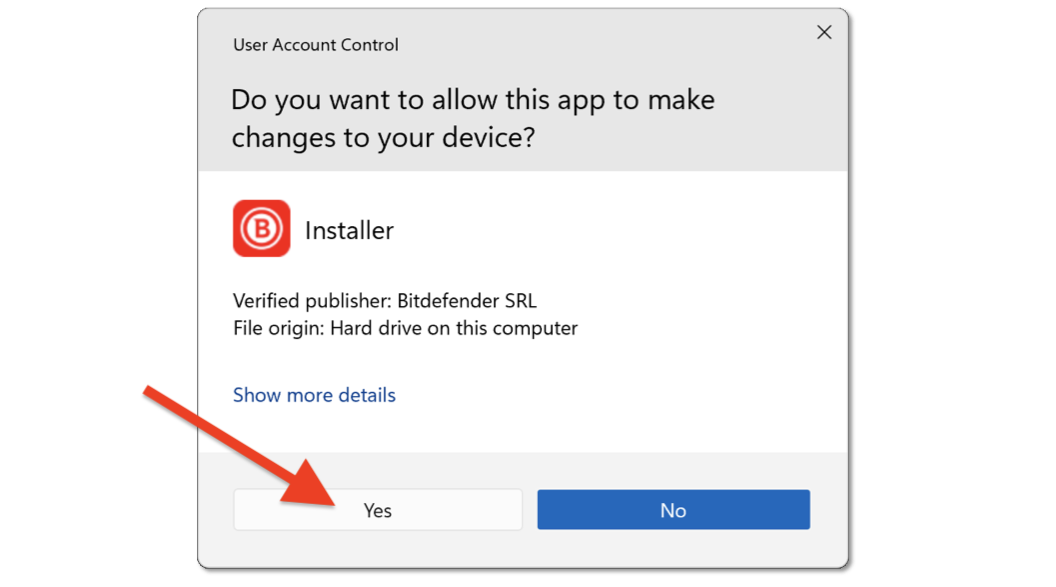
3. Allow the Uninstallation
If the User Account Control window appears asking “Do you want to allow this app to make changes to your device?”, click Yes.
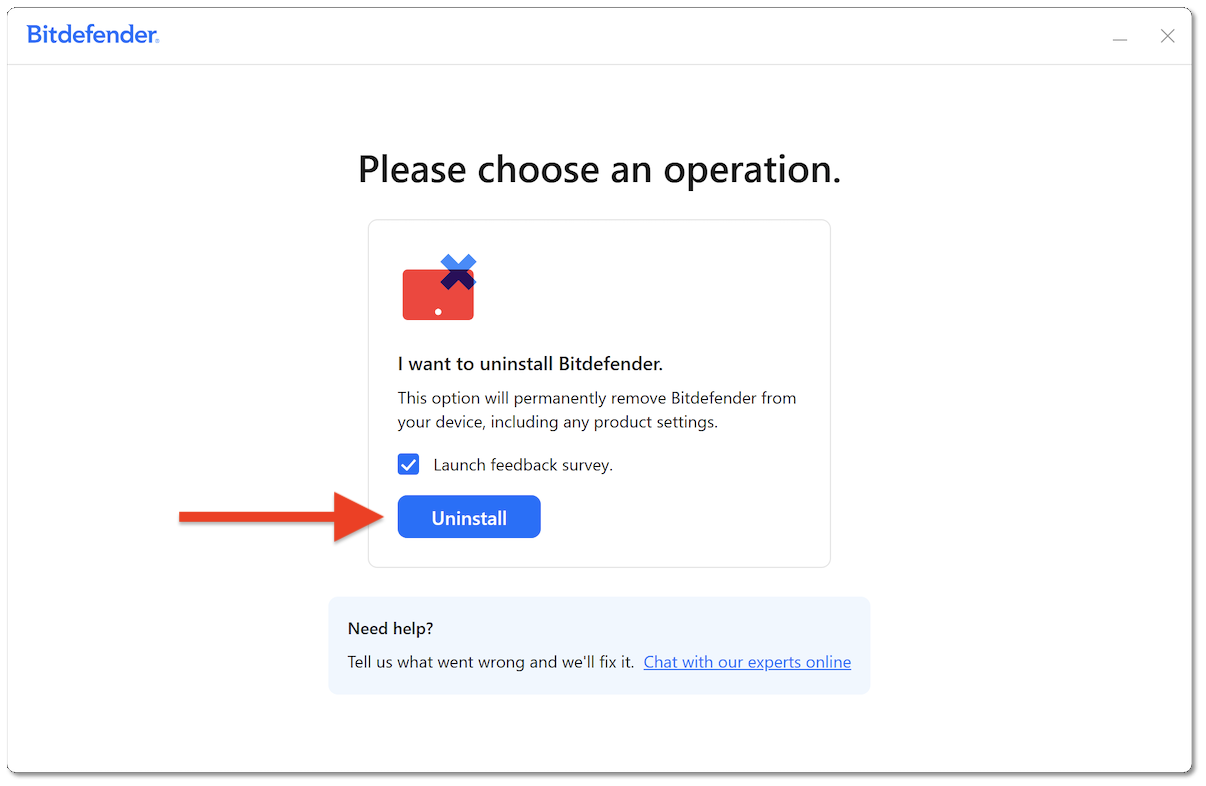
4. Uninstall Bitdefender
In the Bitdefender uninstall window, click the Uninstall button.
5. Complete the Uninstallation
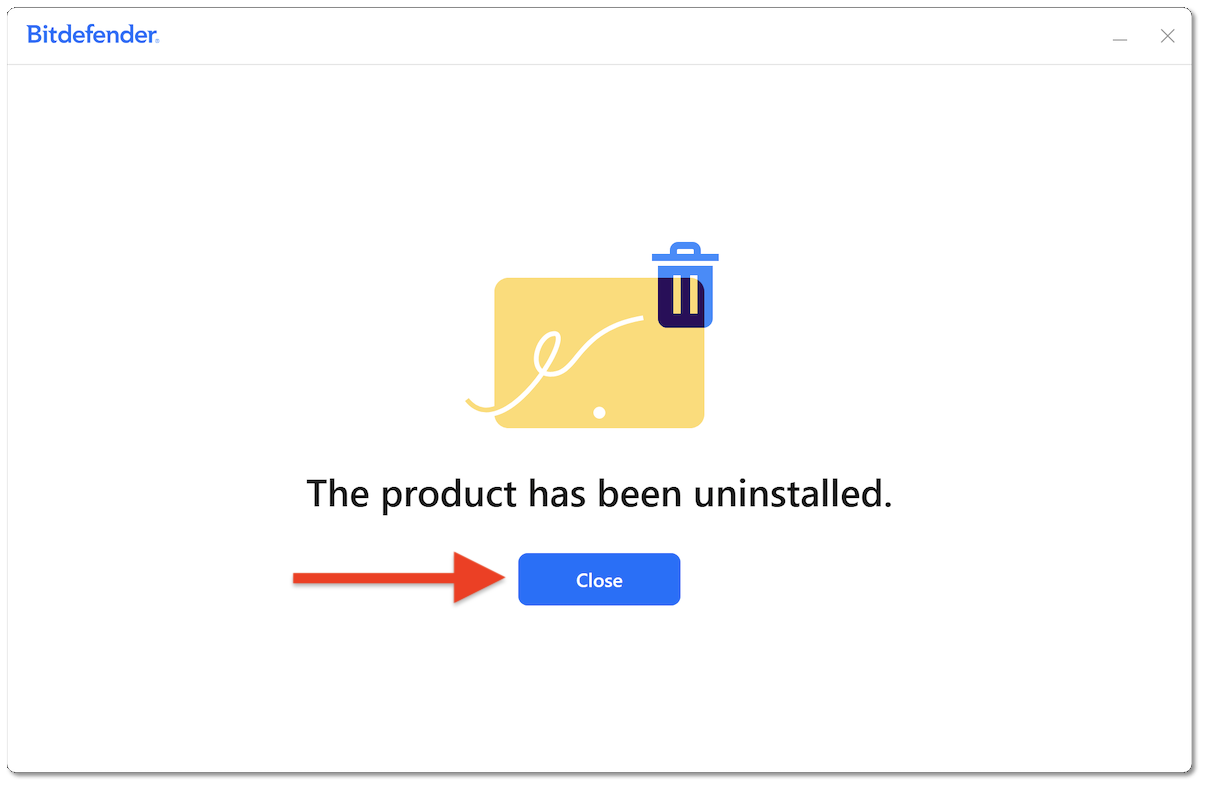
Wait for the Bitdefender uninstallation to finish, then click Close.
- If the uninstallation process encounters errors, use the Bitdefender Uninstall Tool to remove the Bitdefender App. See the instructions at the end of this guide.
After completing these steps, the Bitdefender App will be successfully uninstalled from your Windows computer.
Use the Bitdefender Uninstall Tool (if needed)
If the standard uninstallation fails, follow these steps to uninstall Bitdefender App for Windows:
- Download the Bitdefender Uninstall Tool from the link below. https://www.bitdefender.com/files/KnowledgeBase/file/Bitdefender_2023_Uninstall_Tool.exe
- Run the tool and follow the on-screen instructions.
- If errors occur while using the Bitdefender uninstall tool, run the tool in Safe Mode.
- Once the tool completes its process, restart your computer.
Following these steps will completely remove Bitdefender App from your PC.