This guide explains how to add an Advanced Threat Defense exception in the Bitdefender App for Windows to prevent it from scanning a specific process or application. Advanced Threat Defense is a behavior-based protection feature that continuously monitors process activity to identify suspicious patterns and stop even the most advanced, unknown cyberthreats, including zero-day exploits, in real time.
Add an Advanced Threat Defense Exception
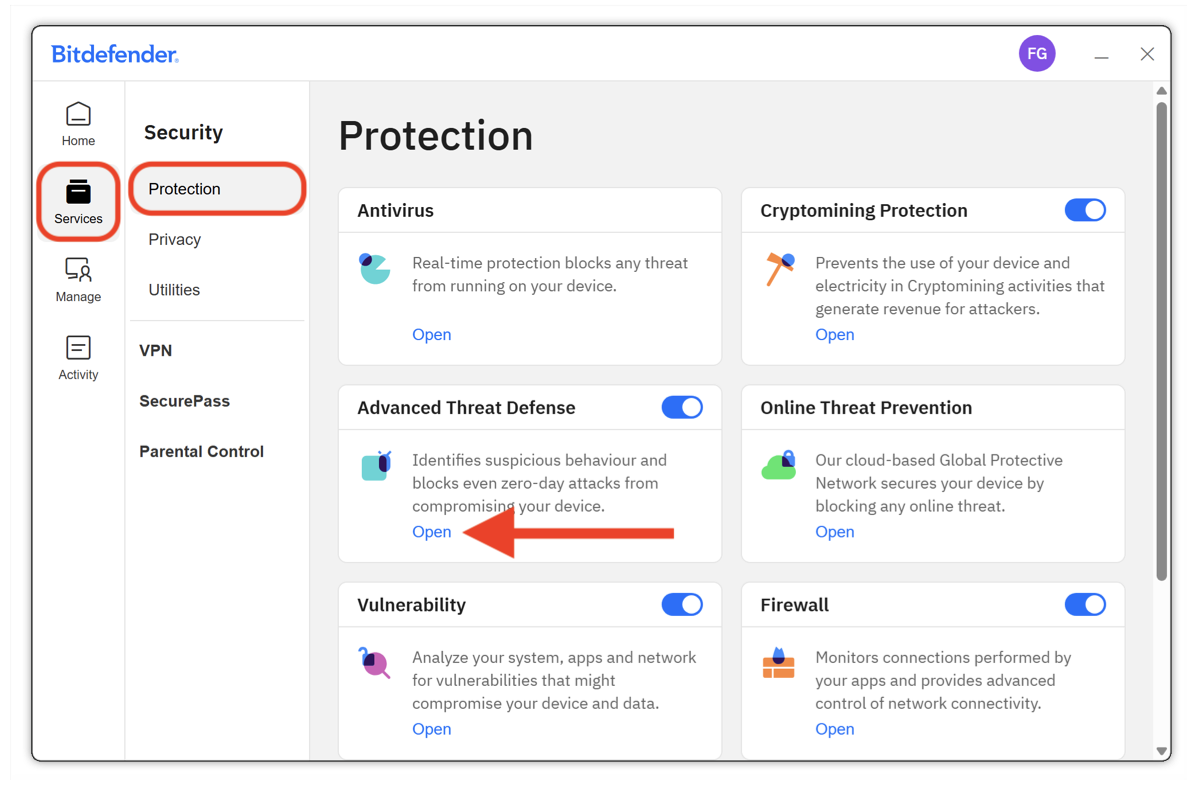
1. Open the Bitdefender App, then click Services in the left-hand sidebar.
2. Next, go to Protection in the Security menu.
3. In the Advanced Threat Defense panel, click Open.
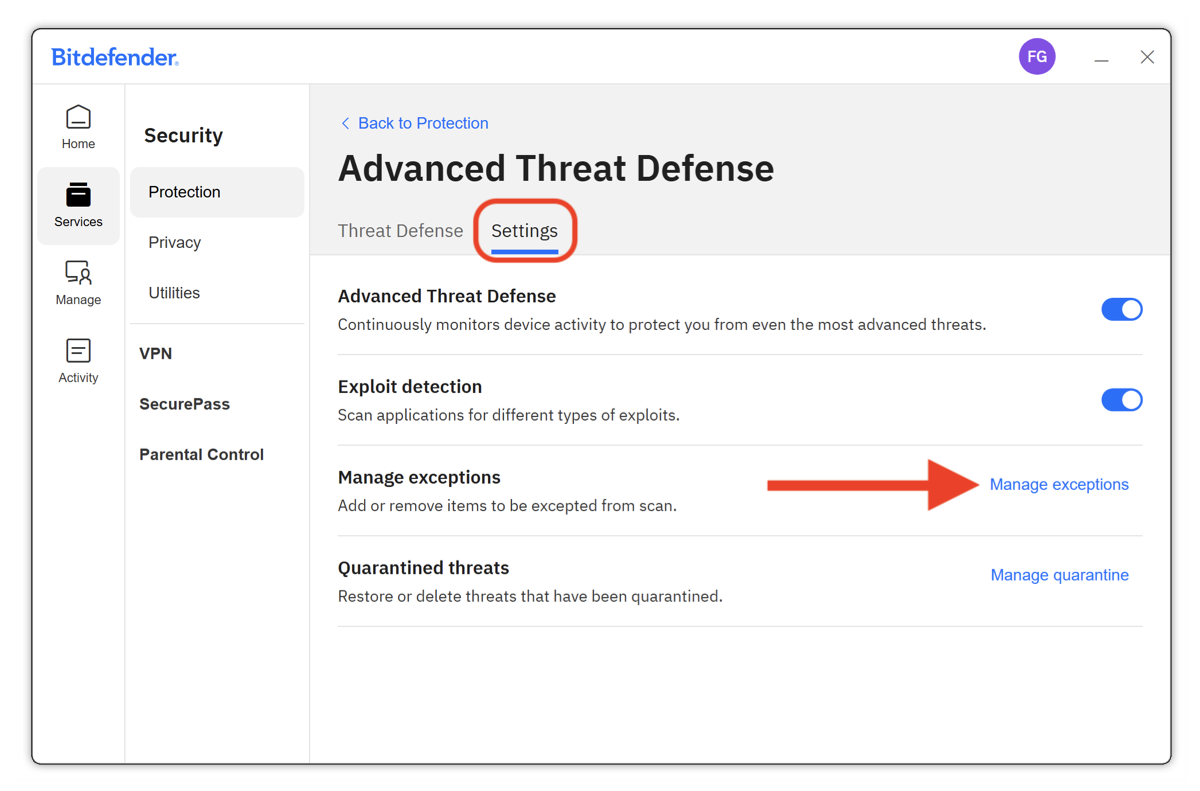
4. In the Advanced Threat Defense window, access the Settings tab, then click on Manage exceptions.
5. In the new window, click the + Add exception button.
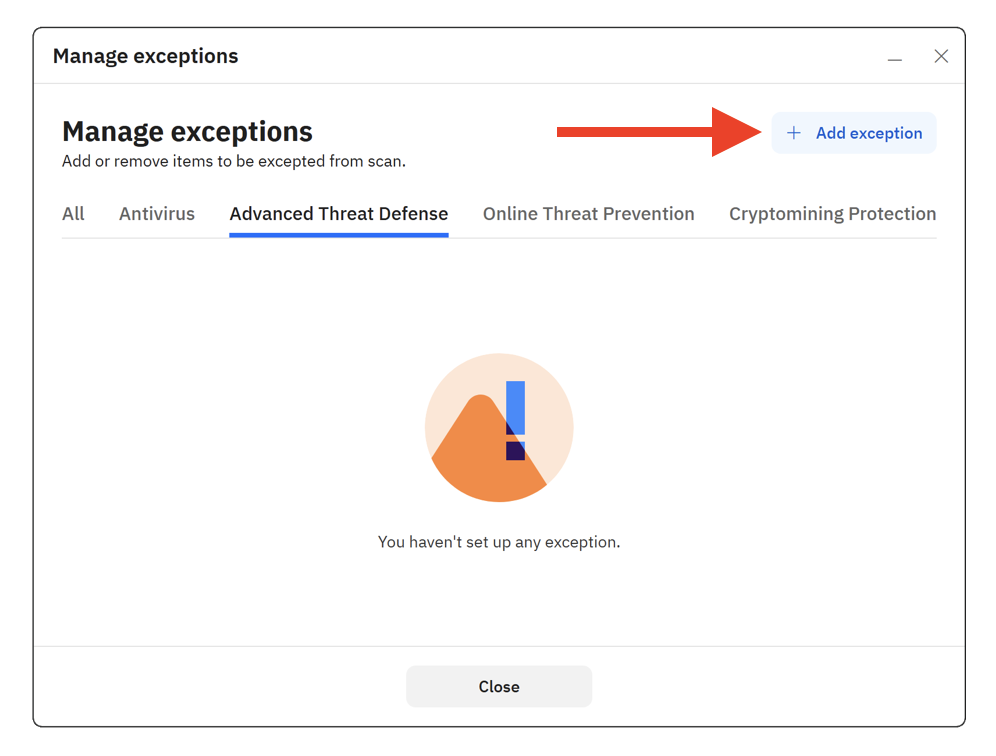
6. Drag and drop the application to the designated field or browse to the full path of the application executable (e.g. C:\Program Files\Application\app.exe).
Important!
Only .EXE file types can be added to the exception list. The extension .exe stands for “executable”, the file that opens an app. Other file types or folders cannot be excluded as Advanced Threat Defense only monitors running processes.
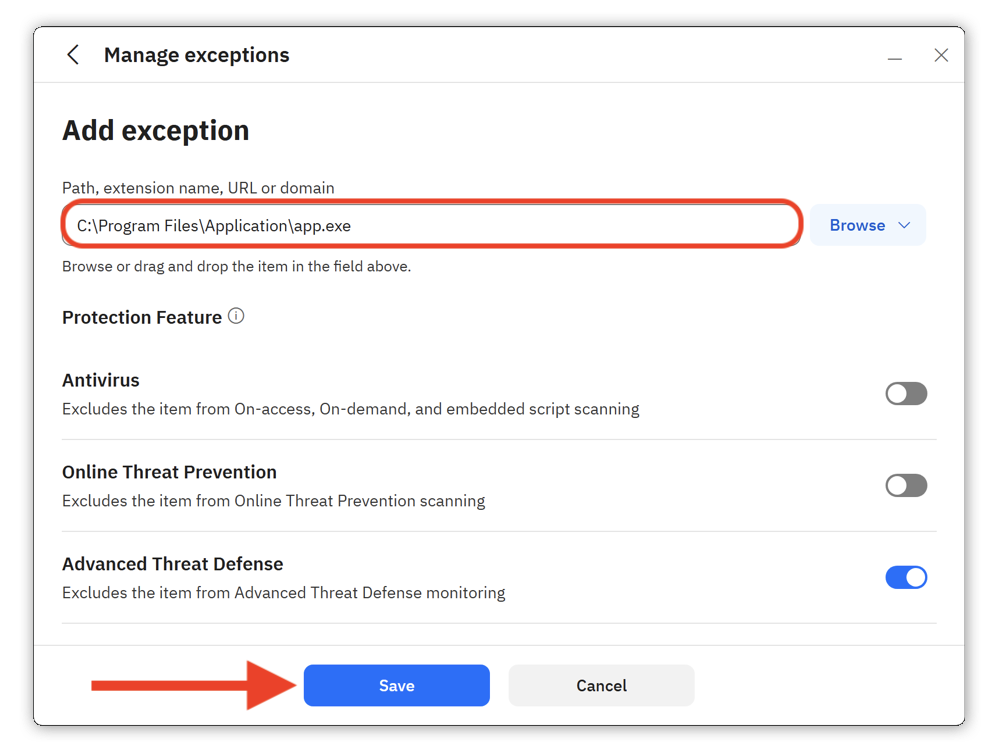
7. Click Save to add the item to the Advanced Threat Defense exceptions list.
8. Click Yes if prompted to allow the change.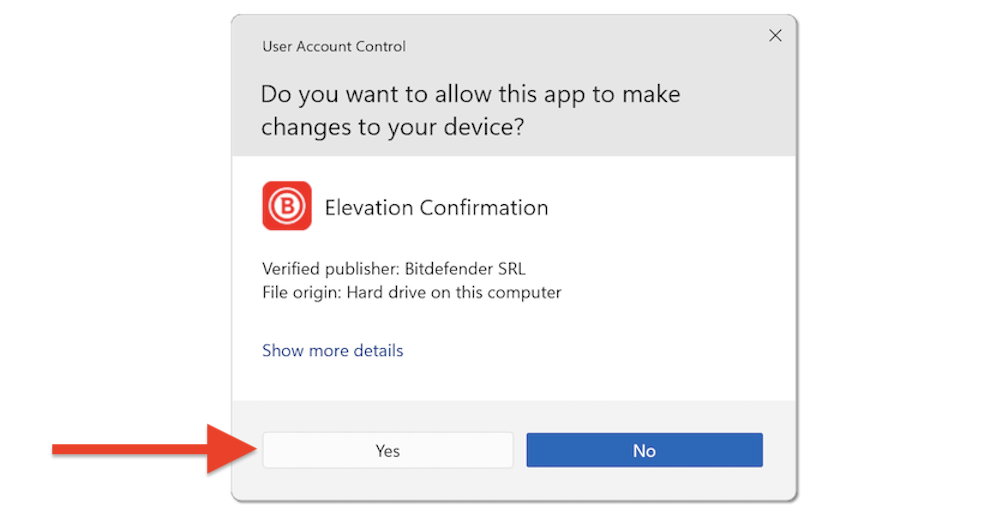
The application name and its path will appear in the exceptions list. Close the Manage exceptions window to return to the main Bitdefender interface.
Advanced Threat Defense will no longer scan the excluded application executable.
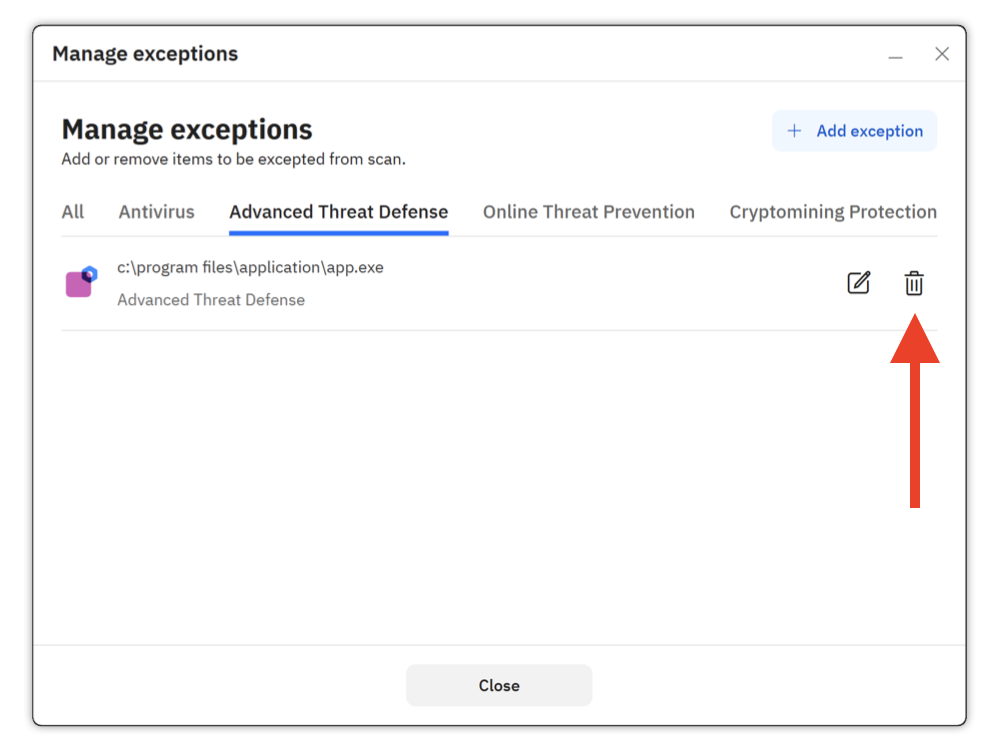
Remove an Exception
If you want to remove an Advanced Threat Defense exception:
- Return to Services → Protection → Advanced Threat Defense → Settings → Manage exceptions.
- Click the trash bin icon next to the application executable you want to remove from the list.