


How to import GravityZone Virtual Appliance in different hypervisors
Bitdefender GravityZone provides full visibility into organizations' overall security posture, global security threats, and control over its security services that protect virtual or physical desktops, servers and mobile devices. All Bitdefender's Enterprise Security solutions are managed within the GravityZone through a single console, Control Center, that provides control, reporting, and alerting services for various roles within the organization.
This article explains how to install the GravityZone Virtual Appliance in different virtualization environments.
- Overview
- Import GravityZone Virtual Appliance in VMWARE
- Import GravityZone Virtual Appliance in Hyper-V
- Import GravityZone Virtual Appliance in Citrix
- Import GravityZone Virtual Appliance in KVM
Overview
Bitdefender GravityZone is delivered as a virtual appliance. The Bitdefender GravityZone appliance image is available in several different formats, compatible with the main virtualization platforms.
Note: In order to receive a trial license, you will have to go to Bitdefeder website and register.
Import GravityZone Virtual Appliance in VMWARE
Import GravityZone Virtual Appliance in vCenter
Bitdefender GravityZone OVA file can be downloaded from Bitdefender website: OVA and MD5.
To import Bitdefender GravityZone OVA file on vCenter, you have to:
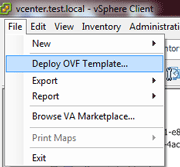
- Open the vSphere client.
-
Go to File > Deploy OVF template. This works for both OVA and OVF.
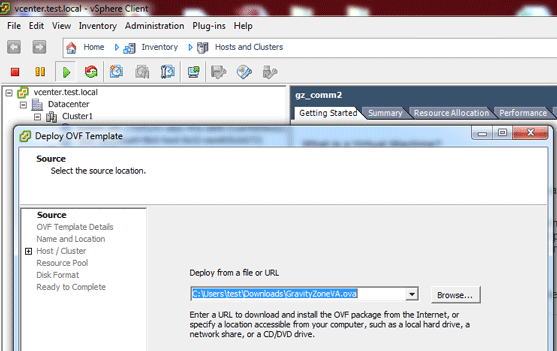
-
Browse and select the package you would like to deploy, and then hit Next.
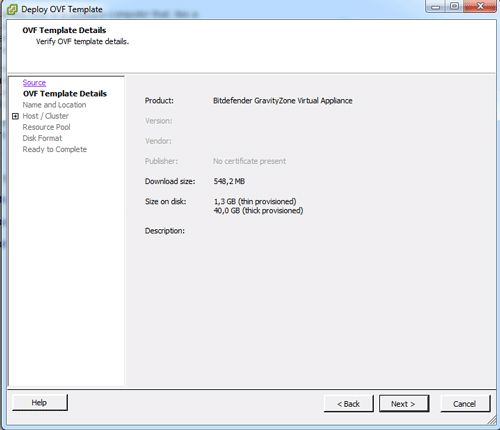
-
You will get details about it. Hit Next.
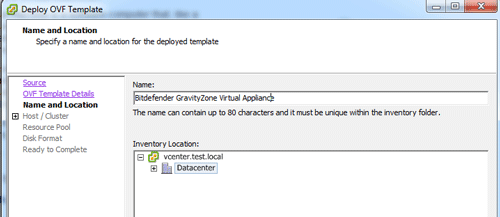
-
Now you get to name your virtual machine and place it in the proper datacenter and folder.
-
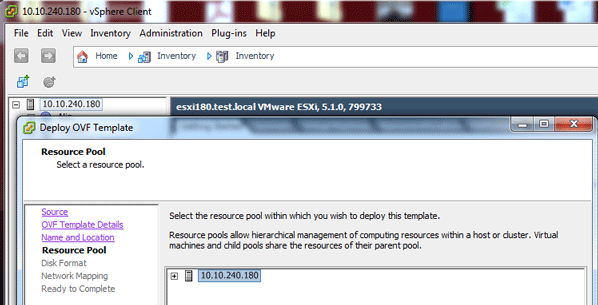
Now you choose your cluster.
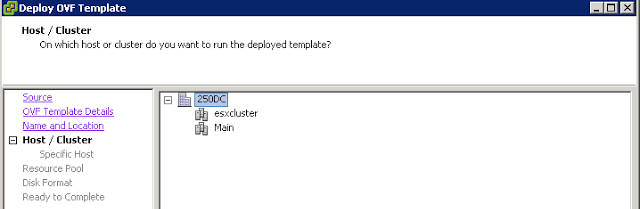
-
Choose the storage locations.
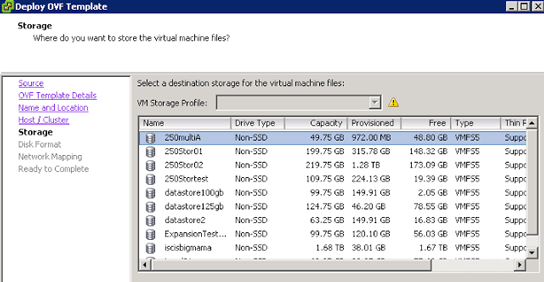
-
Choose the disk provisioning virtual machine type thin or thick.
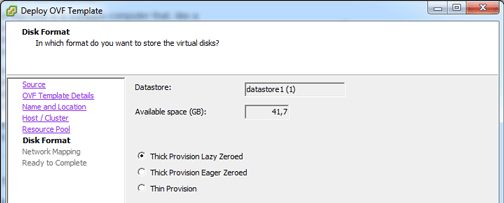
-
Choose the network.
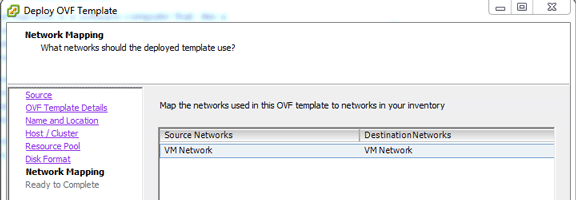
-
Hit Finish and watch your virtual machine being created.
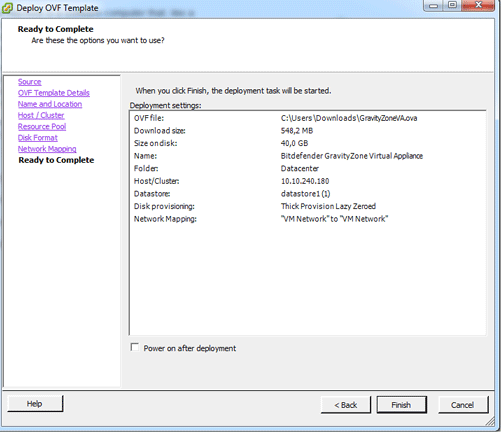
-
Wait while the virtual machine is deployed from the OVA.
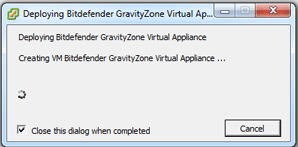
-
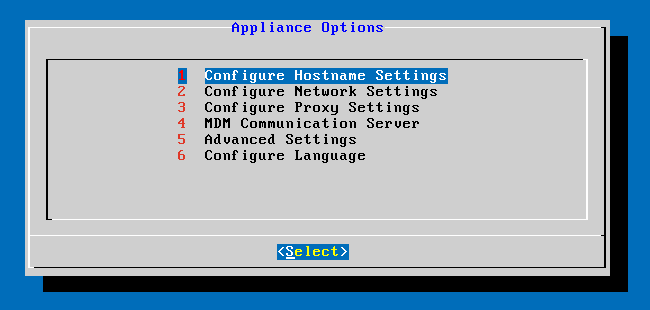
Connect to the virtual machine and start the configuration.
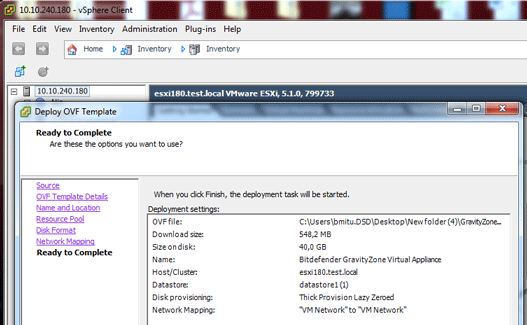
Import GravityZone Virtual Appliance in ESXi host
Bitdefender GravityZone OVA file can be downloaded from Bitdefender website as OVA and MD5.
To import Bitdefender GravityZone OVA file on ESXi Host, you have to:
- Open the vSphere client.
-
Go to File > Deploy OVF template. This works for both OVA and OVF.
-
Browse and select the package you would like to deploy, and then hit Next.
-
You will get details about it. Hit Next.
-
Now you get to name your virtual machine and place it in the proper datacenter and folder.
-
Now you choose your cluster.
-
Choose the storage locations.
-
Choose the disk provisioning virtual machine type thin or thick.
-
Choose the network.
-
Hit Finish and watch your virtual machine being created.
-
Wait while the virtual machine is deployed from the OVA.
-
Connect to the virtual machine and start the configuration.
Import GravityZone Virtual Appliance in Hyper-V
Import GravityZone Virtual Appliance in VMM (System Center 2012 - Virtual Machine Manager)
Bitdefender GravityZone VHD file can be downloaded from Bitdefender website: VHD and MD5.
To import Bitdefender GravityZone VHD file on Hyper-V Manager, you have to:
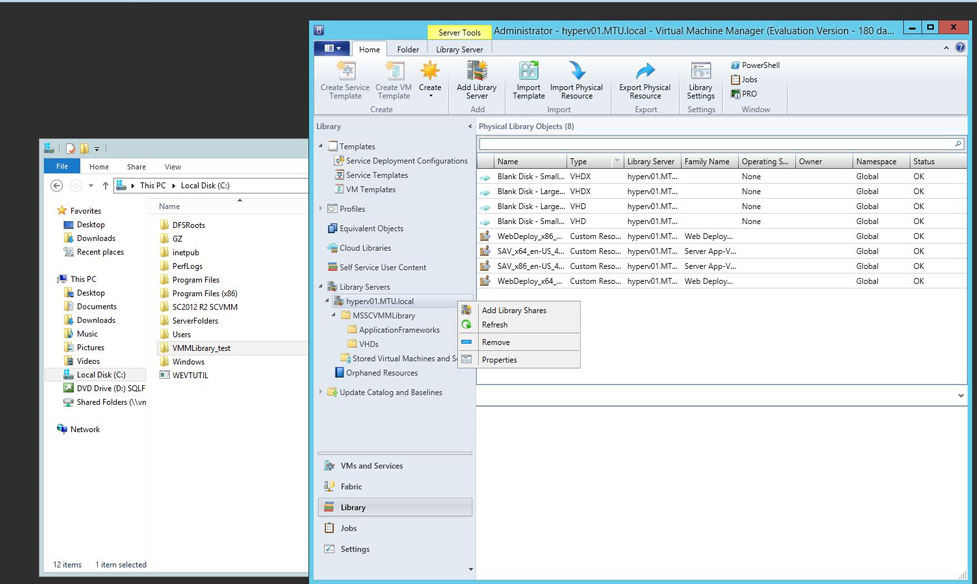
- Open System Center 2012 - Virtual Machine Manager.
- Select the Library tab.
-
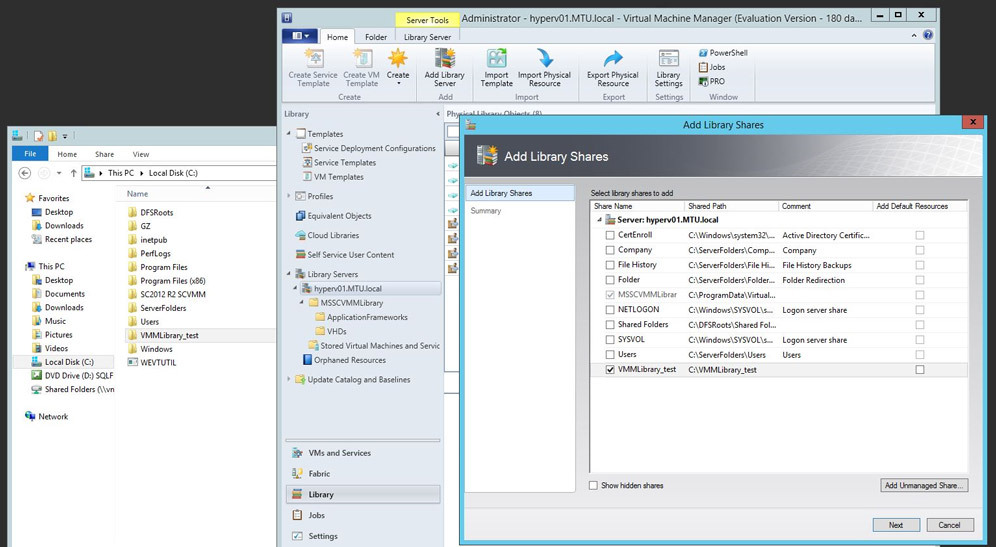
Add that share location to Library Shares.
-
Select the share location, where Bitdefender GravityZone VHD file has previously been copied.
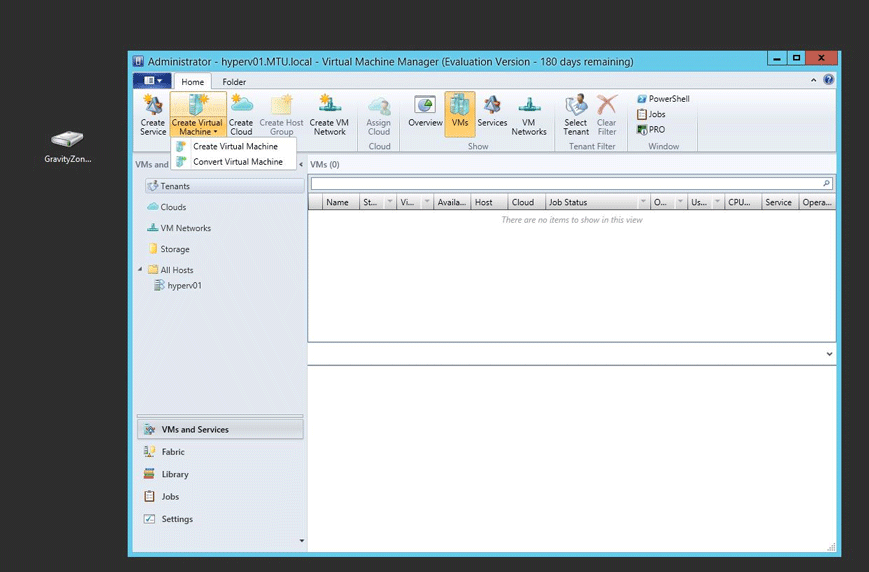
- Select VMs and Services tab, from Virtual Machine Manager.
-
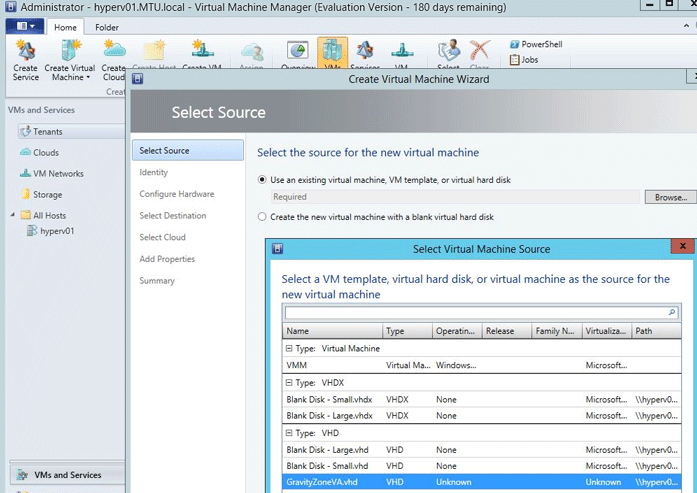
Click Create Virtual Machine.
-
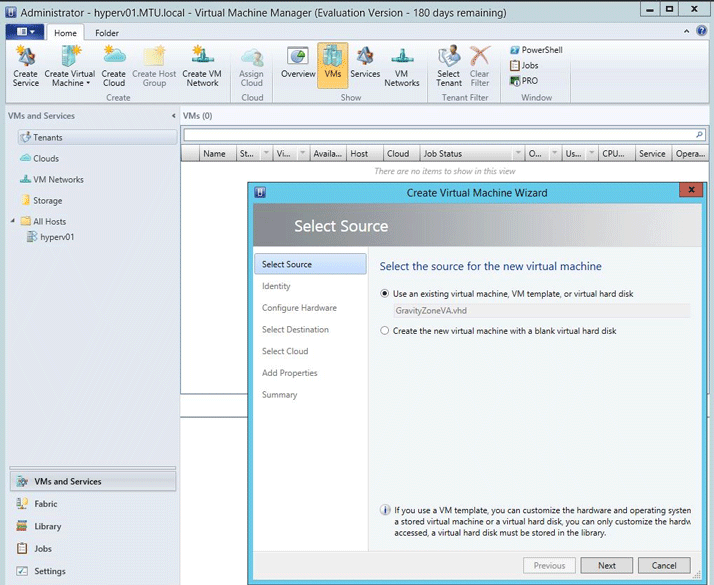
In the next window, select the virtual machine source: GravityZoneVA.vhd and click Next.
-
Select an existing virtual machine.
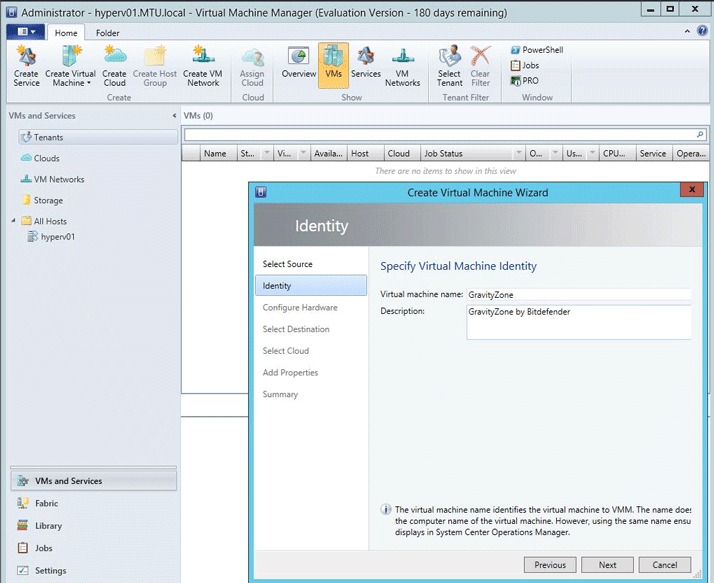
-
Choose a name for the virtual machine.
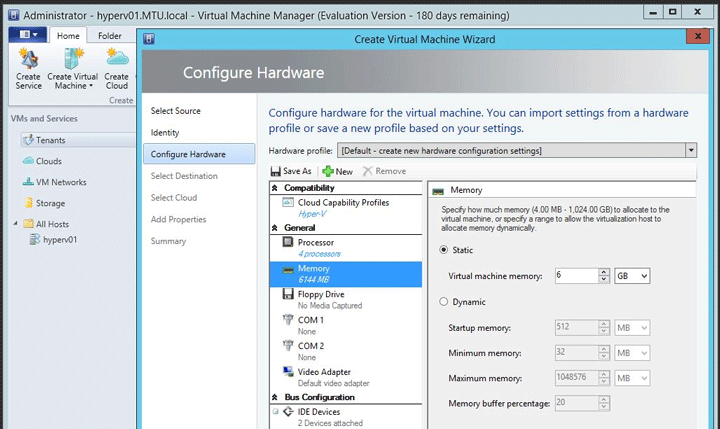
-
Configure hardware for the virtual machine, as mentioned on the chapter System Requirements from the GravityZone Administrator's Guide.
-
Select the destination.
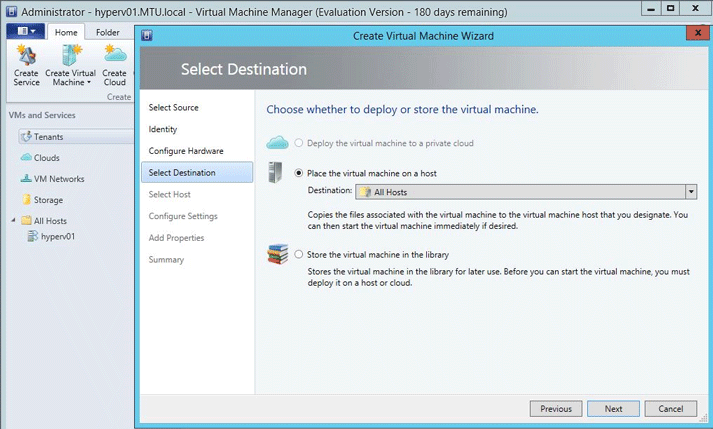
-
Select the Hyper-V Host destination.
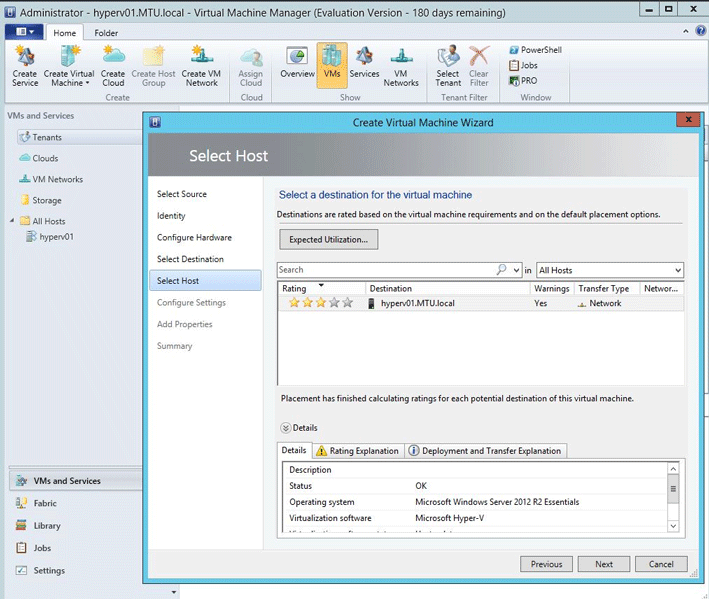
-
Review the virtual machine settings:
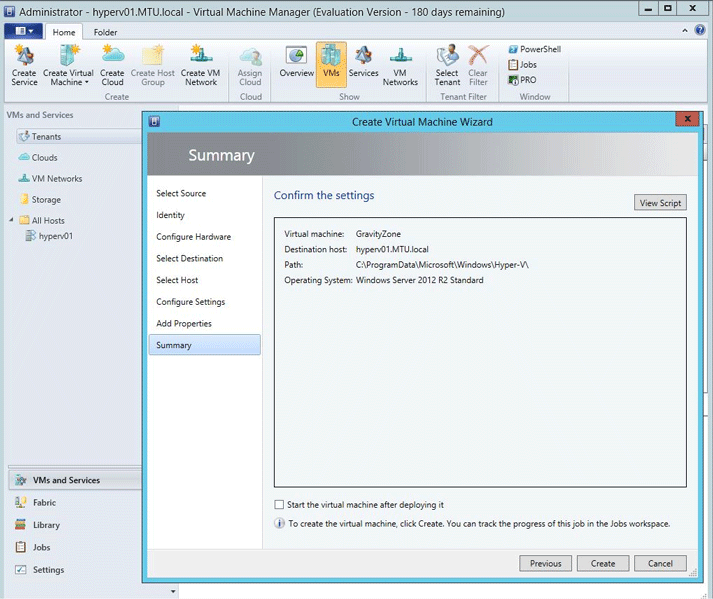
-
A task will be created.
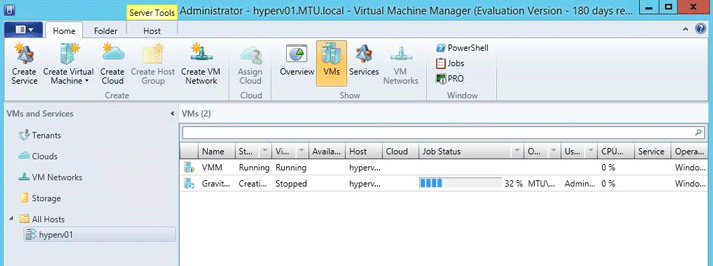
-
Connect to the virtual machine and start the configuration.
Import GravityZone Virtual Appliance in Hyper-V host
Bitdefender GravityZone VHD file can be downloaded from Bitdefender website: VHD and MD5.
To import Bitdefender GravityZone VHD file on Hyper-V Manager, you have to:
- Open Hyper-V Manager.
- From the navigation pane of Hyper-V Manager, select the computer running Hyper-V.
-
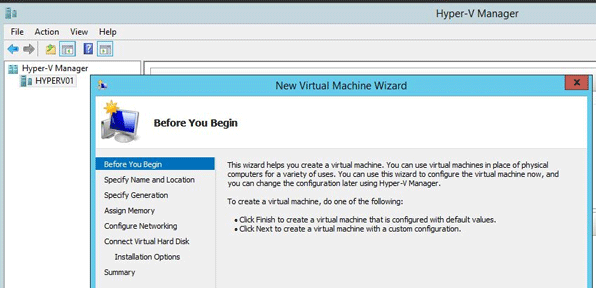
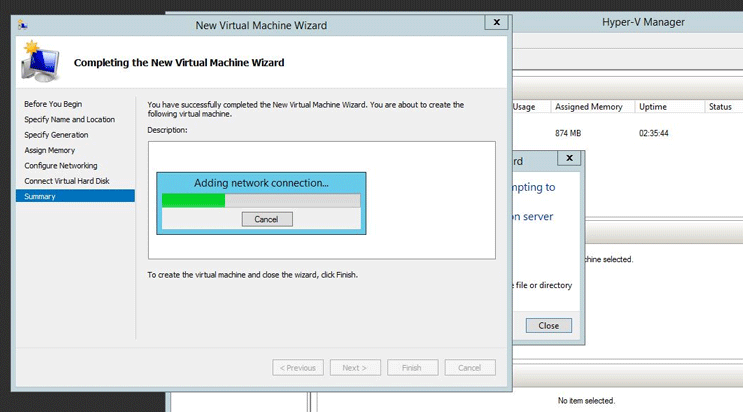
Click New and then click Virtual Machine. The New Virtual Machine wizard opens. Click Next.
-
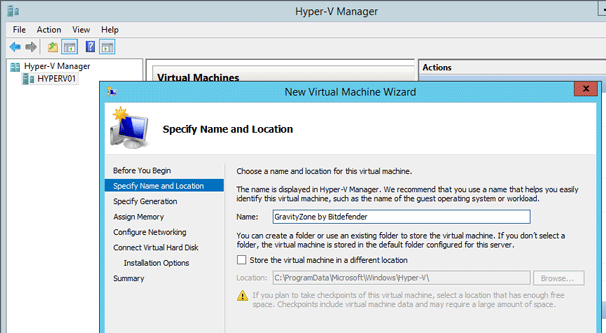
On the Specify Name and Location page, type an appropriate name.
-
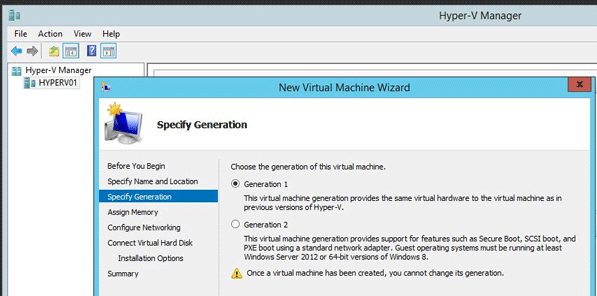
On the Specify Generation, select Generation 1.
-
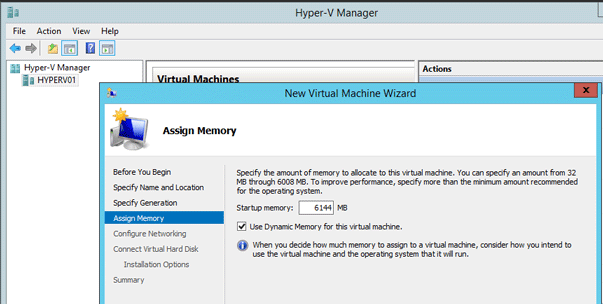
On the Assign Memory page, specify enough memory to start the guest operating system.
-
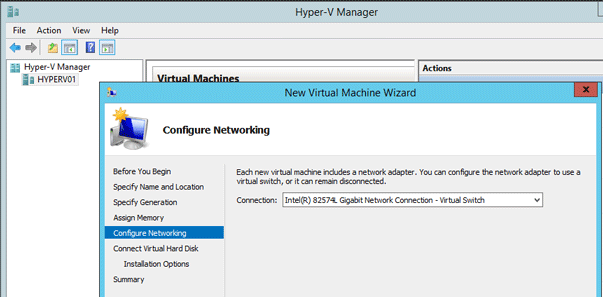
On the Configure Networking page, connect the virtual machine to the switch you created when you installed Hyper-V.
-
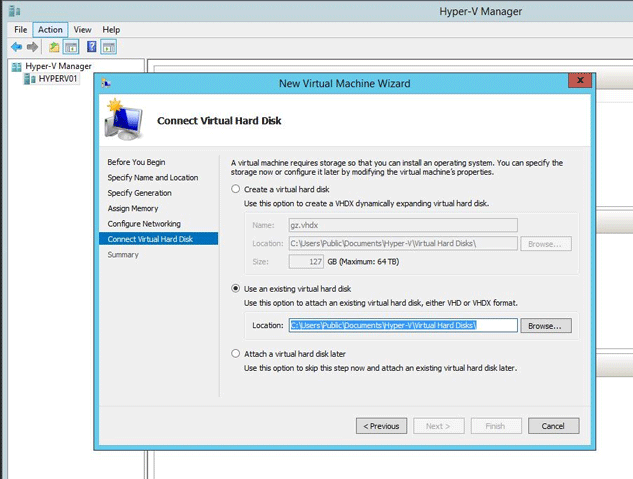
On the Connect Virtual Hard Disk page, choose the option of using an existing virtual hard disk.
-
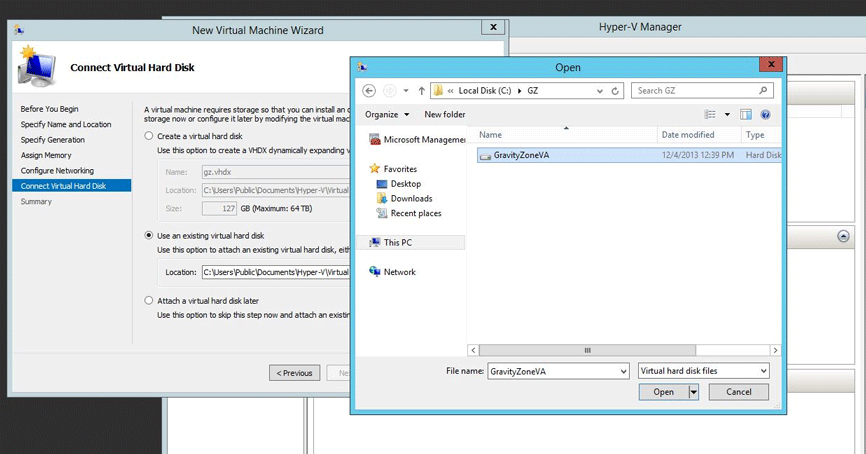
Browse for the location of Bitdefender GravityZone VHD file.
-
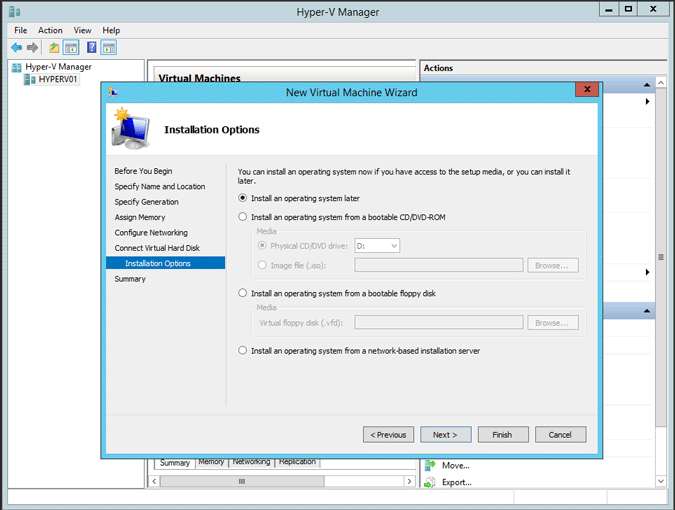
The guest operating system is already installed in a virtual hard disk, so choose Install an operating system later.
-
On the Summary page, verify your selections and then click Finish.
-
Connect to the virtual machine and start the configuration.
Import GravityZone Virtual Appliance in Citrix
Import GravityZone Virtual Appliance in Citrix XenCenter
Bitdefender GravityZone XVA file can also be downloaded from Bitdefender website: XVA and MD5.
You can import Bitdefender GravityZone XVA file using the XenCenter Import wizard.
Importing a VM from an XVA or ova.xml file involves the same steps as creating and provisioning a new VM using the New VM wizard, such as, nominating a home server, and configuring storage and networking for the new VM.
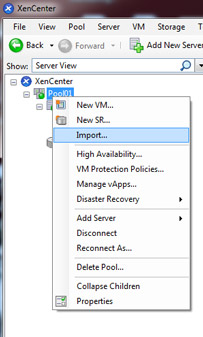
Open the Import wizard by doing one of the following:
-
On the File menu, select Import.
-
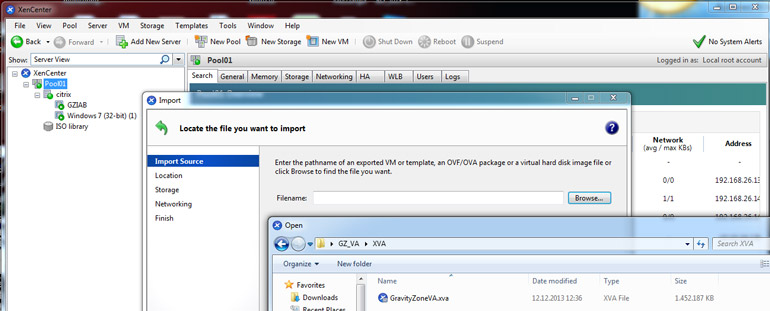
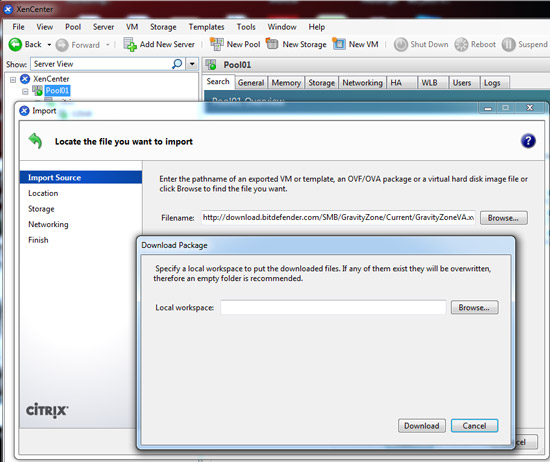
On the first page of the wizard, locate the XVA file you want to import and then click Next.
-
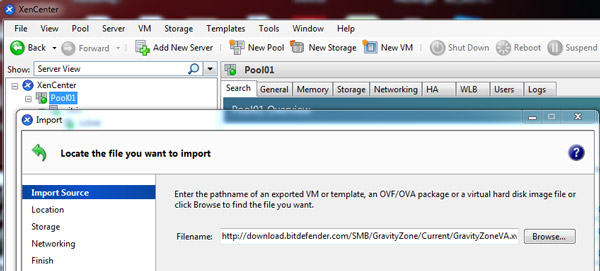
Alternatively you enter a URL location (http | https | file | ftp) in the Filename box.
-
On clicking Next, the Download Package dialog box opens and you must specify a folder on your XenCenter host where the file(s) will be copied.
-
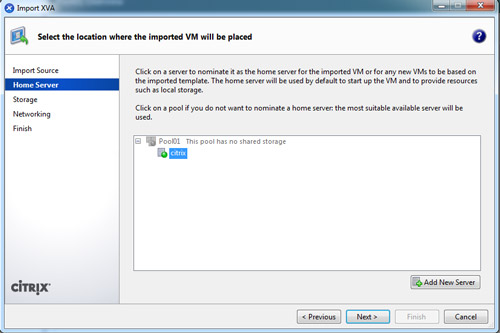
On the Home Server page, specify where to put the new VM:
- To place the imported VM in a pool without assigning it a home server, select the destination pool in the list, and then click Next.
-
To place the imported VM in a pool and assign it to a specific home server (or to place it on a standalone server), select a server and then click Next to continue.
-
On the Storage page, select a storage repository (SR) where the imported virtual disks will be placed, then click Next to continue.
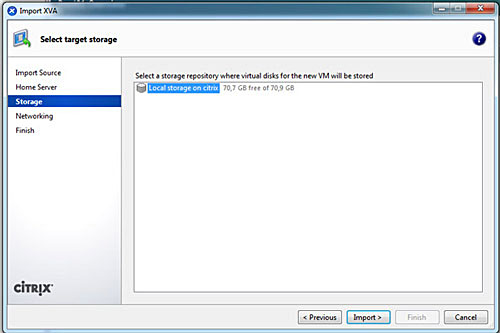
-
On the Networking page, map the virtual network interfaces in the VM you are importing to target networks in the destination pool. The Network and MAC address shown in the list on this page are stored as part of the definition of the original (exported) VM in the export file. To map an incoming virtual network interface to a target network, select a network from the list in the Target network column.

- Click Next to continue.
-
On the last page of the Import wizard, review the configuration options you have selected. To have the imported VM start up as soon as the import process has finished and the new VM is provisioned, select the Start VM after import check box.
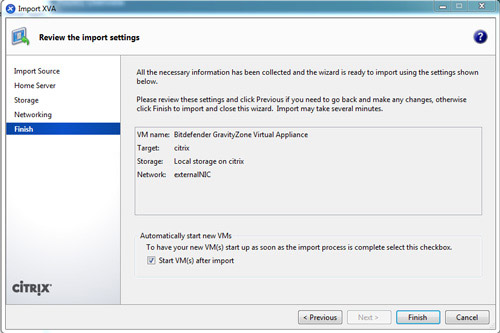
-
Click Finish to begin importing the selected file and close the wizard.
The import progress is displayed in the status bar at the bottom of the XenCenter window and also on the Logs tab.
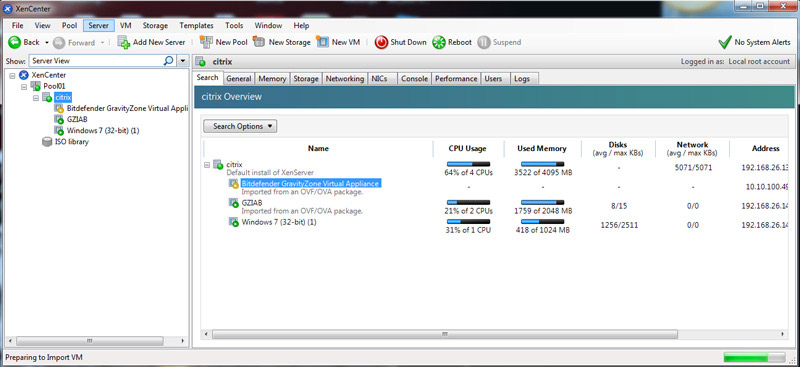
The import process may take some time, depending on the size of the imported VM's virtual disks, the available network bandwidth, and the disk interface speed of the XenCenter host. When the newly-imported VM is available, it appears in the Resources pane.
Import GravityZone Virtual Appliance in KVM
Bitdefender GravityZone KVM image can be downloaded from Bitdefender website: RAW and MD5.
To import GravityZone image to KVM you have to install the Virtual Machine Manager utility on a Linux machine with GUI. The Linux with GUI machine should have connectivity with the KVM server.
Example of the Virtual Machine Manager installation on Ubuntu with GUI:
#apt-get install virt-manager
To import GravityZone image using Virtual Machine Manager, you have to:
- Upload GravityZone KVM image to the KVM server storage pool location using WinSCP. By default the storage location is /var/lib/libvirt/images.
-
Extract GravityZone image archive using the following command:
tar -jxf /var/lib/libvirt/images/GravityZoneVA_KVM.tar.bz2 -
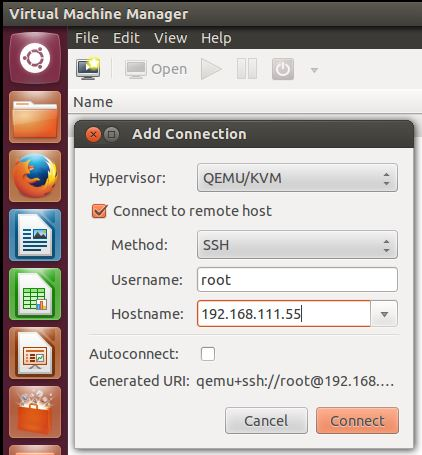
Open Virtual Machine Manager and connect to the KVM server: File > Add connection.
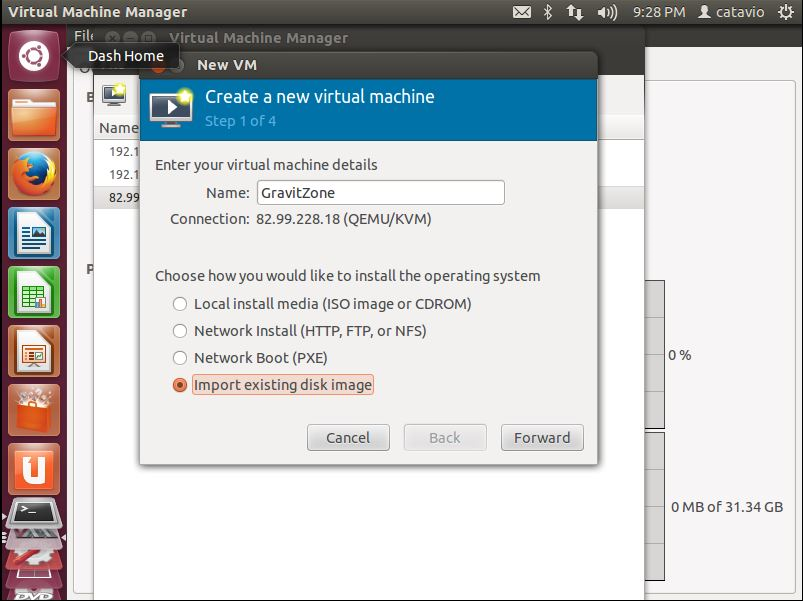
- Click the Create Virtual Machine icon, to create a new virtual machine.
-
Type a name and select Import existing disk image.
-
Click Browse to provide a storage path.
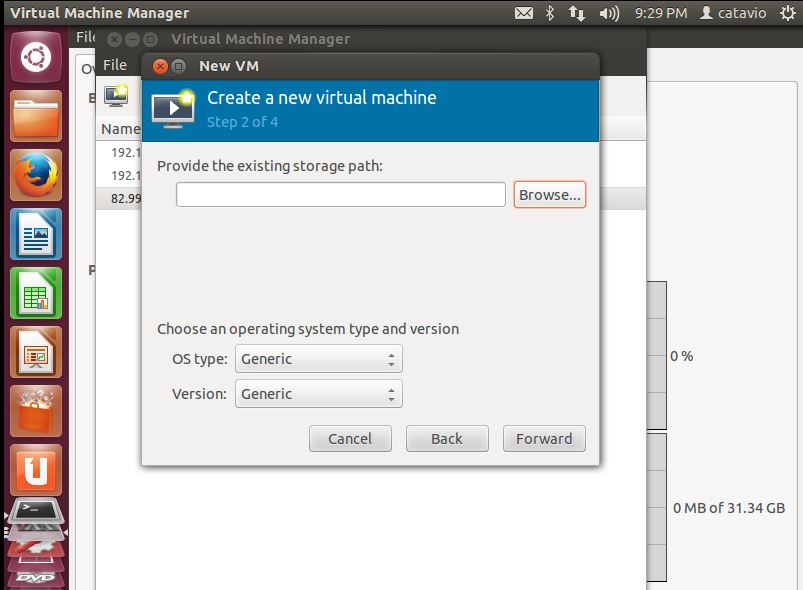
-
Select the GravityZone raw file extracted before.
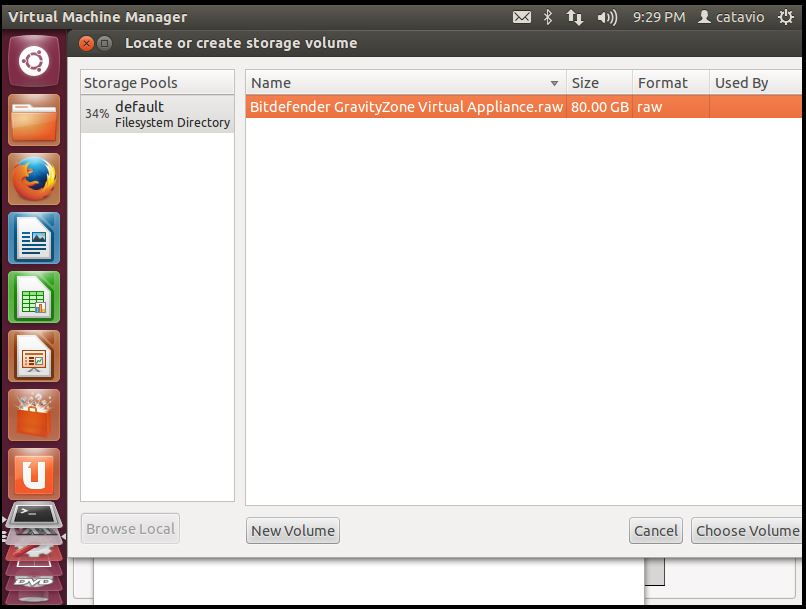
Note: If the GravityZone raw file is not listed, the /var/lib/libvirt/images is not the default storage location. To check or change the default storage location from Virtual Machine Manager, select the KVM connection Details option, under the Storage tab.
-
Configure GravityZone virtual machine CPU and memory.
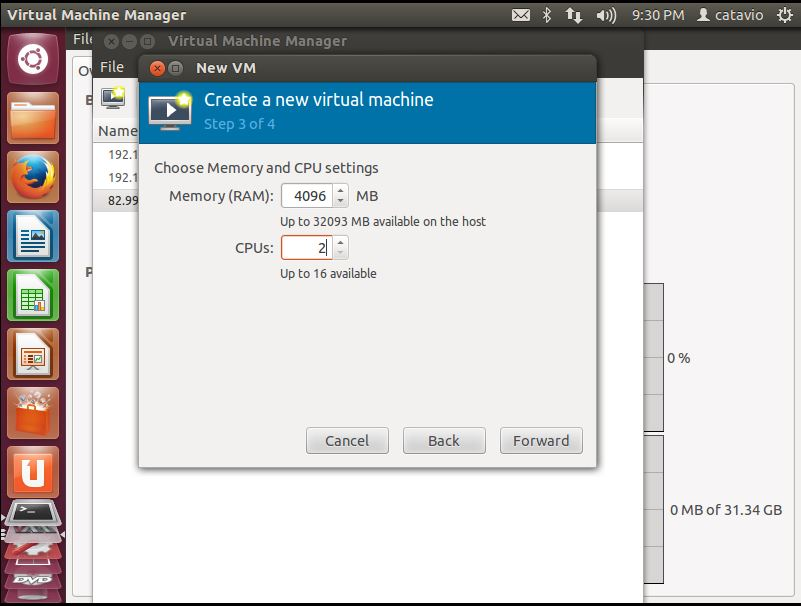
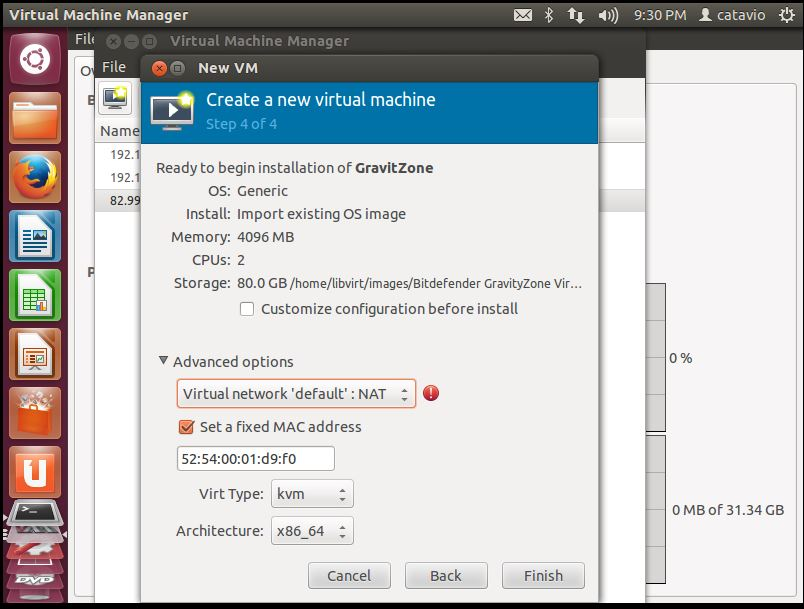
-
Configure GravityZone virtual network and click Finish.
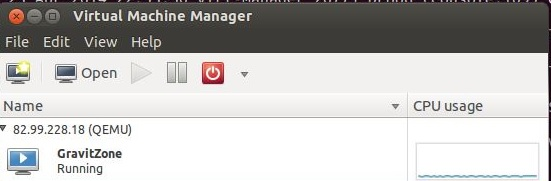
- Right click the virtual machine icon to power it on.
-
Select Open to access the virtual machine.
 Australia:
(+61) 1300 888 829, (+61) 385 956 732
Australia:
(+61) 1300 888 829, (+61) 385 956 732 Canada:
(+1) 647 977 5827, (+1) 647 367 1846
Canada:
(+1) 647 977 5827, (+1) 647 367 1846  Deutschland:
(+49) 2304 9993004
Deutschland:
(+49) 2304 9993004  España:
(+34) 937 370 223
España:
(+34) 937 370 223
 France:
+33(0)184070660
France:
+33(0)184070660  New
Zealand: (+64) 0800 451 786
New
Zealand: (+64) 0800 451 786  Osterreich:
(+49) 2304 9993004
Osterreich:
(+49) 2304 9993004  România:
(+40) 21 264 1777, (+40) 374 303 077
România:
(+40) 21 264 1777, (+40) 374 303 077  Schweiz:
(+49) 2304 9993004
Schweiz:
(+49) 2304 9993004  United
States: (+1) 954 414 9621, (+1) 954
281 4669
United
States: (+1) 954 414 9621, (+1) 954
281 4669  United
Kingdom: (+44) 2036 080 456, (+44) 2080 991 687
United
Kingdom: (+44) 2036 080 456, (+44) 2080 991 687  WorldWide: (+40) 31 620 4235,
(+40) 374 303 035
WorldWide: (+40) 31 620 4235,
(+40) 374 303 035