In this tutorial, we’ll show you how to set up Bitdefender BOX as a standalone router, using its built-in router functionality. If you prefer to use the router or gateway provided to you by your Internet Service Provider, read – How to install Bitdefender BOX using your ISP-provided router. If you prefer to use your personal router, read – How to install Bitdefender BOX using a personal router.
The whole setup process should take you less than 10 minutes, so let’s get started!
Before you begin, make sure you have the following available:
- a working Internet connection
- a mobile device, which you’ll use to set up your Bitdefender BOX
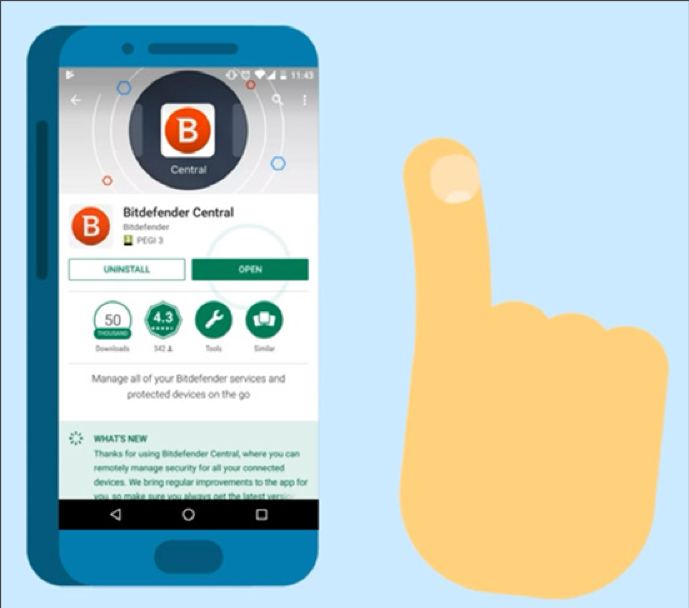
Step 1. Open the Bitdefender Central app on your smartphone. If you don’t have the app, please install it from either App Store or Google Play.
Step 2. Sign in to your Bitdefender Central account or create an account if you don’t have one yet.

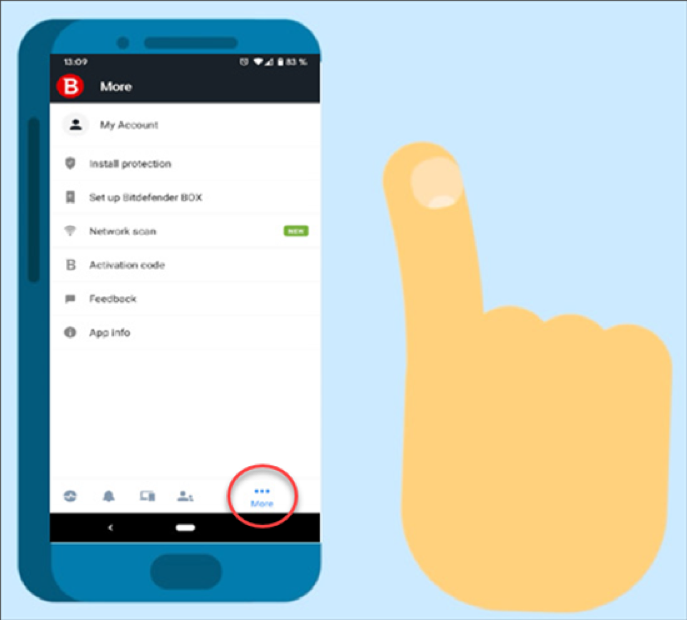
Step 3. In the Central app, press the More button, at the bottom of the screen.
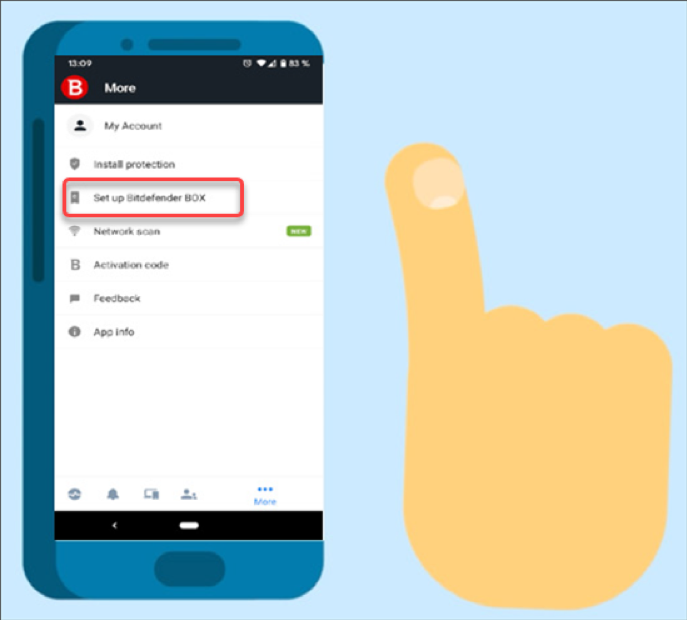
Step 4. Press Set up Bitdefender BOX, to begin the installation process.
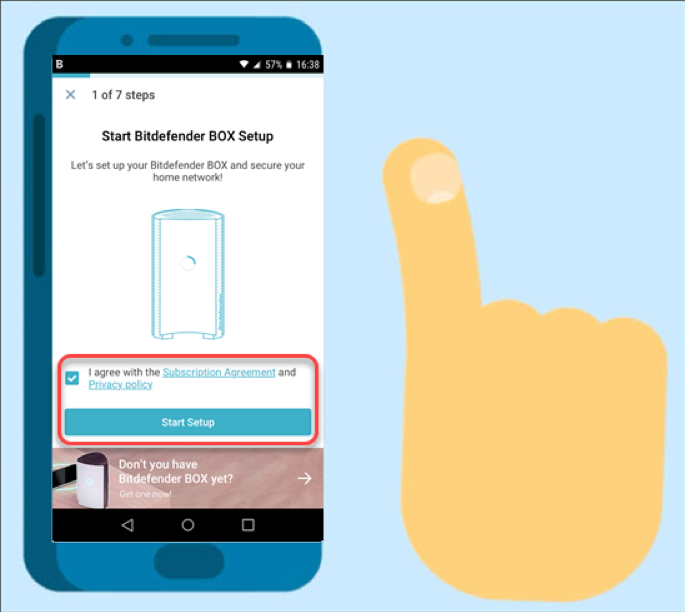
Step 5. To continue the installation, you will have to agree with the Subscription Agreement & Privacy policy, then tap Start Setup.
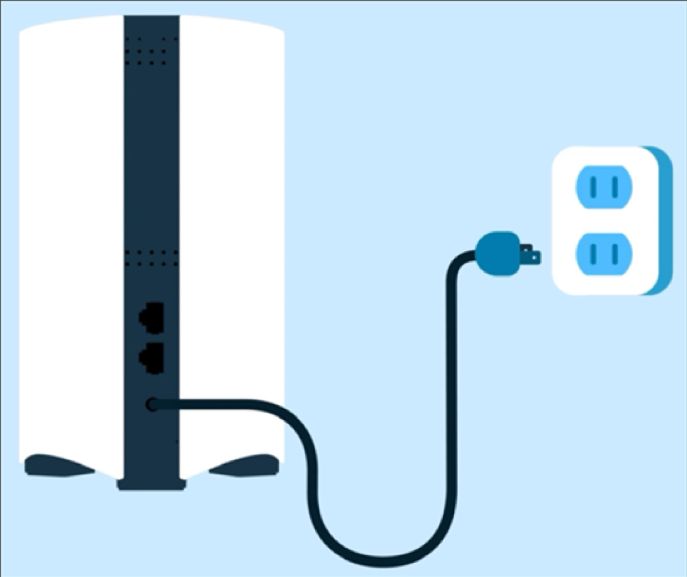
Step 6. Connect Bitdefender BOX to a power outlet and wait a few seconds.
Step 7. Once the front light starts spinning, press Next on your phone.

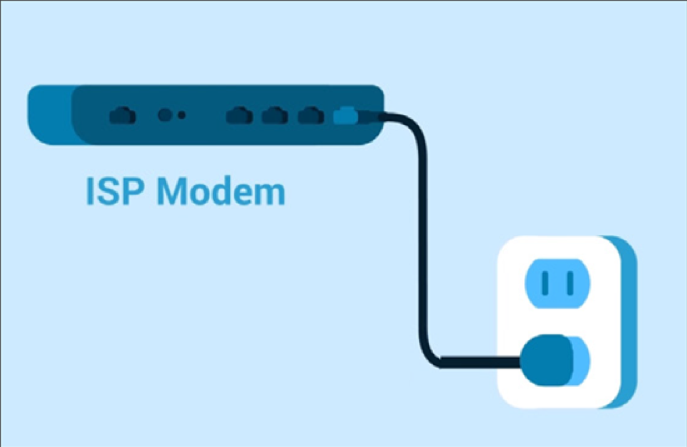
Step 8. Power off your ISP modem. This is the device that came from your Internet provider. Just unplug it from the power outlet.
Step 9. On your phone, press Next.

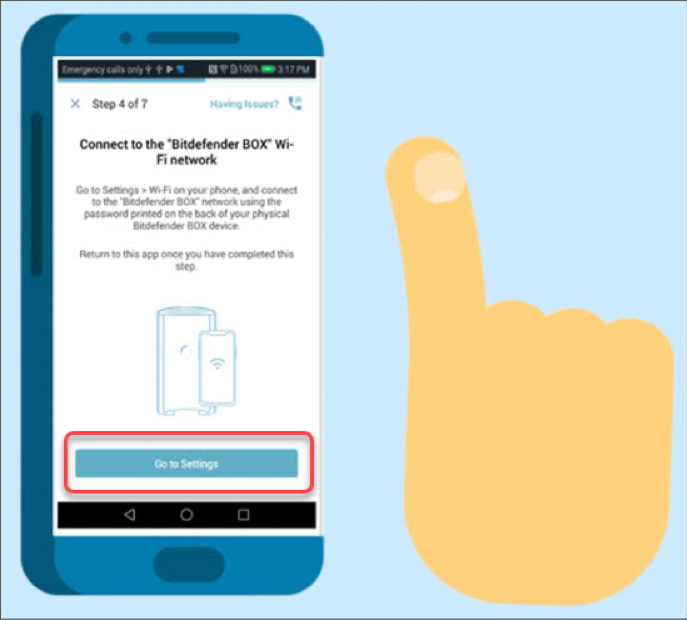
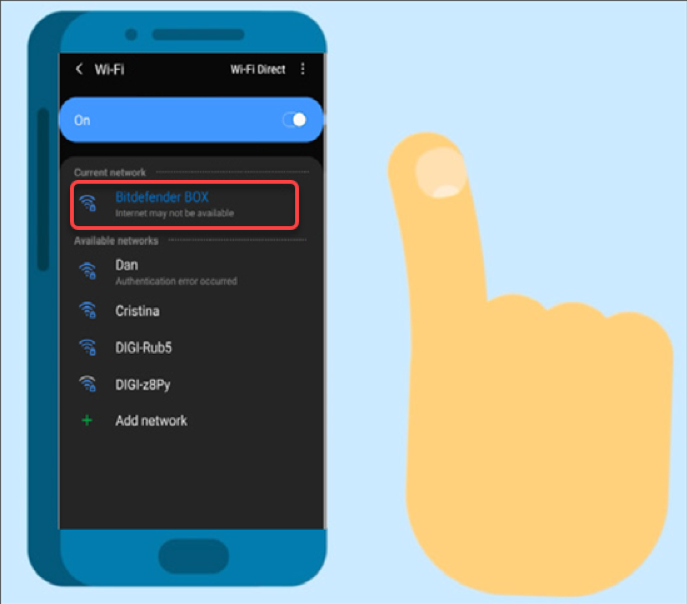
Step 10. Go to Settings → Wi-Fi on your smartphone…
…and connect to the Wi-Fi network named Bitdefender BOX.
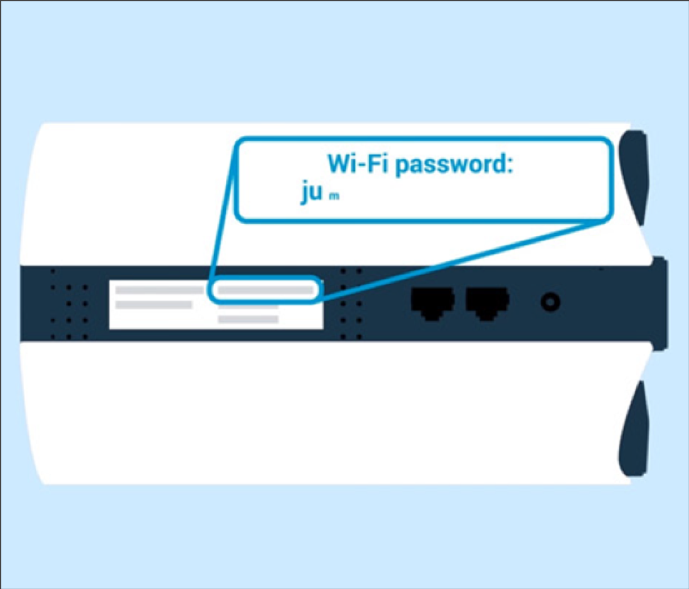
Step 11. You’ll be asked to enter a password for this Wi-Fi network. For security reasons, each Bitdefender BOX has its own unique password. You’ll find yours printed on the back of the device.
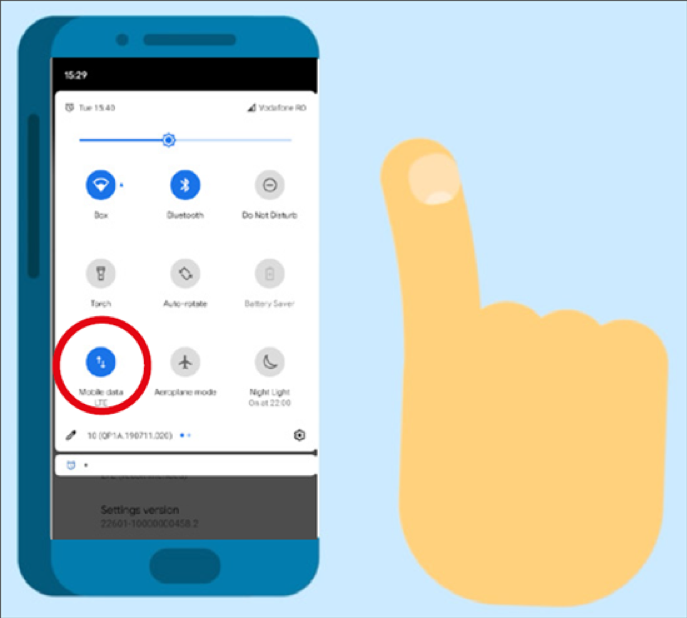
Step 12. This Wi-Fi has no internet access yet, so your phone may try to switch to other networks. To prevent this, turn off Mobile Data, and choose to stay on the Bitdefender BOX network, if prompted.
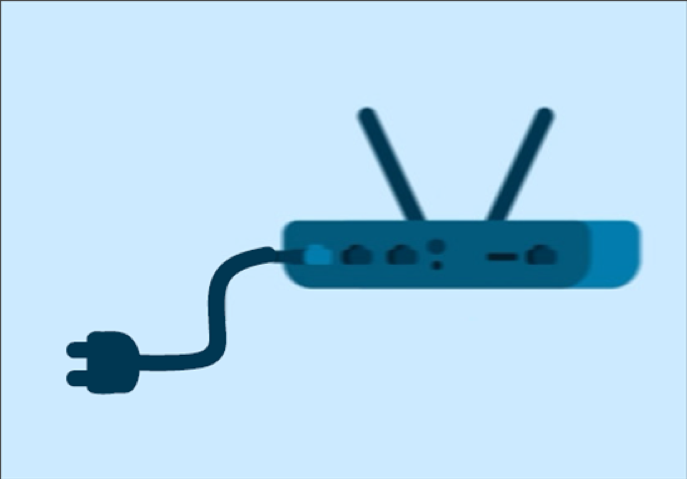
Step 13. Remember how you unplugged your ISP modem earlier? Now it’s time to plug it back in.

Step 14. On your phone, press Next.
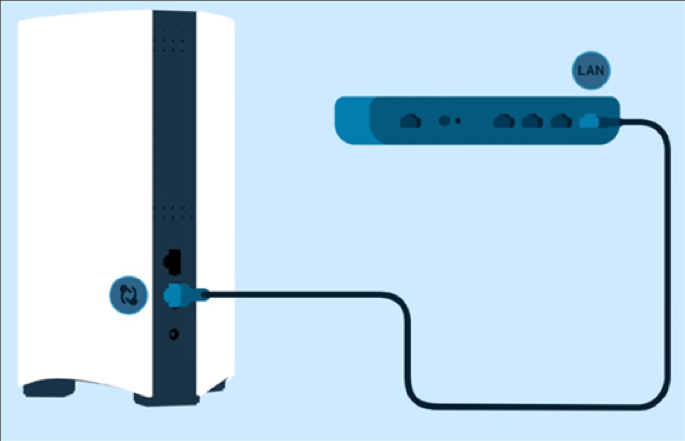
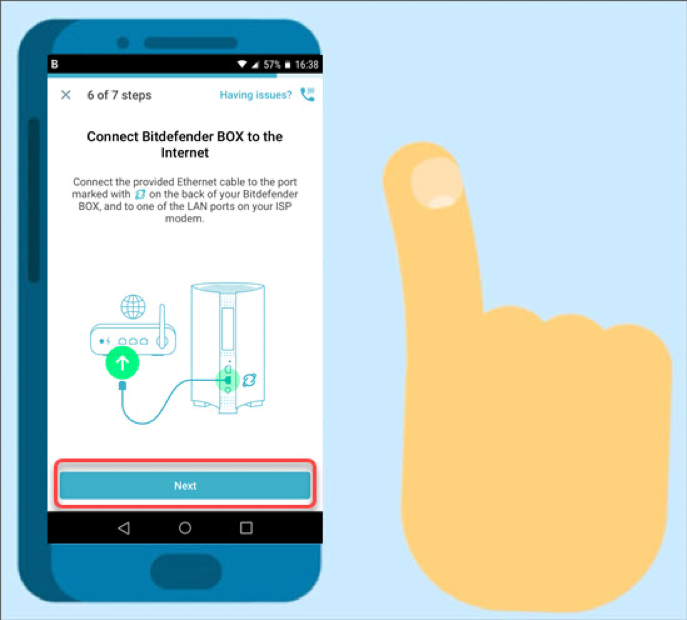
Step 15. Find the Ethernet cable that came with Bitdefender BOX, and connect one end to the port marked with a circle with the two arrows, and the other end to a LAN port on your ISP modem.
Step 16. Press Next. Bitdefender BOX will now connect to the Internet.
Step 17. Almost there! Press Finalize Setup.
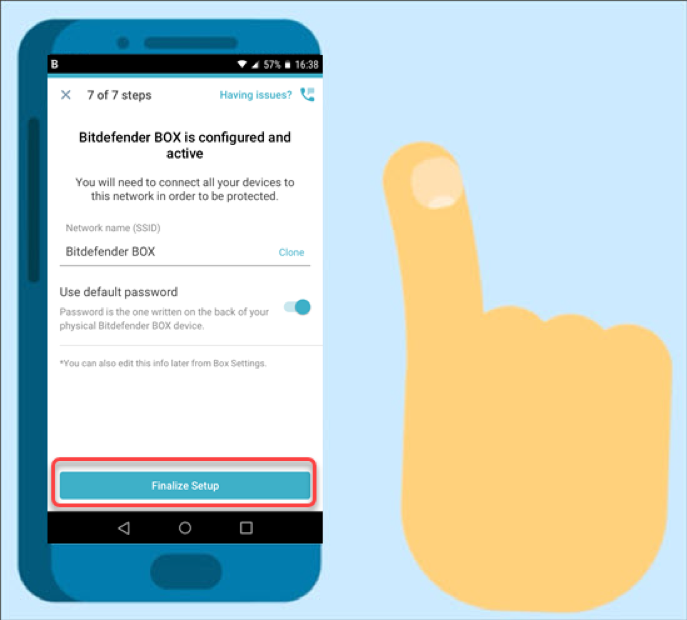
Step 18. Wait a few seconds while Bitdefender BOX is setting up your secure Wi-Fi network. When the front light stops spinning, your product is ready.

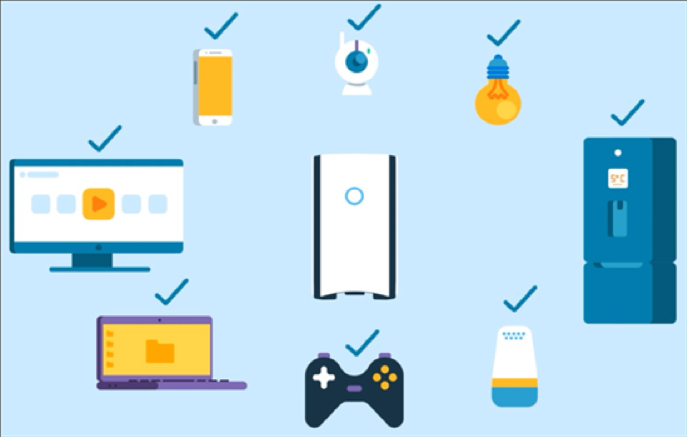
Step 19. To protect your smart devices, simply connect each one to the new Bitdefender BOX Wi-Fi. The password is the one printed on the back of your Bitdefender BOX.
Step 20. You’ll now need to physically replace your personal router with Bitdefender BOX. At this point, both your router and Bitdefender BOX are connected to your ISP modem.
Disconnect your router from the modem, then unplug it.
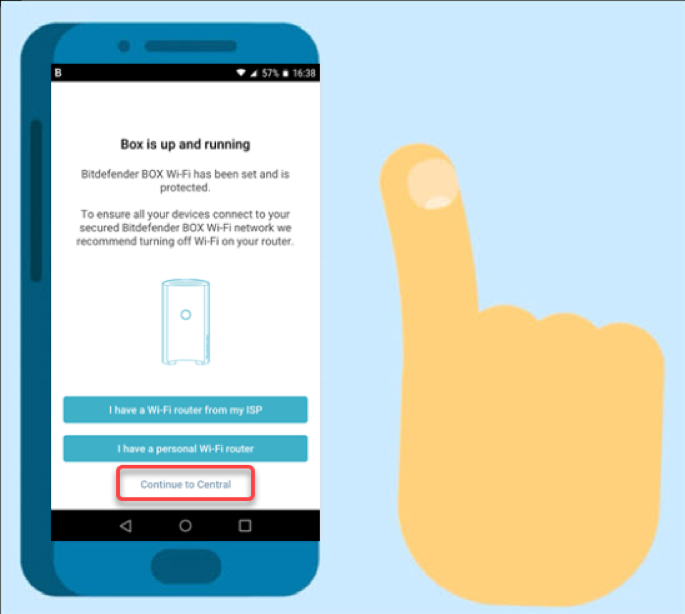
Step 21. That’s it! Bitdefender BOX is now your router. Tap Continue to Central in the Central app.
Congratulations! You have completed the setup process and installed Bitdefender BOX as a standalone router.