This guide will show you how to temporarily disable all protection features in Bitdefender (Total Security, Internet Security, Antivirus Plus) for troubleshooting purposes. Remember to re-enable the features afterward.
Note: If your Bitdefender product doesn’t include certain features, only disable the ones available.
Video tutorial
Watch our video tutorial on disabling Bitdefender or follow the step-by-step instructions below.
1. Antivirus
-
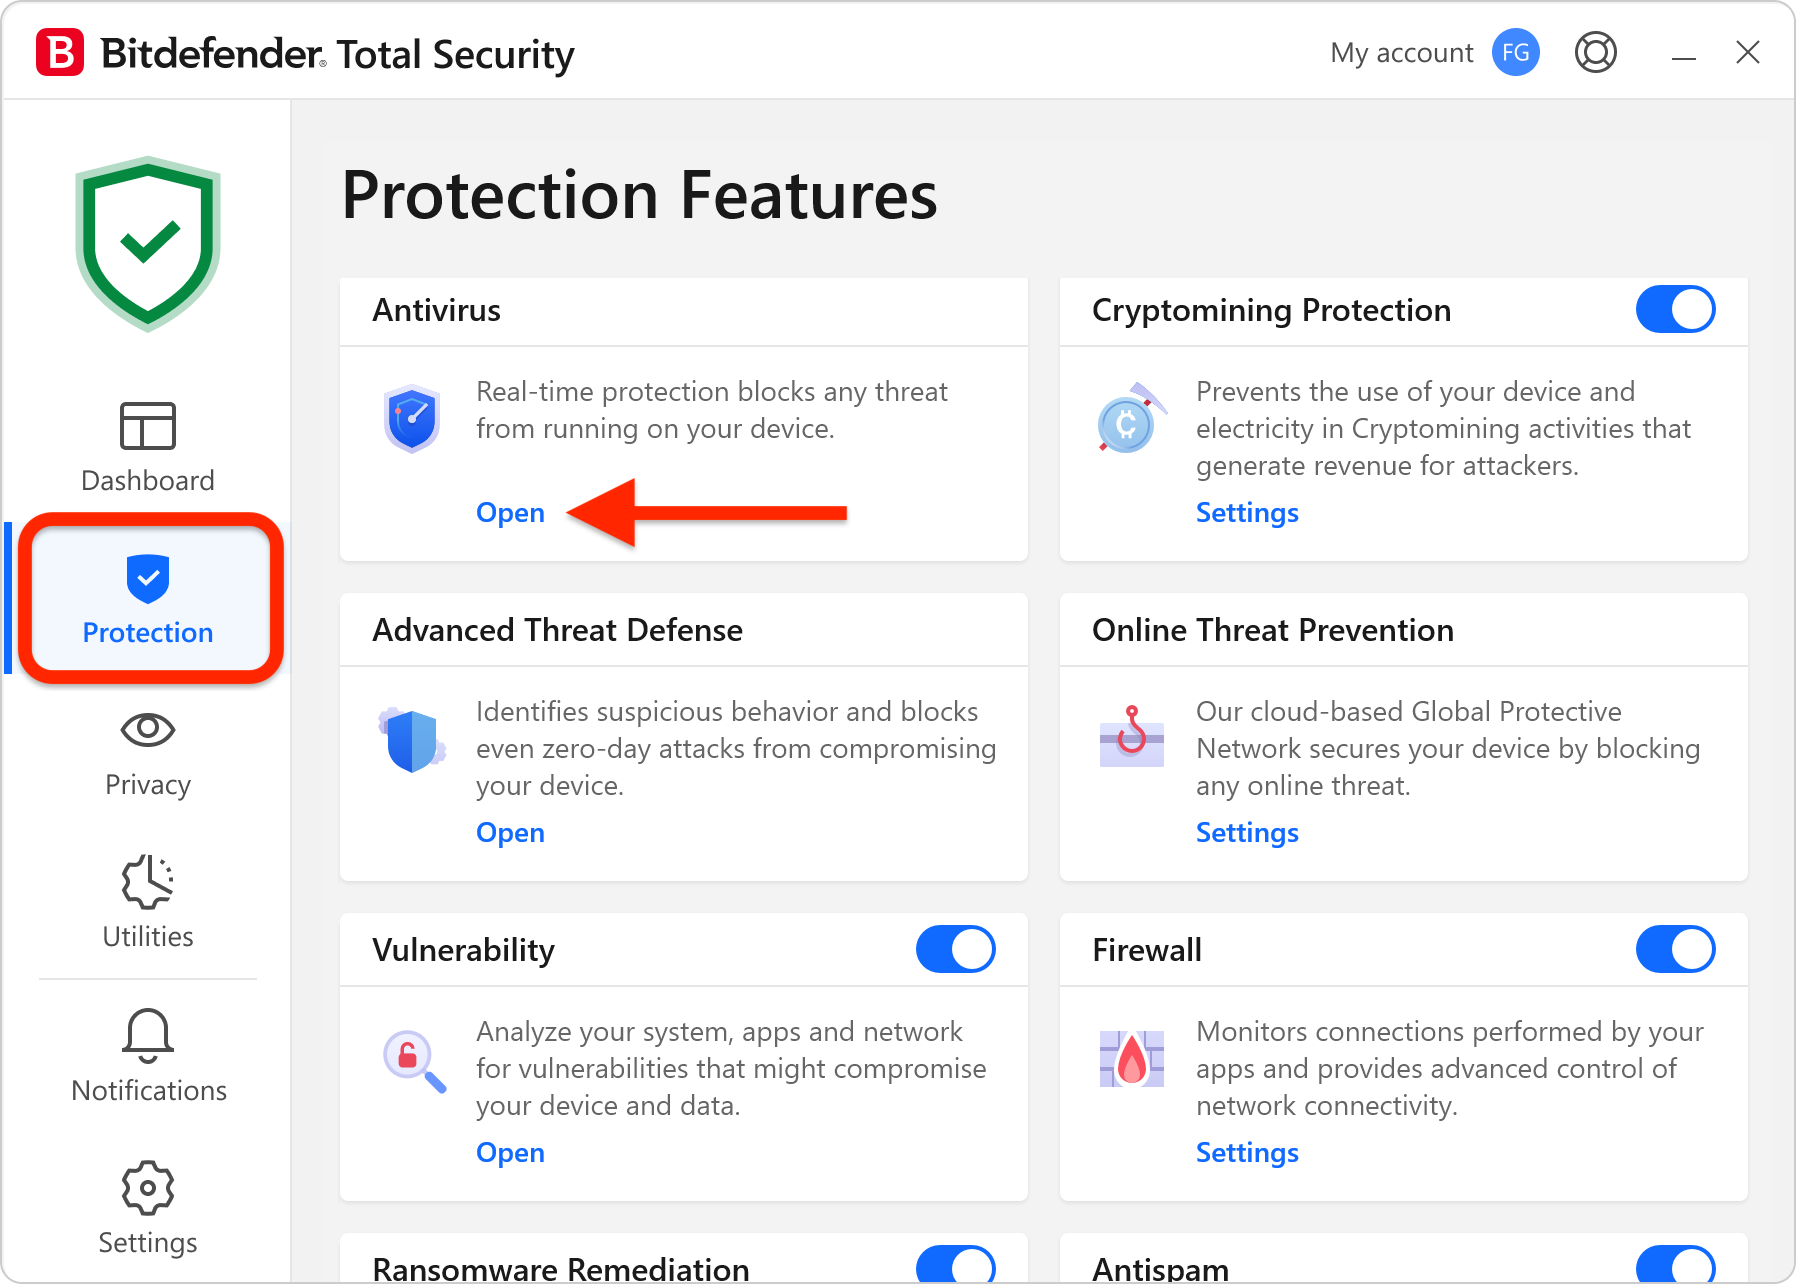
- Open Bitdefender and click on Protection on the left side menu.
- In the Antivirus panel, click Open.

- Go to the Advanced tab and turn off Bitdefender Shield.
- Choose to disable it Permanently or Until system restart and press OK.
- Go to the Settings tab and turn off the following:
- Scan CD & DVD
- Scan flash drives
- Scan mapped network drives
2. Advanced Threat Defense
-
- In the Advanced Threat Defense panel, click Open.
- In the Settings tab, turn off Advanced Threat Defense.
3. Online Threat Prevention
-
- In the Online Threat Prevention panel, click Settings.
- Turn off the following:
- Web Protection
- Search Advisor
- Encrypted web scan
- Fraud protection
- Phishing protection
- Network Protection
- Email Protection (select Don’t scan emails)
4. Firewall
-
- Turn off the Firewall switch.
5. Antispam
-
- Turn off the Antispam switch.
6. Vulnerability
-
- Turn off the Vulnerability switch.
7. Cryptomining Protection
-
- Turn off the Cryptomining Protection switch.
8. Ransomware Remediation
-
- Turn off the Ransomware Remediation switch.
You’ve now disabled all Bitdefender features. Re-enable features one at a time to find out which one may be the culprit.