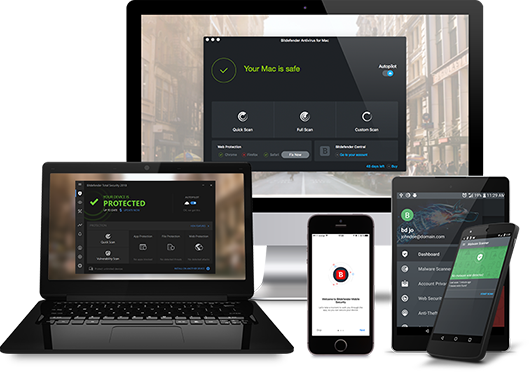
In this article, we will show you how to install Bitdefender on Windows PCs, Macs, smartphones, and tablets running Android or iOS. Prior to the installation, please make sure that the Bitdefender subscription is active in your Central account so the product you install can retrieve its validity from your account. If you need help activating your subscription, refer to this article – How to activate the Bitdefender subscription.
Click on any section to learn more:
How to install Bitdefender on Windows
VIDEO
1. Sign in to your Bitdefender Central account. If you don’t have an account already, please sign up for one.
2. Go to My Devices, then click + Install Bitdefender products on your devices.
3. A new window will pop up. Choose Security, then click This device to install Bitdefender on your PC.
4. Wait until the download completes, then run the installer. This button will help you locate it in the browser
5. The installation package is first updated, then the setup wizard appears. Downloading the installation files can take a long time, especially over slower internet connections.
6. Select the language you want to install the product in.
7. Click Install to confirm your preferences and begin the installation. Wait for the installation to complete.
8. Click Start Device Assessment to initiate a scan of critical system areas. When the scan is completed, click Open Bitdefender Interface.
If you do not wish to perform the scan, simply click Skip.
9. In the Getting started window you can see details about your active subscription. Click Finish to access the Bitdefender interface.
Bitdefender is now installed on Windows.
How to install Bitdefender on Mac
VIDEO
1. Sign in to your Bitdefender Central account. If you don’t have an account already, please sign up for one.
2. Select the My Devices panel.
3. In the My Devices window, click + Install Bitdefender products on your devices.
4. A new window will pop-up. Choose Security, then click This device to install Bitdefender on your current Mac.
5. The installer will be downloaded on your system inside the Downloads folder. Double-click the bitdefender file with the .pkg extension and follow the on-screen instructions. Click Allow if prompted, then Continue.
6. Next, you will be guided through the steps necessary to install Bitdefender on your Mac. Click on Continue.
7. In order to continue the installation, you will have to agree to the terms of the software Subscription Agreement.
8. Select the disk where you want to install the Bitdefender software, then click on Continue. After that, select Install.
9. When prompted, type your username and password, then click Install Software.
10. A small window will appear and Bitdefender Antivirus for Mac will automatically download and install on your Mac.
The installation is now complete if you have macOS Yosemite, El Capitan, or Sierra.
Continue with the steps below only if your Mac is using macOS High Sierra or a newer version such as Mojave, Catalina, Big Sur – Find out which macOS your Mac is using. Older macOS versions do not require these extra steps.
How to continue the installation on High Sierra 10.13
11. If you have High Sierra, you will be notified that a system extension signed by Bitdefender has been blocked. This is not an error, just a security check. Click on OK.
The notification appears because of a new feature introduced with High Sierra. This feature enforces that only kernel extensions (KEXT) approved by the user will be loaded on a system. When a request is made to load an extension that the user has not yet approved, the request is denied and macOS displays an alert similar to the one shown below.
12. To help you with the setup, Bitdefender will display a window listing the steps necessary in order to run Bitdefender properly. Click the Security & Privacy link.
13. This will open Security & Privacy. Click the lock icon in the bottom left corner to make the changes. When prompted, enter your macOS administrator password, then press Unlock.
14. Click the Allow button, in the lower part of the window.
Or select Bitdefender from the list, then click OK.
Congratulations! You have successfully installed Bitdefender Antivirus for Mac on High Sierra.
How to continue the installation on Mojave 10.14 or later
11. If you have Mojave or a more recent macOS version, you will be notified that a system extension signed by Bitdefender has been blocked. This is not an error, just a security check. Click on OK.
12. To help you with the setup, Bitdefender will display a window listing the steps necessary in order to run Bitdefender properly. Click the Security & Privacy link.
13. This will open Security & Privacy. Click the lock icon in the bottom left corner to make the changes. When prompted, enter your macOS administrator password, then press Unlock.
14. Click the Allow button, in the lower part of the window.
Or select Bitdefender from the list, then click OK.
15. Select the Privacy tab in the Security & Privacy window.
16. Click Full Disk Access on the sidebar.
17. Check the box in front of these two Bitdefender entries from the list:
- Bitdefender.SPSE
- Antivirus for Mac
18. The following message appears: “Antivirus for Mac” will not have full disk access until it is quit. Press Quit & Reopen.
19. Restart your Mac to complete the setup.
Congratulations! You have successfully installed Bitdefender on Mojave, Catalina, or Big Sur.
How to install Bitdefender on Android
VIDEO
1. Open the Google Play app on your smartphone or tablet running Android.
Google Play
2. Search for Bitdefender Mobile Security on Google Play. After locating the app, select it and tap ‘Install’ to download Bitdefender Mobile Security on Android.
3. Once the download completes, open the Bitdefender Mobile Security app. Check the box next to ‘I agree with the Subscription agreement’ and tap CONTINUE after you read and agree with the subscription terms.
4. Next, sign in to your Bitdefender Central account using your username and password.
5. Tap GET STARTED on the configuration screen.
6. To finish the installation and secure your browsers, you will need to turn on the Web Protection feature in Bitdefender Mobile Security. Tap ACTIVATE.
7. In the Accessibility screen, tap the Bitdefender Mobile Security app.
8. Then toggle ‘Use Bitdefender Mobile Security’ to the on position.
9. Choose ‘Allow’ to confirm the action. The Accessibility Service is required so Bitdefender can scan and block dangerous websites accessed in browsers.
10. Go back to the installation screen, and you’ll have the possibility to scan your Android device for malware. Tap SCAN NOW. If you wish to perform the scan later, choose SKIP.
11. Allow Bitdefender to scan different file types on the device.
12. Bitdefender will start scanning your apps. Wait until the scan is complete.
Bitdefender is now installed on your Android smartphone or tablet.
How to install Bitdefender on iOS
VIDEO
1. Open the App Store app on your iPhone or iPad.
App Store
2. Search for ‘Bitdefender Mobile Security’ on the App Store. After locating the app tap the cloud icon with an arrow pointing down to download Bitdefender Mobile Security for iOS.
3. Once the download completes open the Bitdefender Mobile Security app and tap ‘Get started’ on the welcome screen.
4. Check the small box and select ‘Continue’ after you read and agree with the Subscription Agreement.
5. Now, sign in to your Bitdefender Central account using your username and password.
6. To finish the installation and secure your browsers, you will need to turn on the Web Protection feature in Bitdefender Mobile Security. Access the ‘Web Protection’ icon at the bottom of the screen.
7. Tap ‘I Agree’ after you read and agree to the Web Protection privacy policy.
8. Next, tap ‘Allow’ when prompted to continue installing the web scan filter.
9. If an authentication method (fingerprint or PIN code) has been set to protect your device, you are required to use it. After a short wait, Web Protection will be enabled. In the picture below, we enter the iPhone passcode.
Bitdefender Mobile Security for iOS is now installed on your device.