This article guides you stepwise to set up a custom DNS server on your Bitdefender BOX at the network level. A DNS (Domain Name System) works like a phonebook for Internet-enabled devices. It lets you access websites and other online services by using domain names instead of IP addresses. Most users rely on ISP (Internet Service Provider) supplied DNS servers. Changing the DNS on Bitdefender BOX is perfectly legal, reversible, helps resolve queries on the local subnets and, unless your ISP has some hardwired limitations, it’s also a great way to circumvent geo-blocking.
To configure a custom DNS server on Bitdefender BOX, use the Bitdefender Central app as follows:
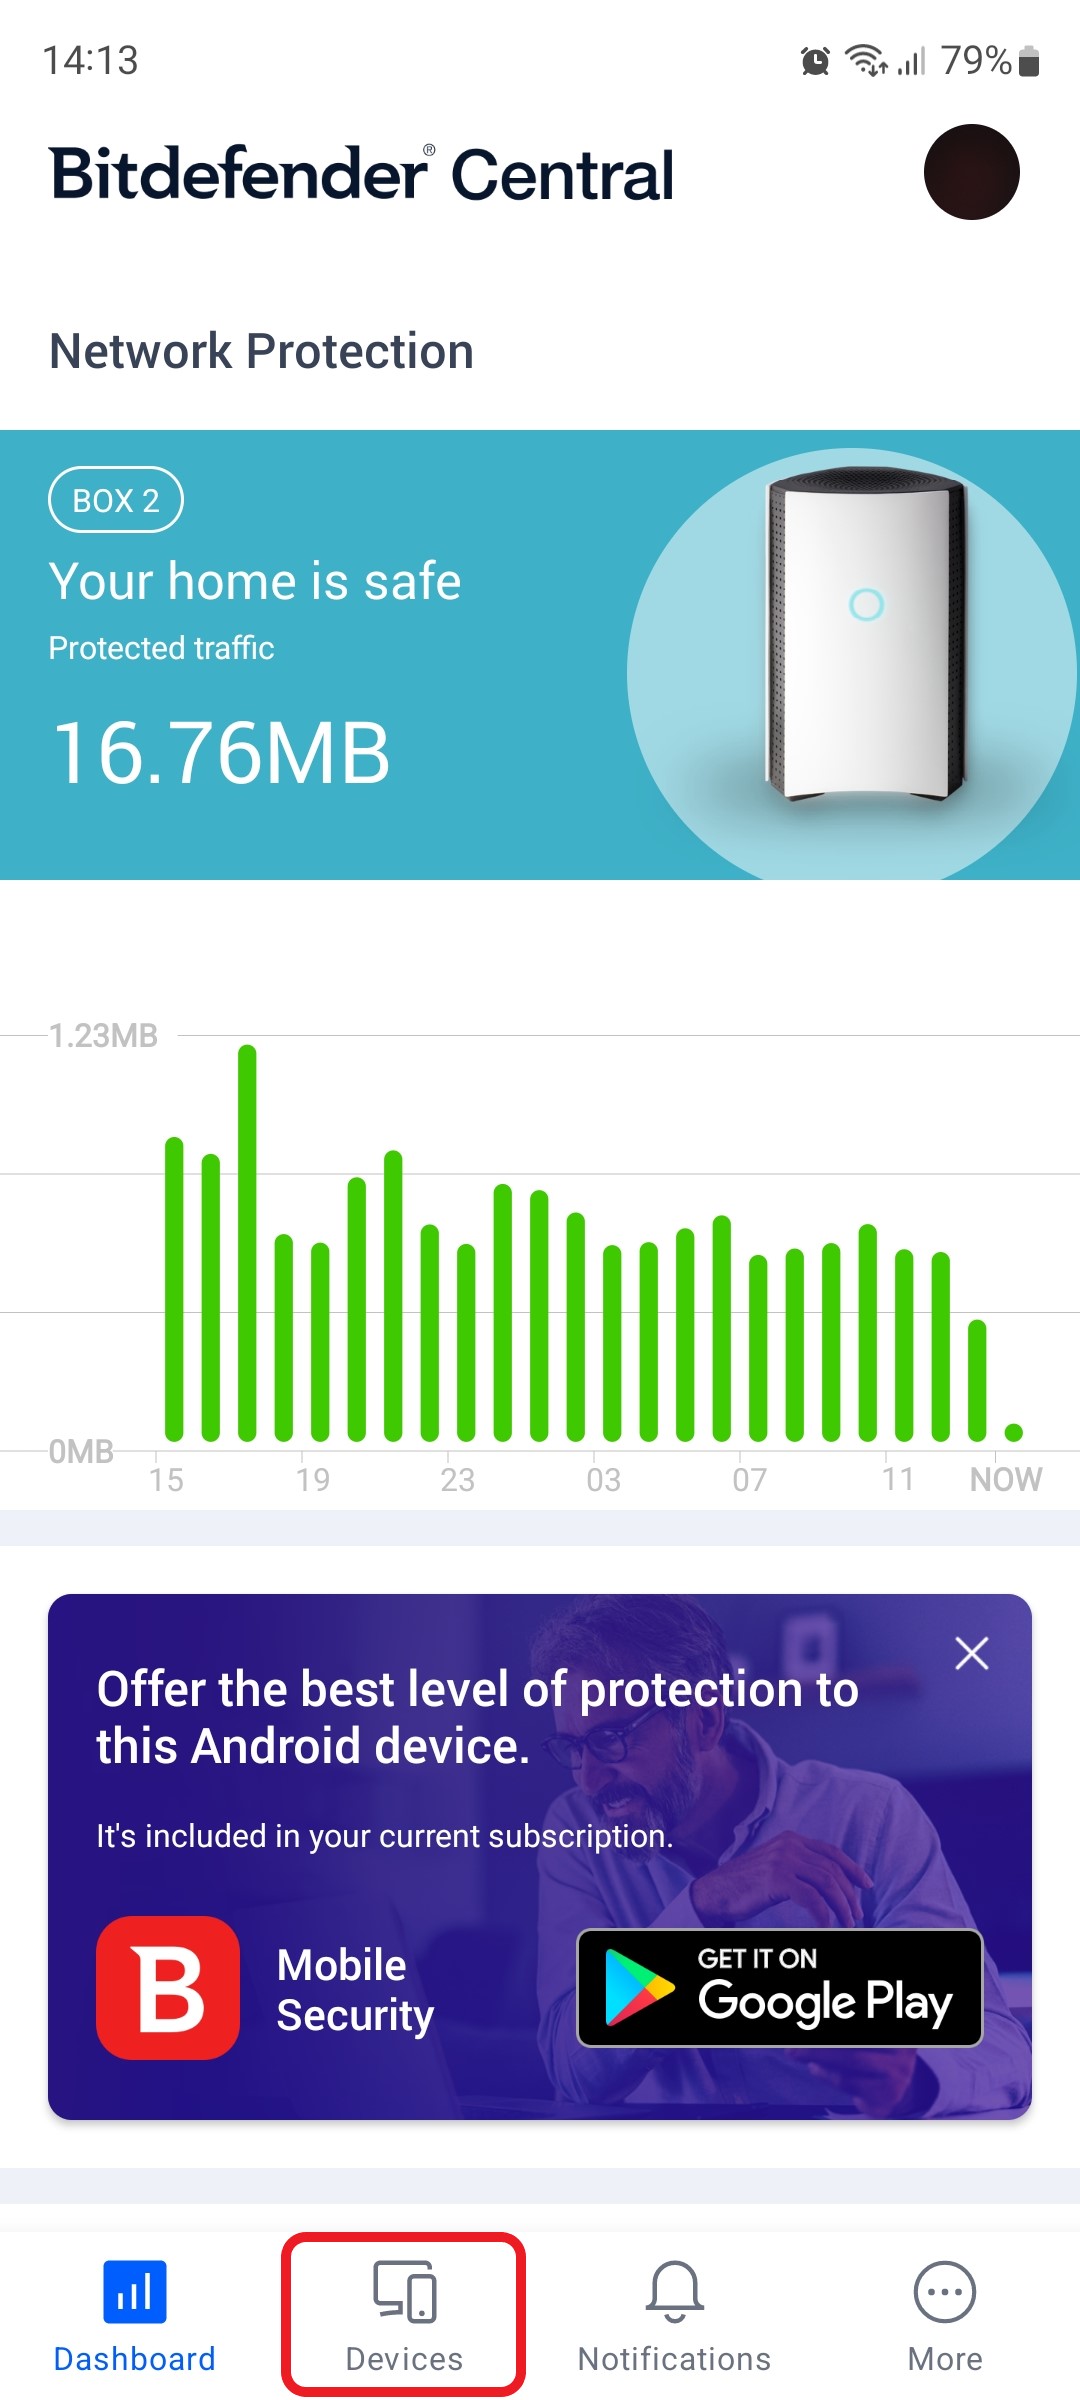
1. Open the Bitdefender Central app installed on your smartphone and go to the “Devices” icon at the bottom of the screen.
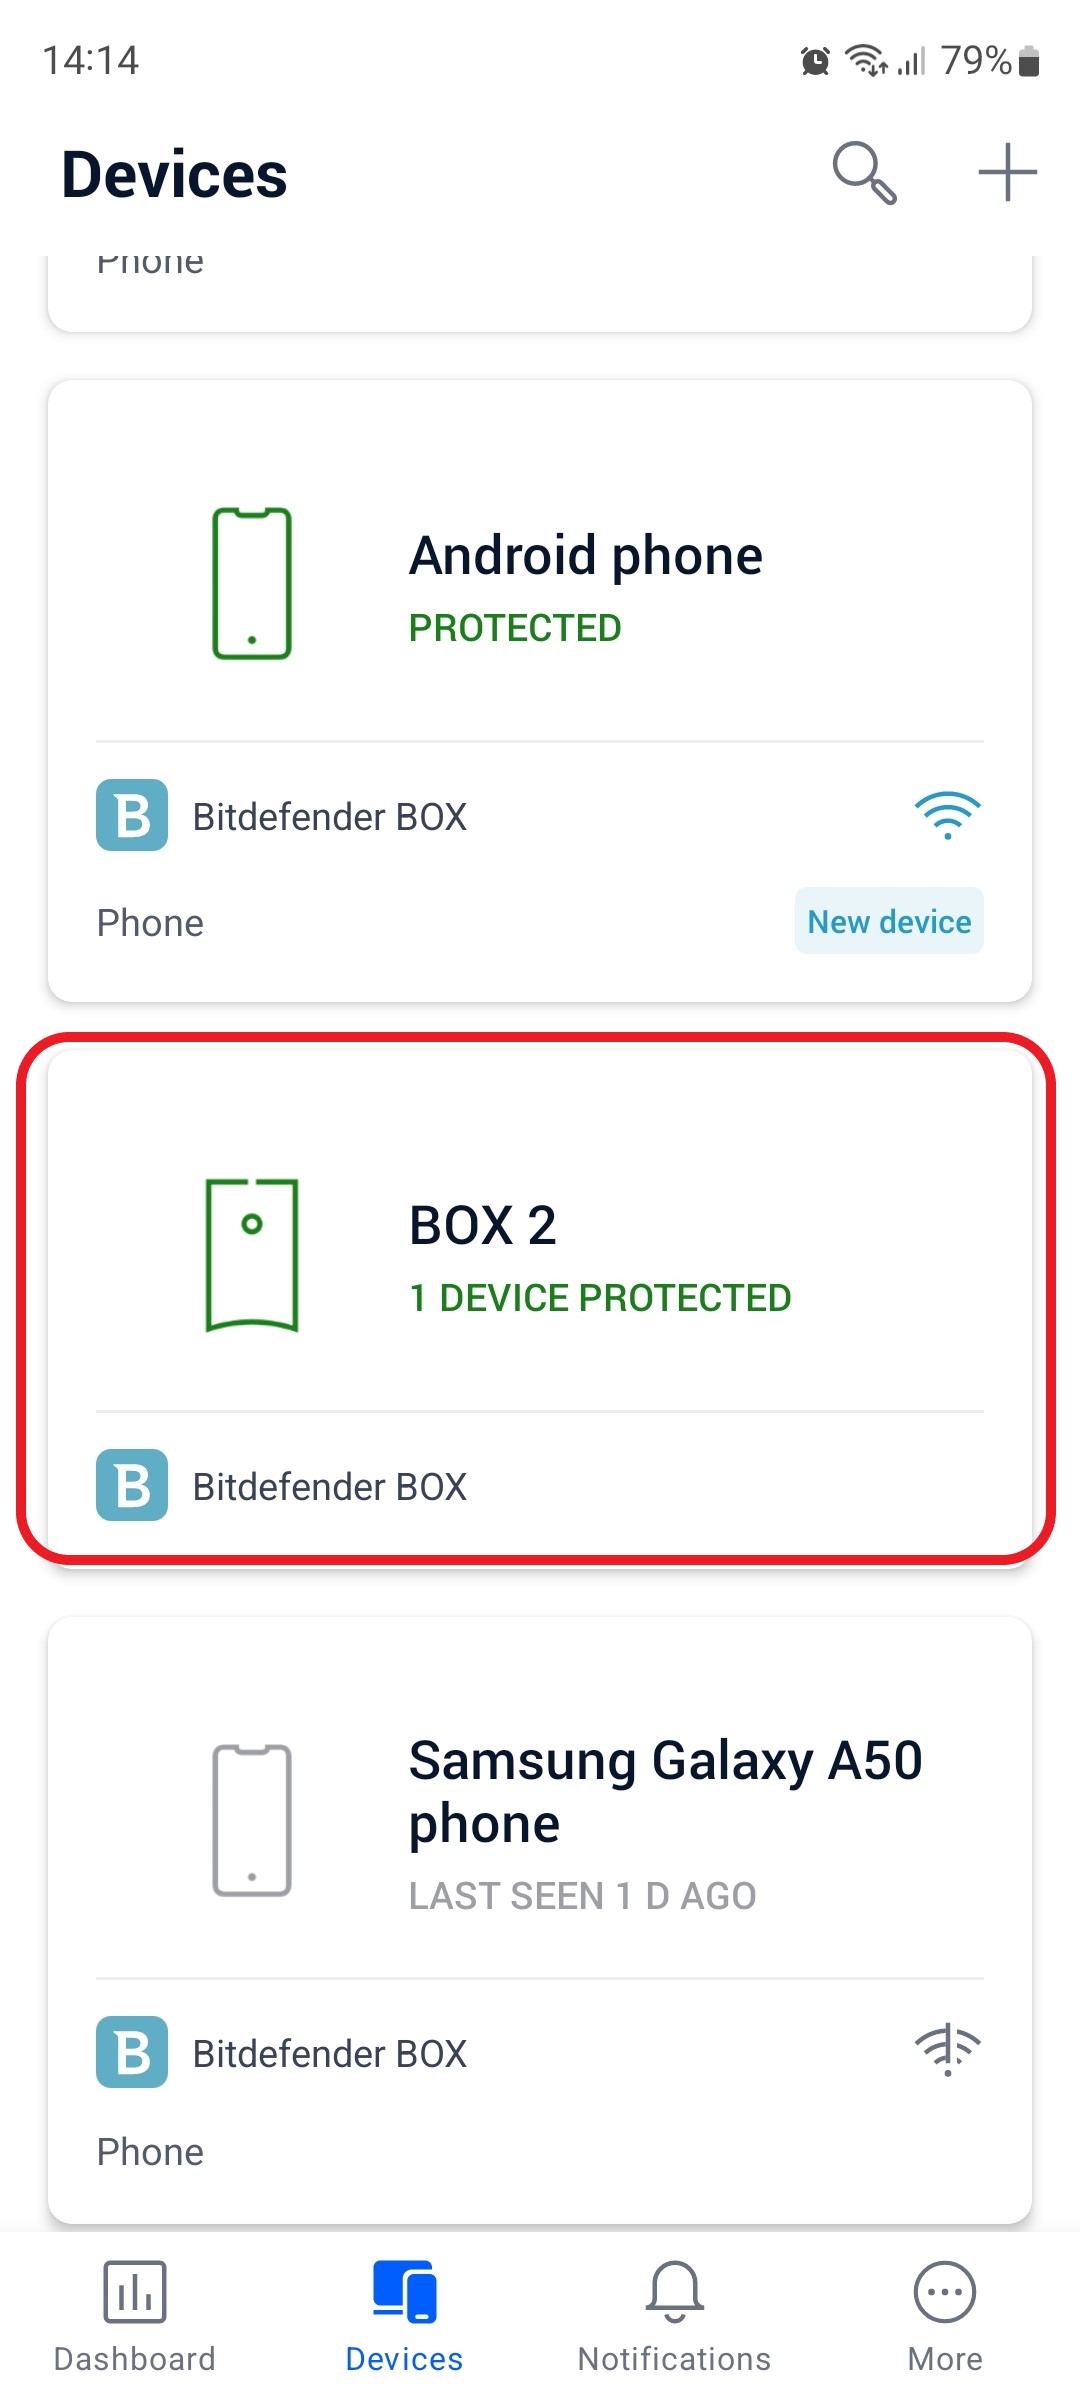
2. Next, select Bitdefender BOX in the list of devices.
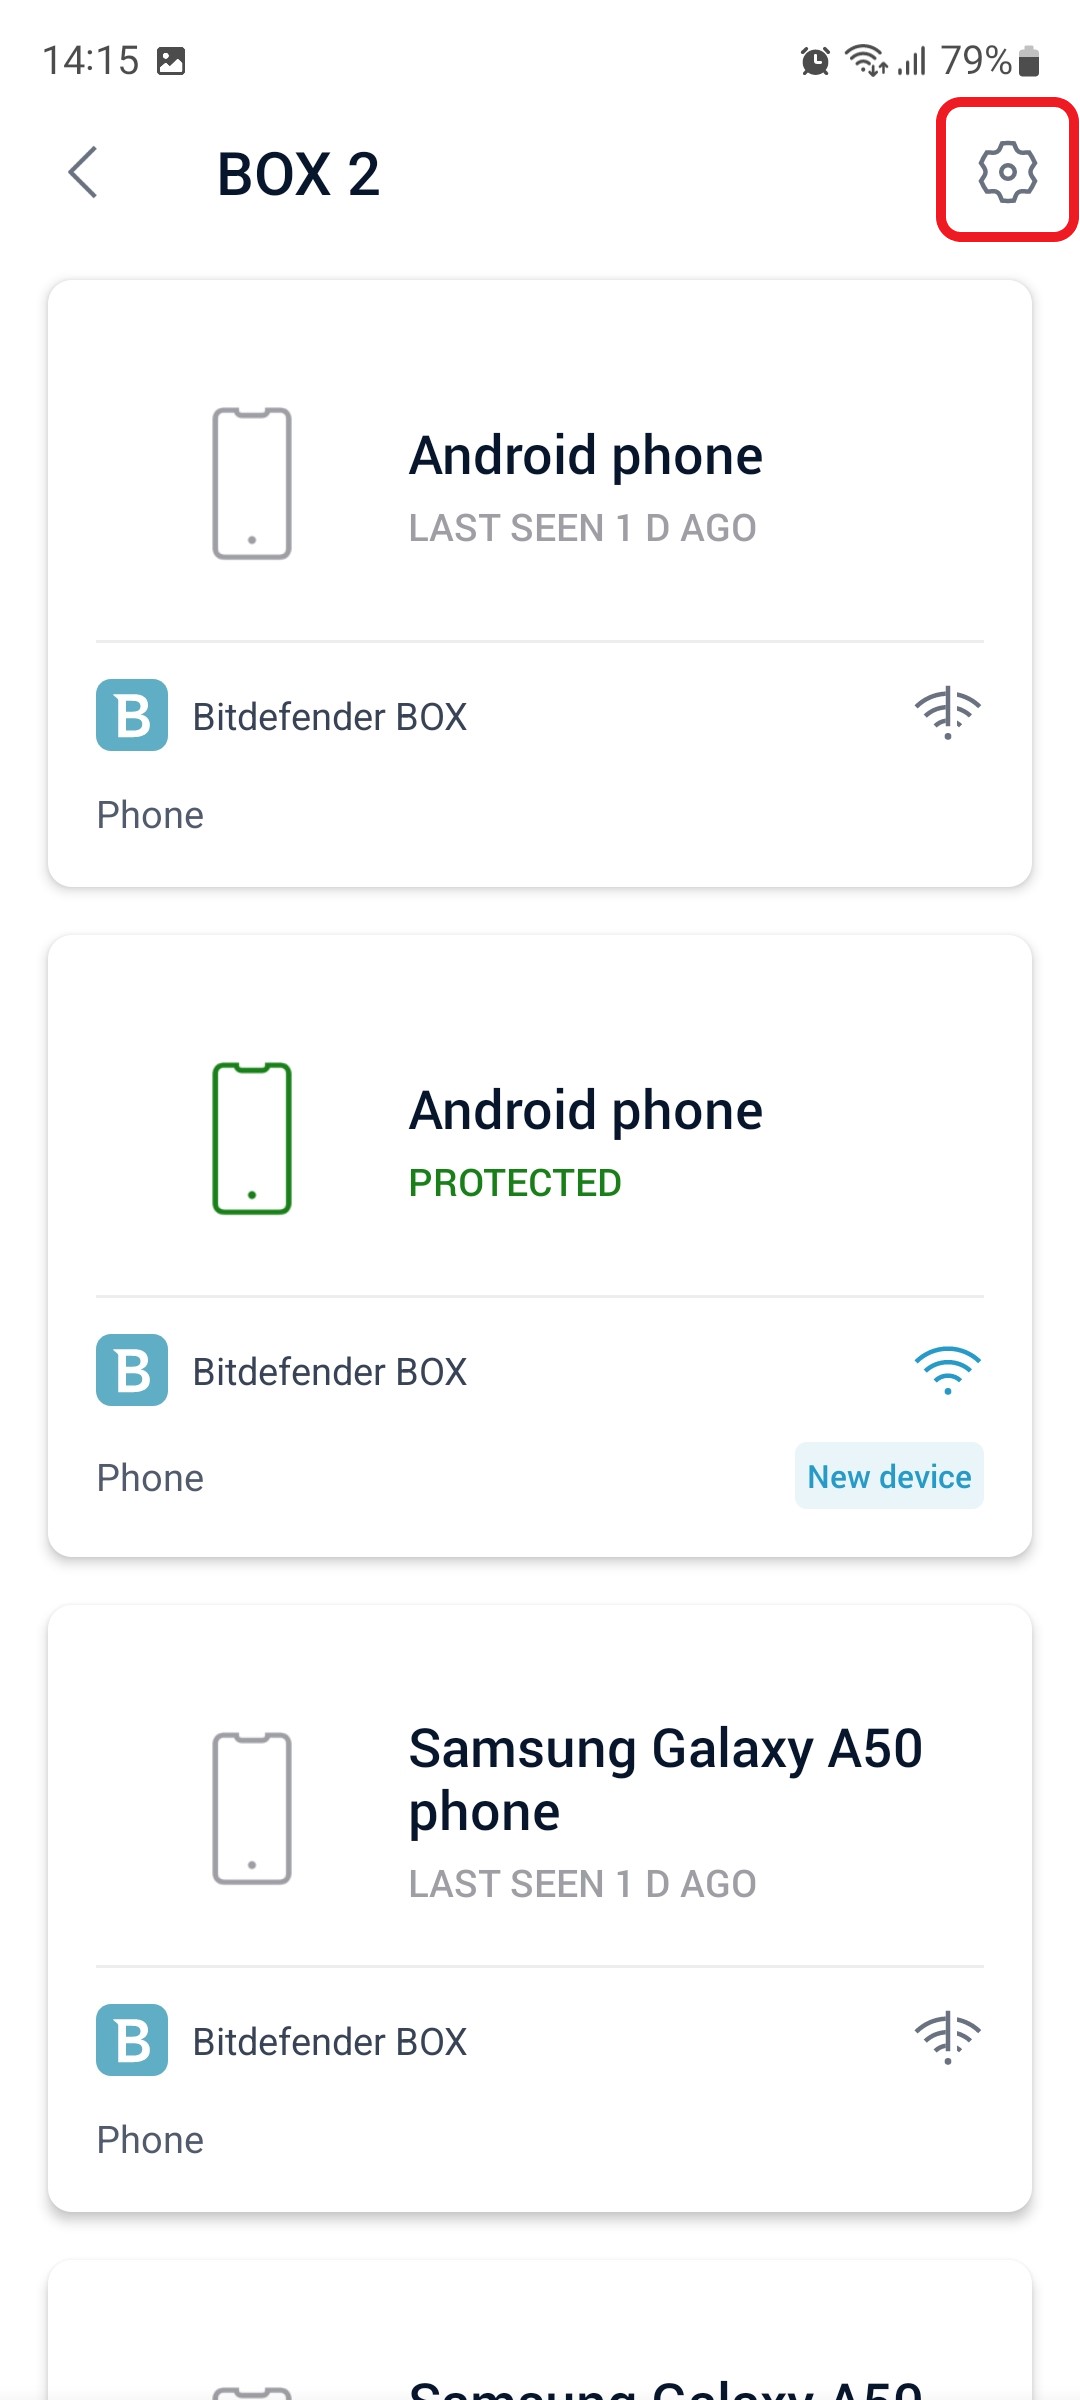
3. Then tap the small cogwheel in the top right corner to open the Bitdefender BOX settings.
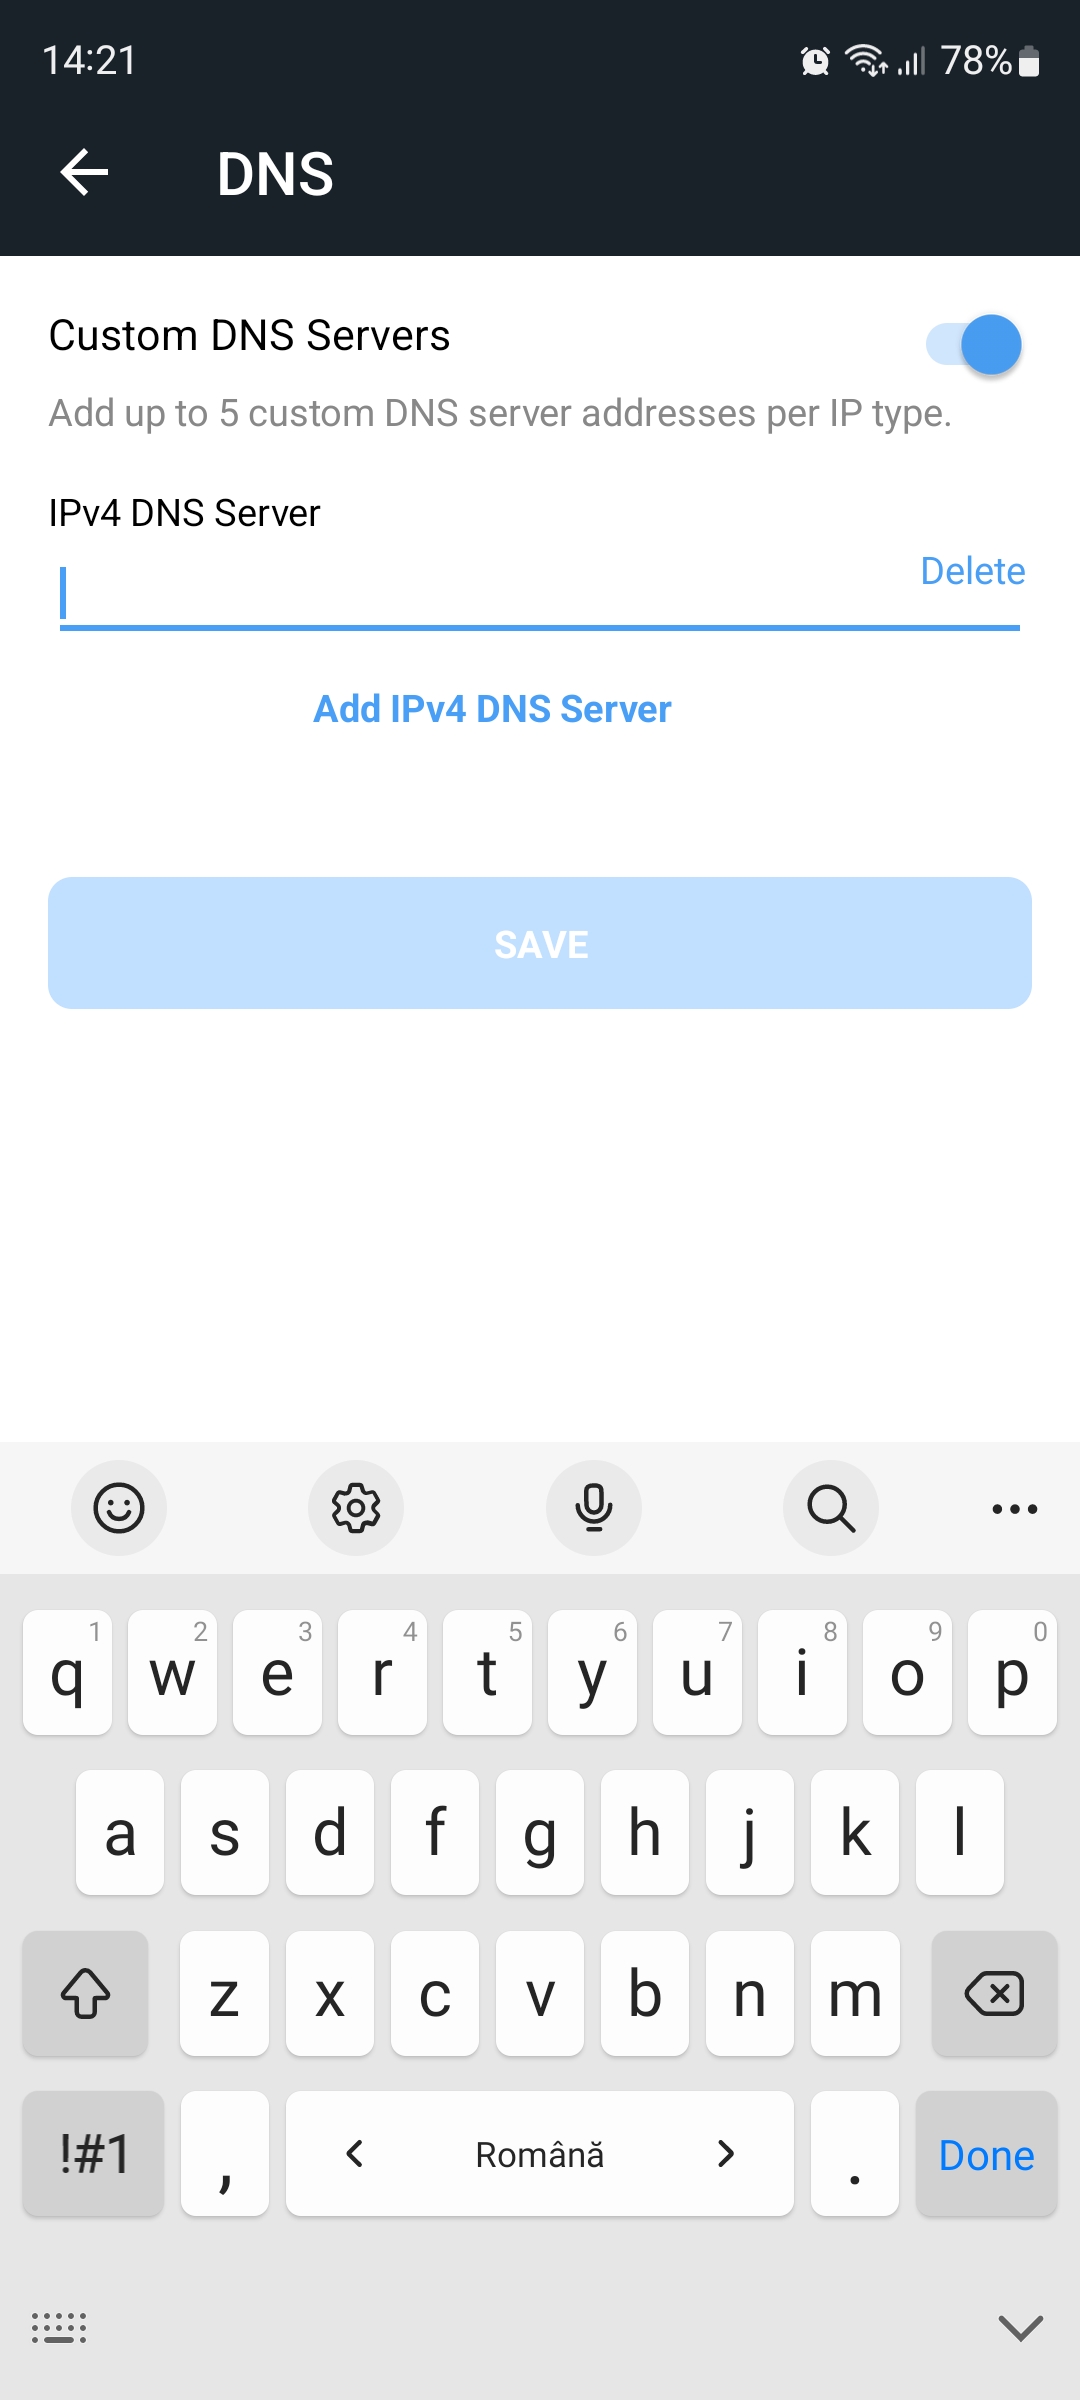
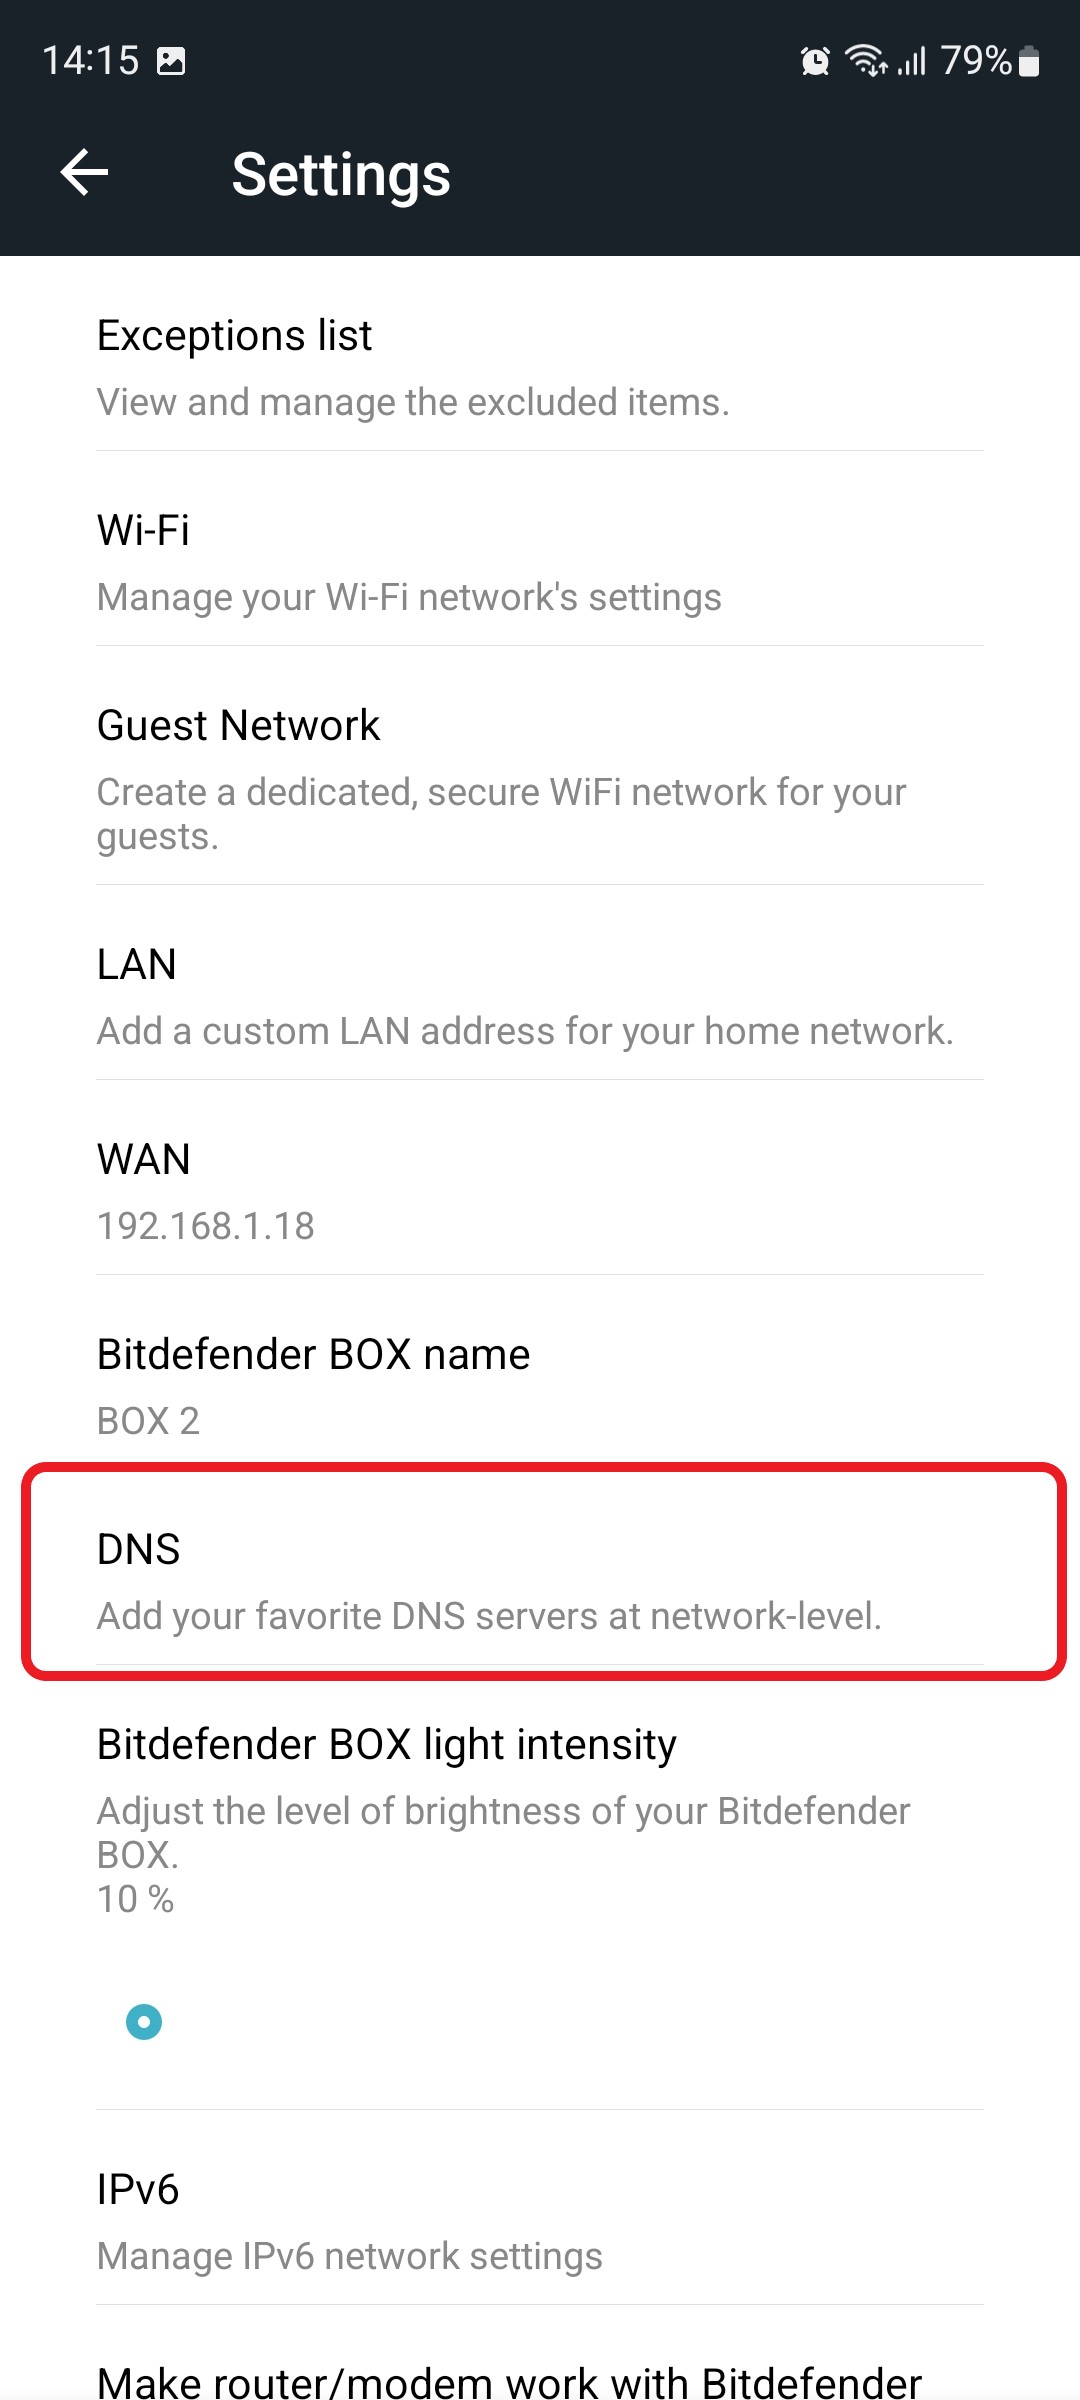
4. After opening the Settings menu, tap on the “DNS” option.
5. Toggle on the “Custom DNS Servers” option, then start typing the address of your preferred DNS server. Up to five custom DNS servers can be added.
Tap the SAVE button when you are done to apply the changes.