This tutorial explains how to grant full disk access for Bitdefender Antivirus for Mac in macOS Mojave, Catalina, Big Sur, Monterey, Ventura, Sonoma, Sequoia and Tahoe.
Overview
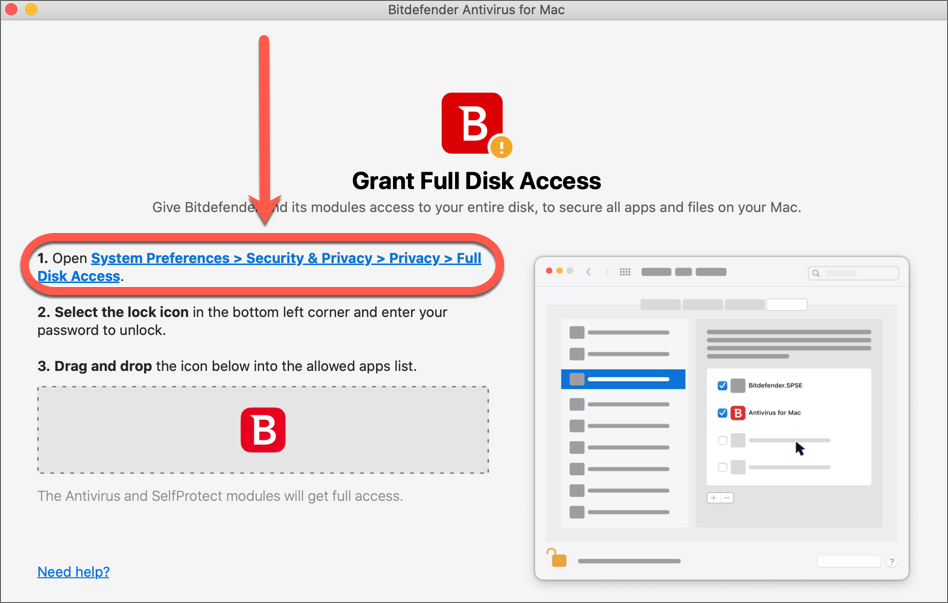
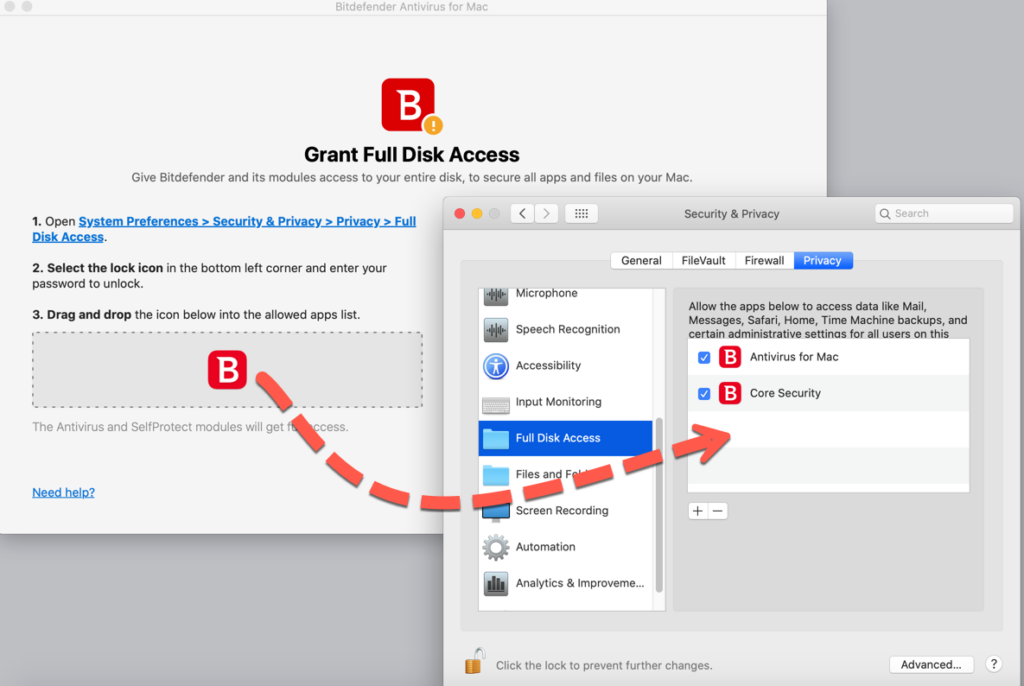
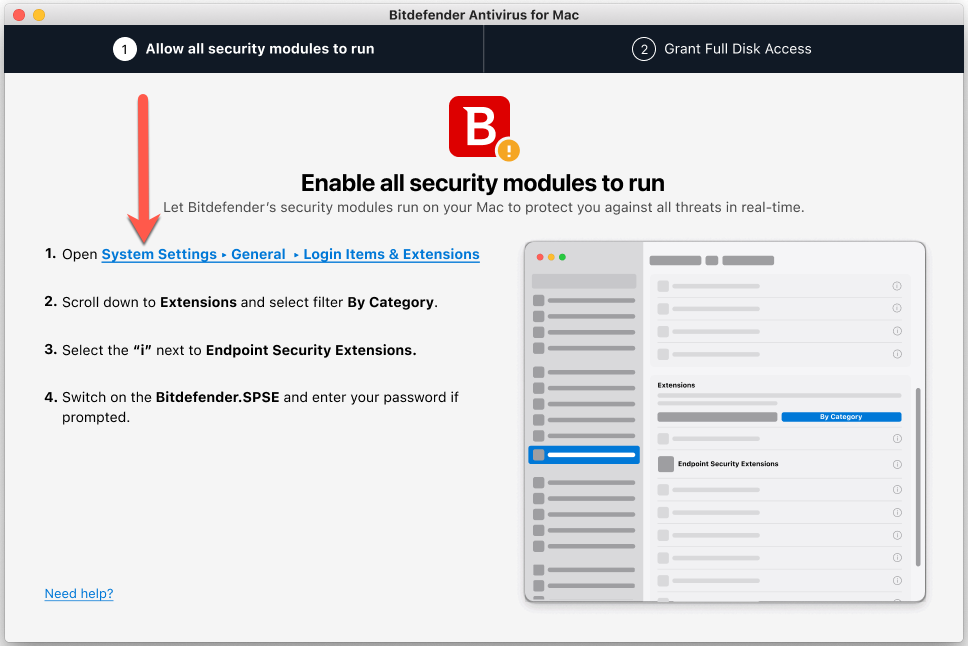
With the launch of macOS Mojave (10.14), Apple has implemented a series of changes that by default block applications’ access to specific system folders and resources such as Mail, Messages, Safari, Time Machine backups. In order for Bitdefender to scan protected such locations, the user must manually allow full disk access to the Bitdefender Antivirus for Mac application files. Otherwise, security features such as the antivirus shield and system scan won’t work and Bitdefender Antivirus for Mac will display a Grant Full Disk Access recommendation. To keep your Mac protected, allow Bitdefender full disk access. Following the instructions outlined below, depending on your macOS version – Find out which macOS your Mac is using.
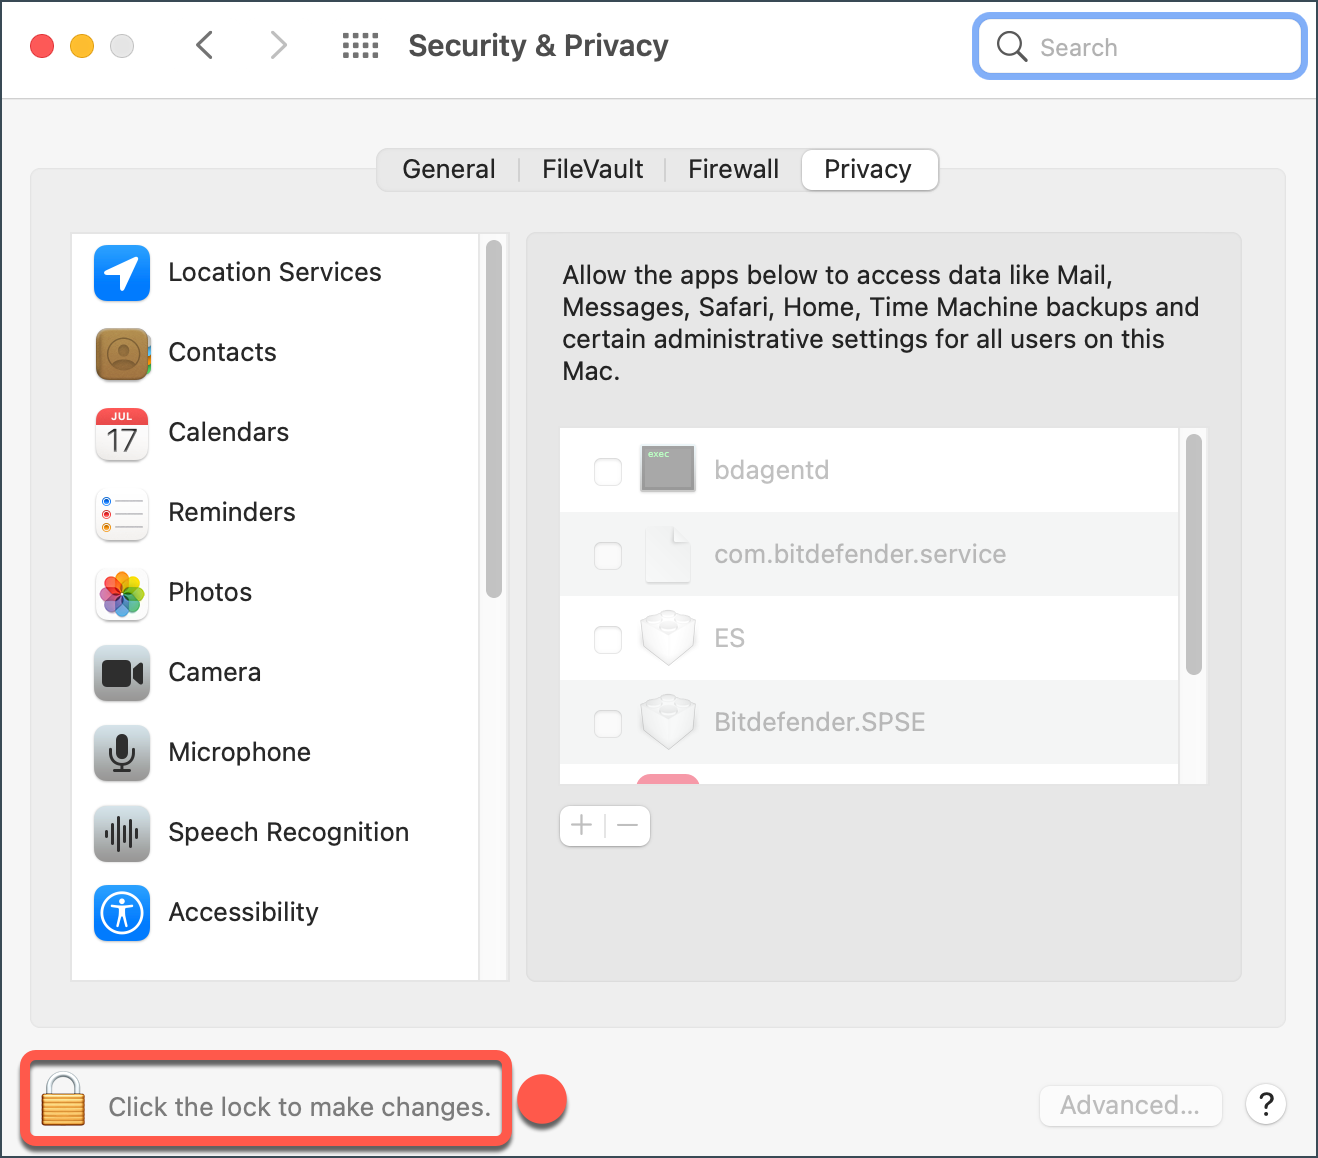
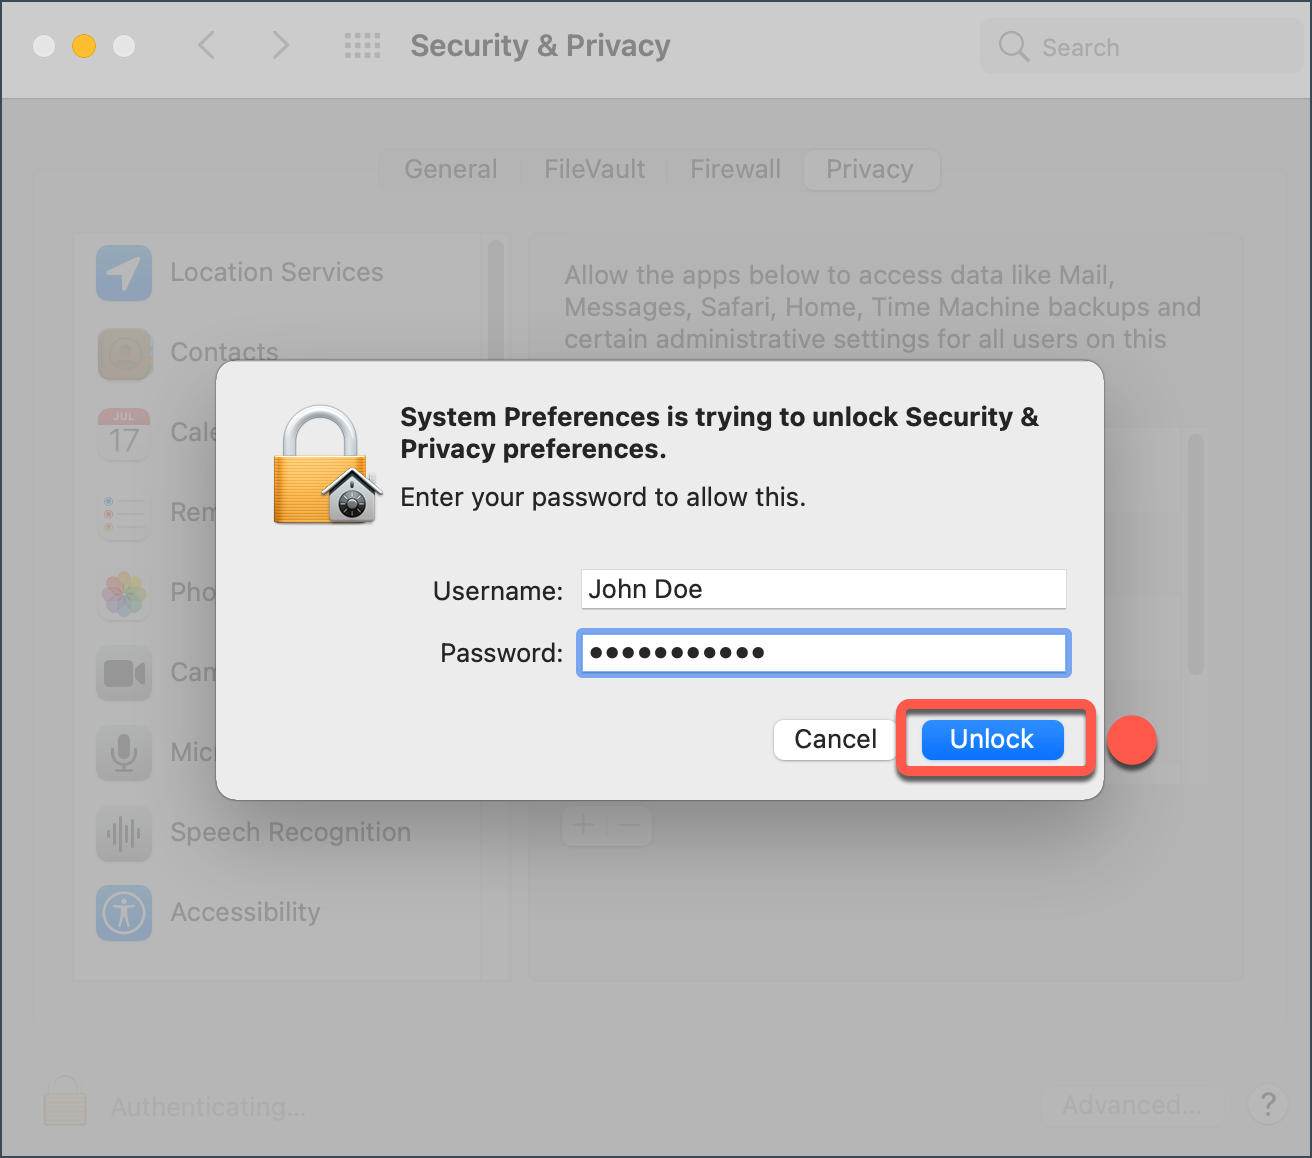
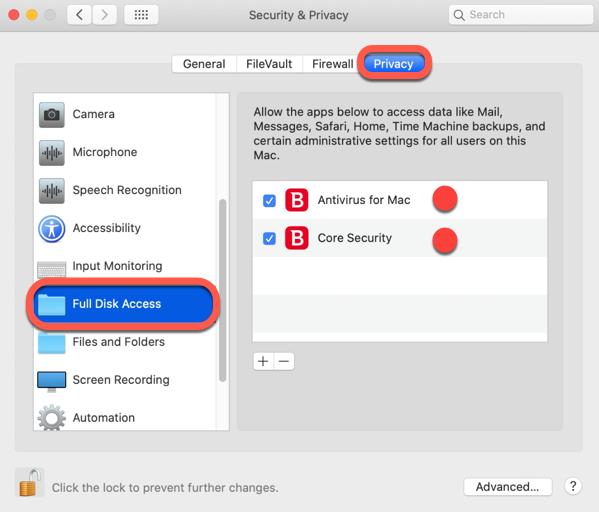
Grant full disk access on macOS Mojave, Catalina, Big Sur, Monterey
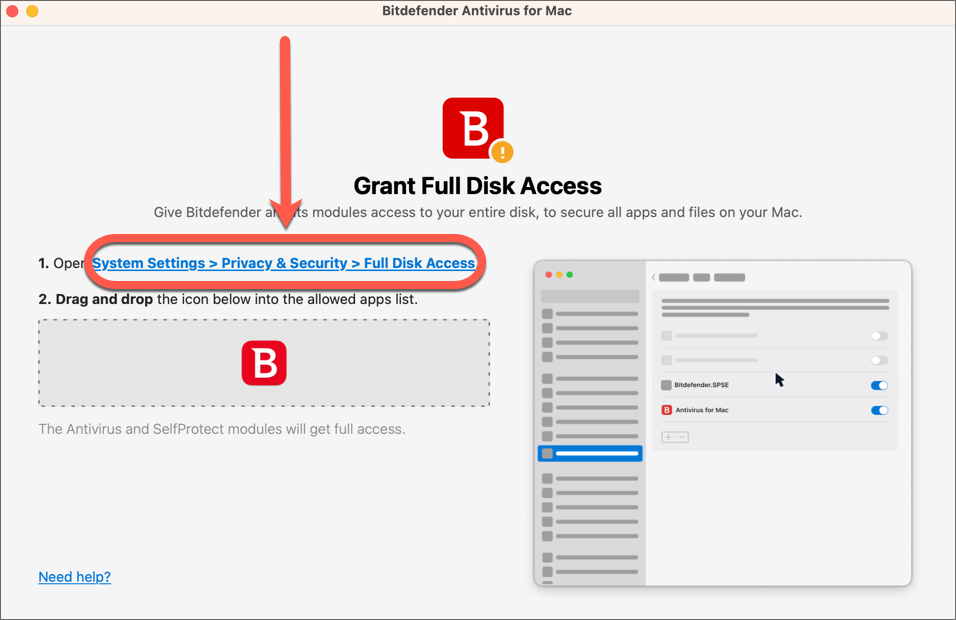
Grant full disk access on macOS Ventura, Sonoma
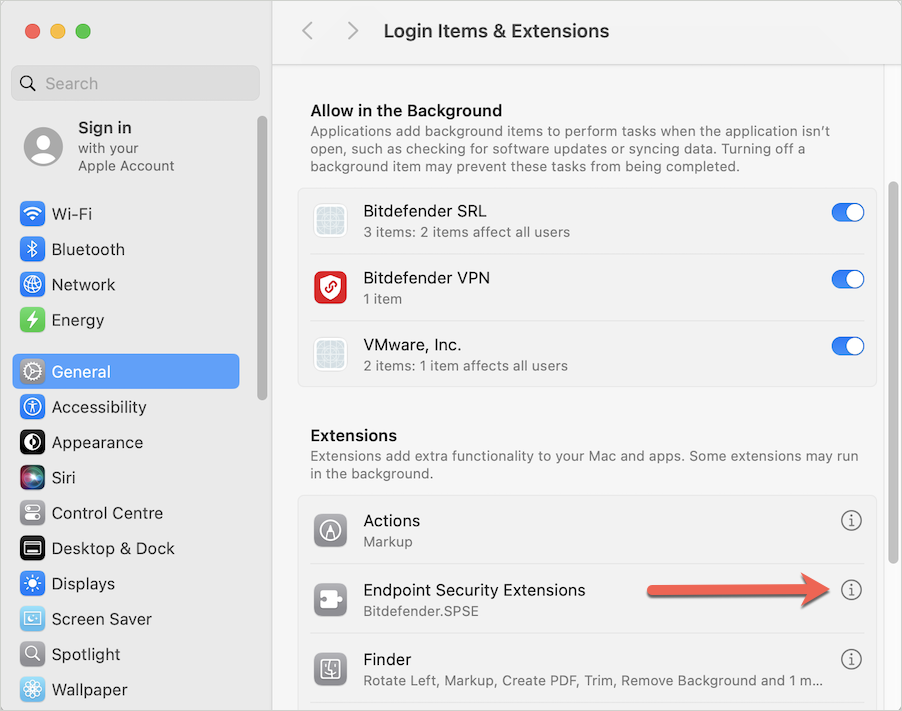
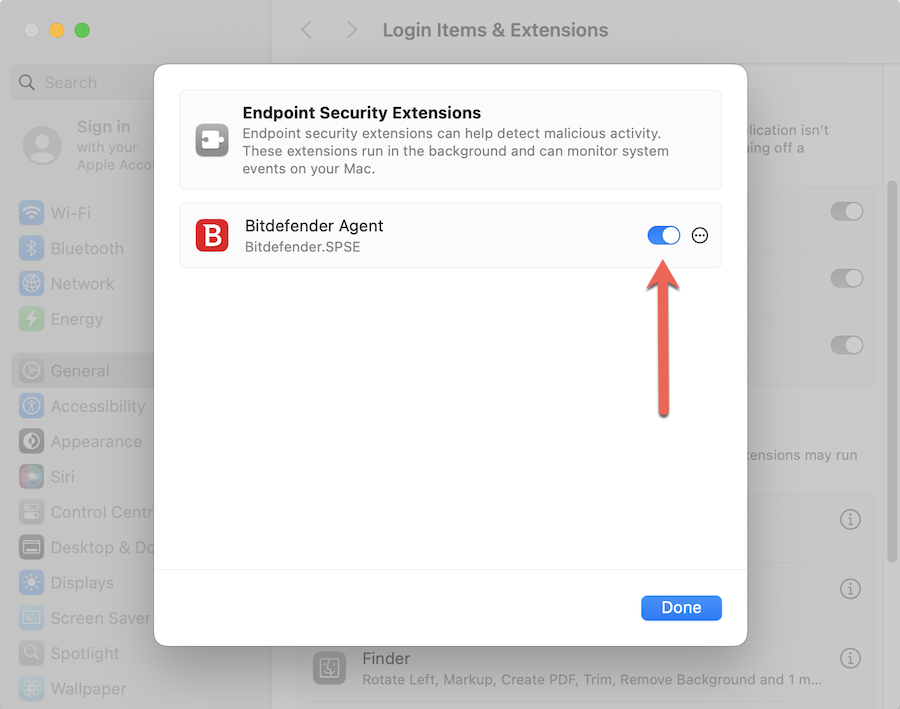
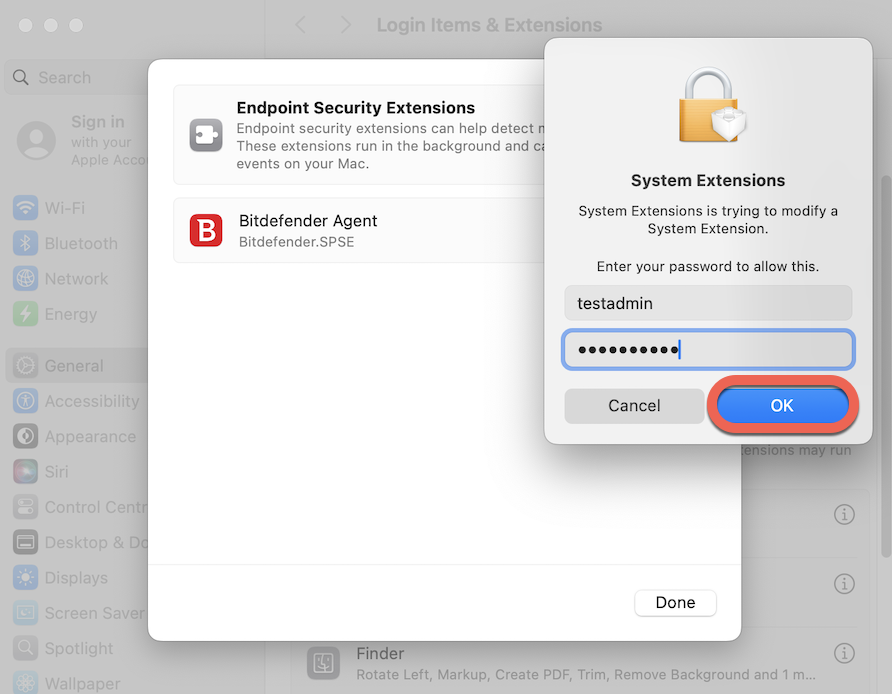
Grant full disk access on macOS Sequoia, Tahoe
Fix Bitdefender requests Full Disk Access at startup
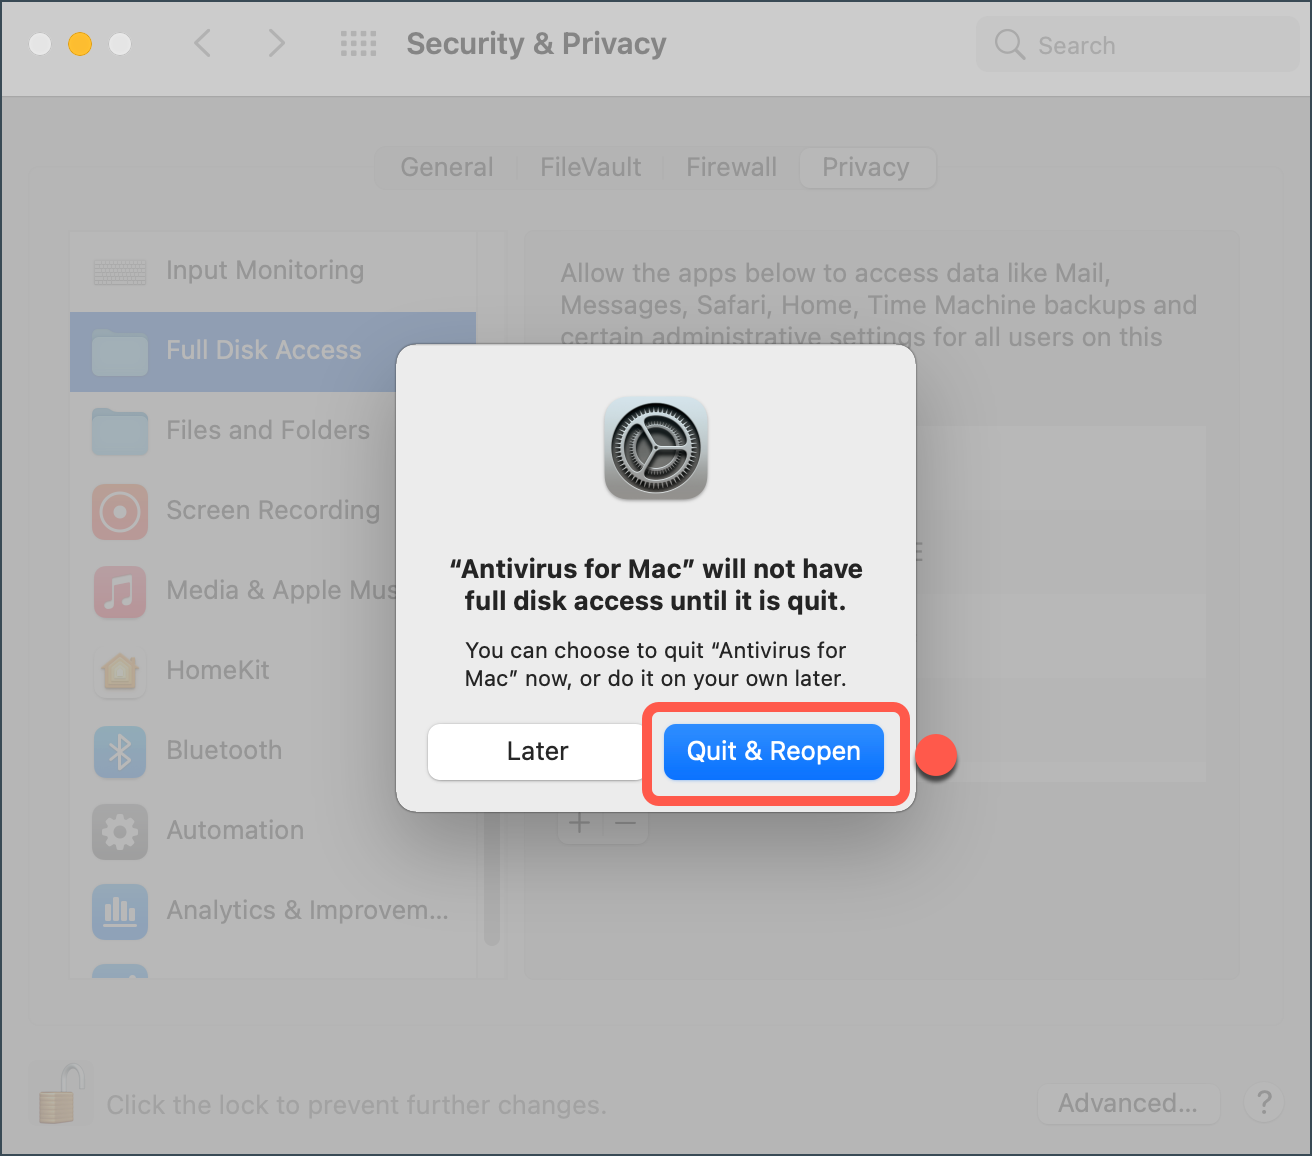
Due to a bug in macOS Ventura (13.0) that is yet to be fixed by Apple, all security solutions – including Bitdefender Antivirus for Mac – may lose their Full Disk Access after the upgrade, even though they still appear to have it in System Settings.
If you notice that Bitdefender keeps asking for Full Disk Access at startup, you can resolve the issue by removing and re-adding its entries in the Full Disk Access list. Follow the steps below only if you are experiencing this issue on your Mac:
Step 1
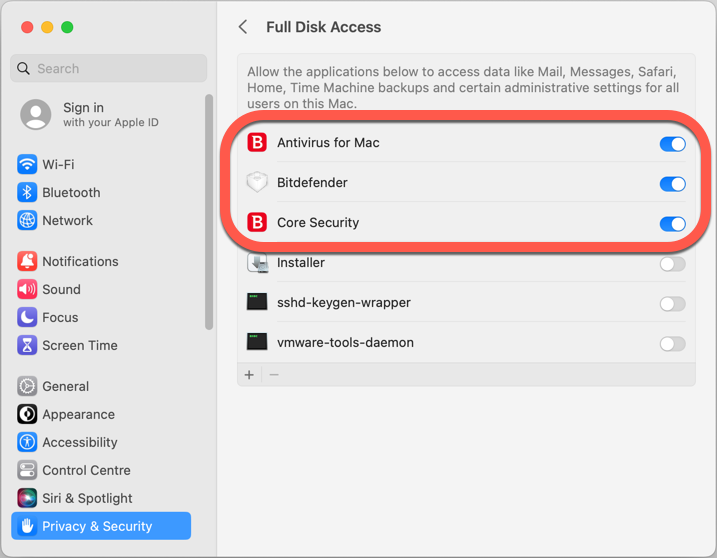
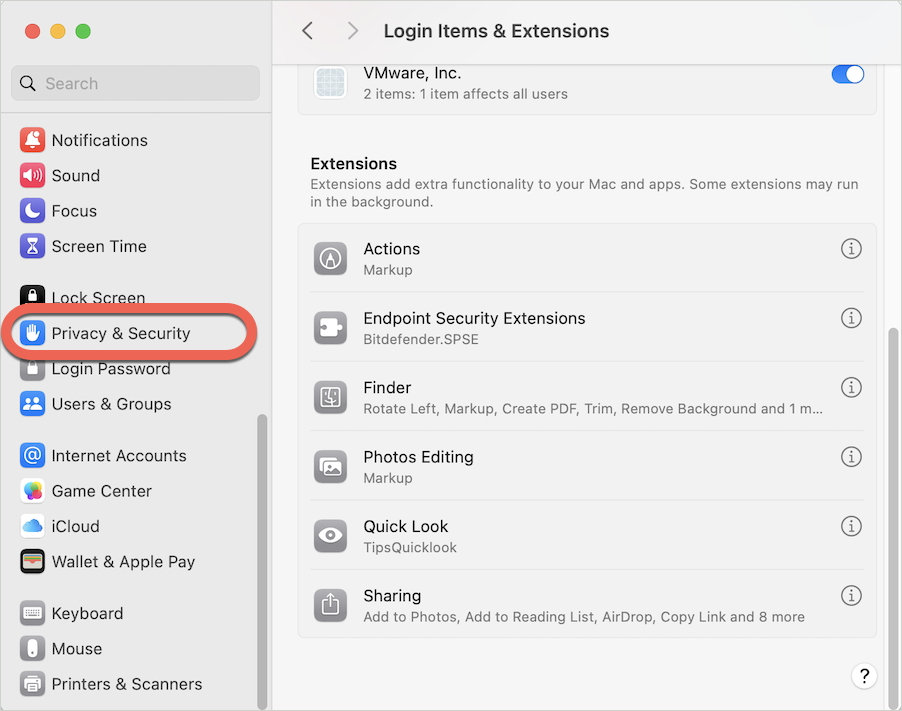
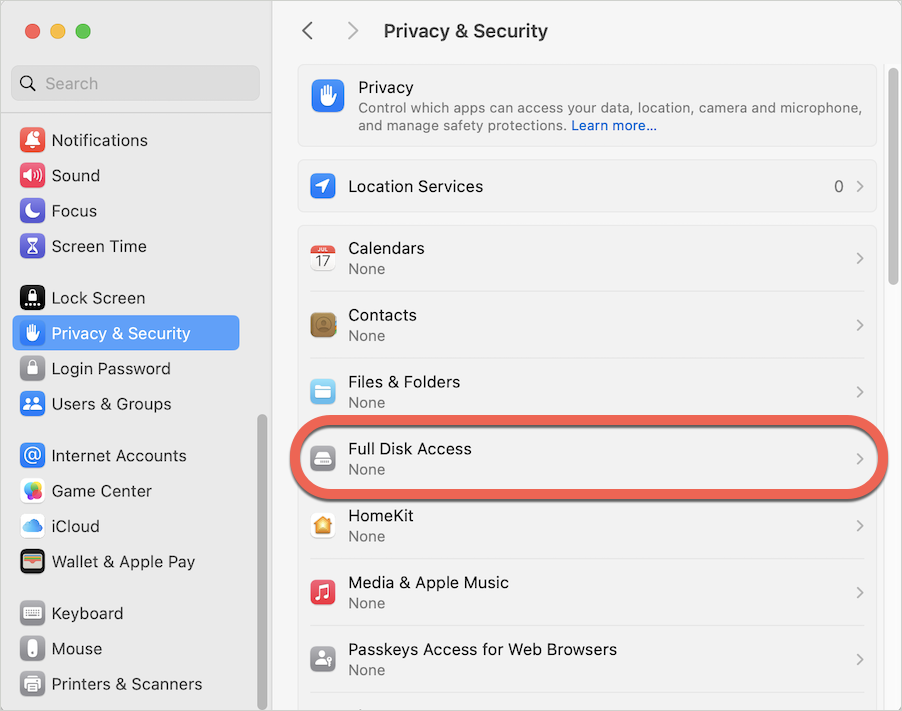
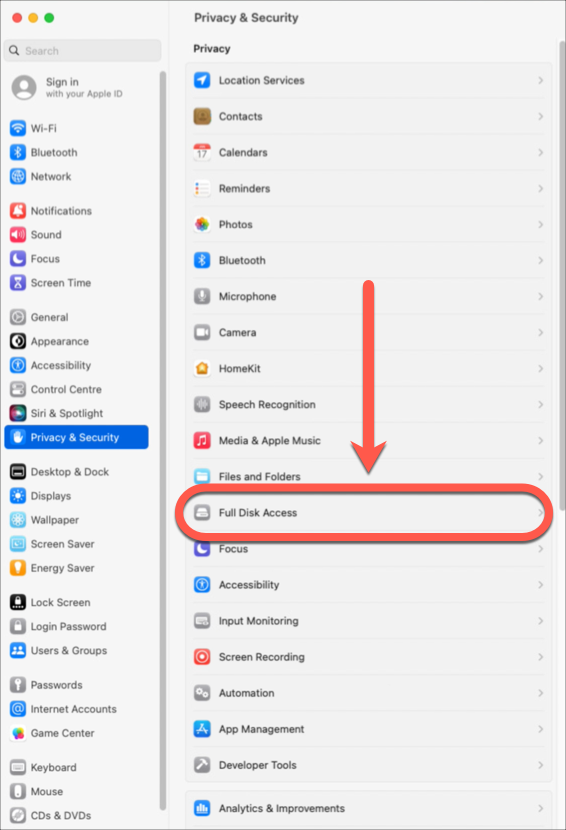
Click the System Settings  icon on your Dock, select Privacy & Security, then open the Full Disk Access section.
Step 2
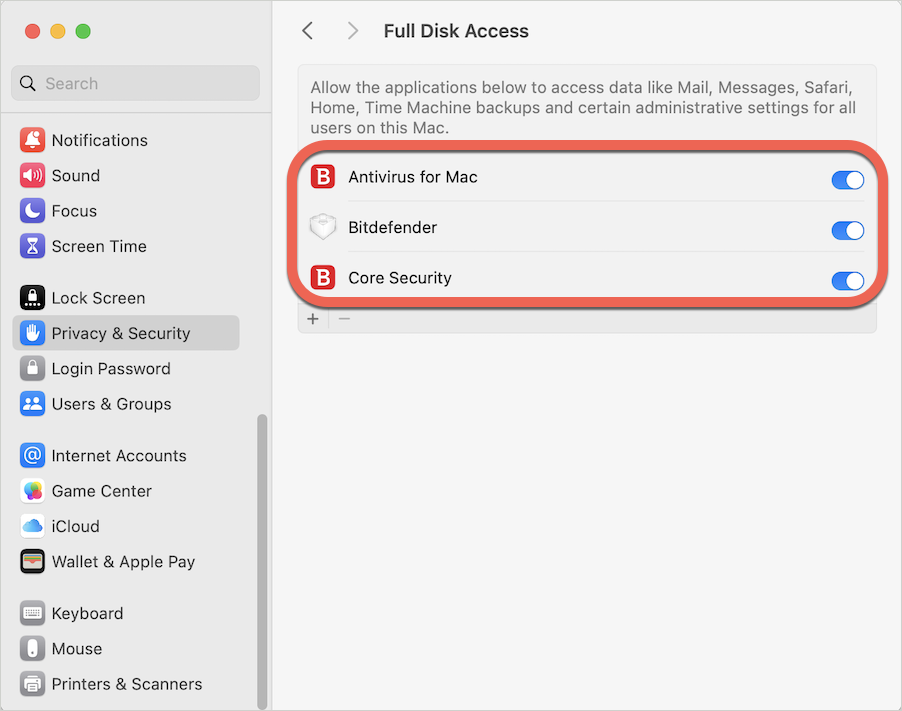
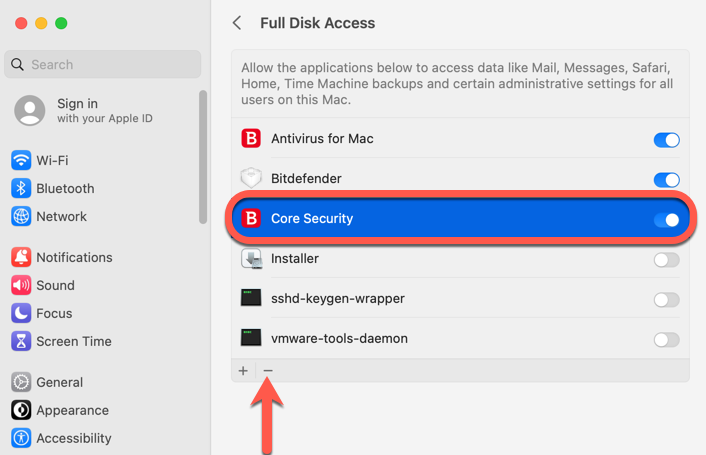
Select Core Security, then click the (−) minus sign at the bottom of the Full Disk Access list to remove this entry.
ⓘ Note: If Core Security does not appear in the list, skip to the next step.
Step 3
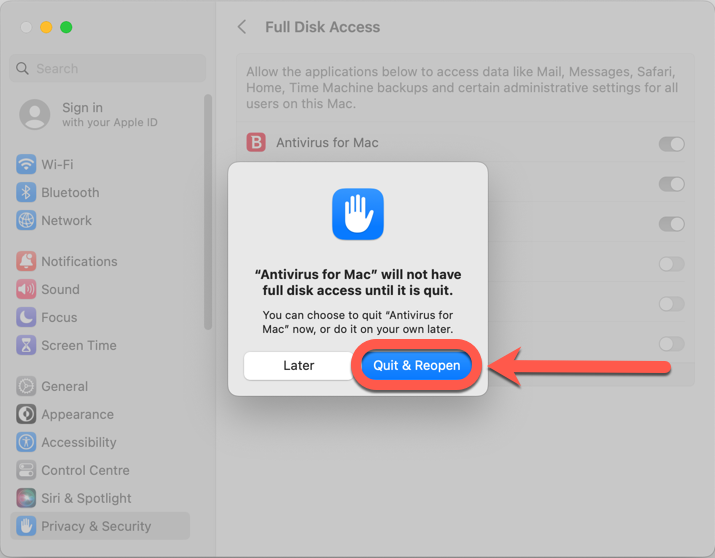
Select Bitdefender, then click the (−) minus sign at the bottom of the Full Disk Access list to remove this entry.
ⓘ Note: If you just toggle Bitdefender to the off position (gray switch) and then back to on (blue switch), the issue still occurs.

Step 4
After deleting Bitdefender from the list, drag & drop the ![]() icon from the instructions window to the Full Disk Access window, as shown below.
icon from the instructions window to the Full Disk Access window, as shown below.
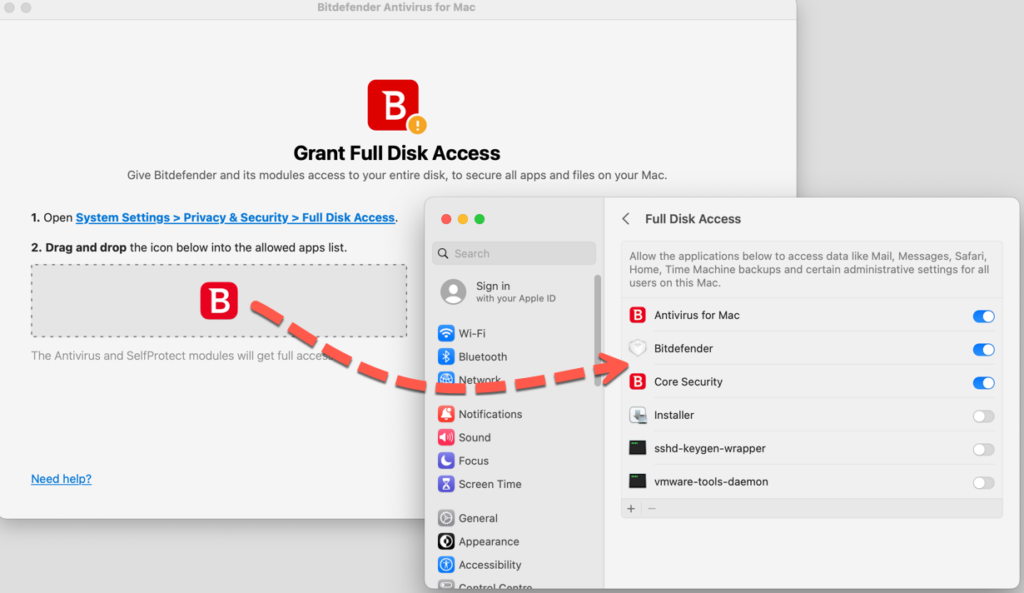
Alternatively, you can also:
- Press the (+) plus sign at the bottom of the Full Disk Access window.
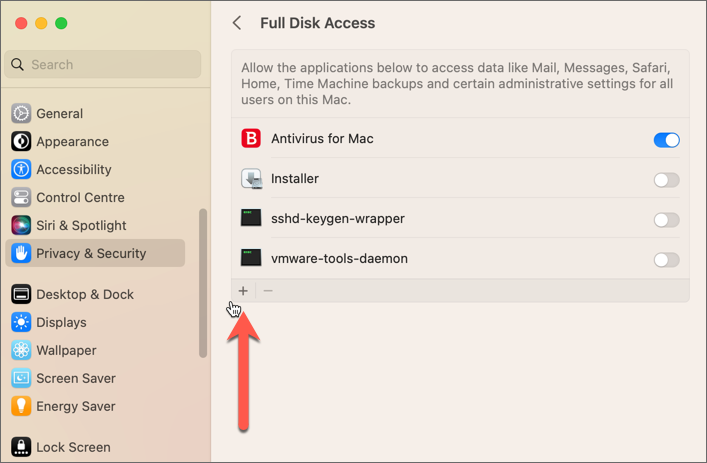
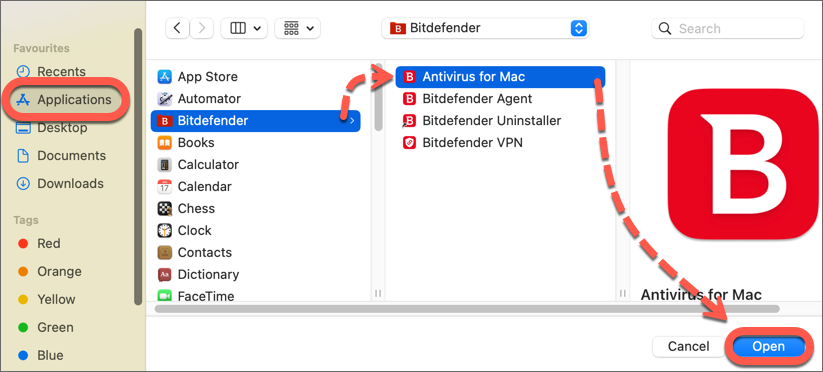
- Then click Applications in the sidebar of the Finder window, select Bitdefender, click on Antivirus for Mac and then press Open.
Step 5
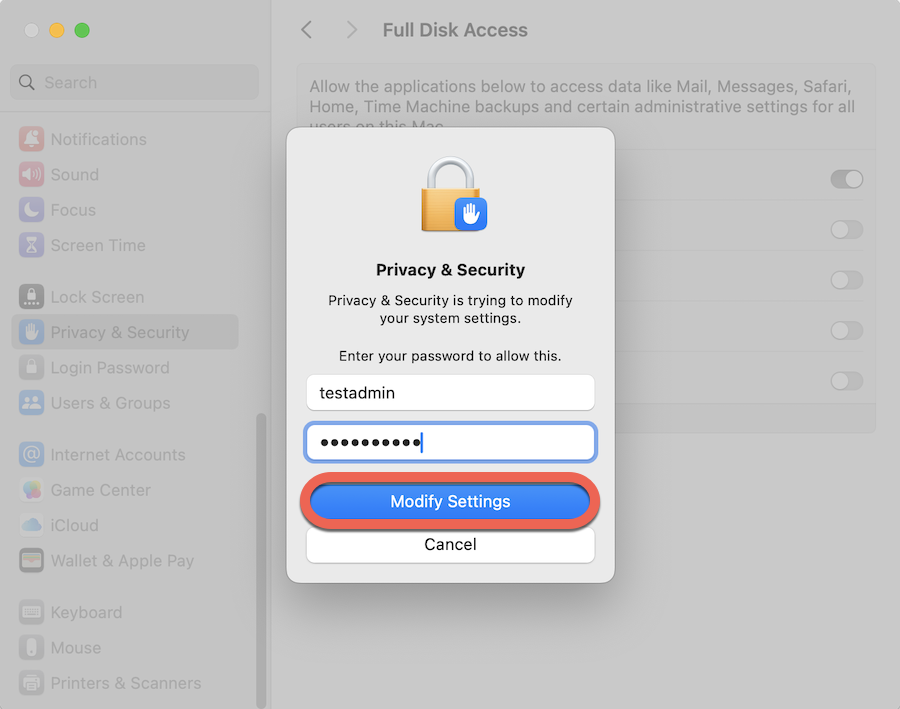
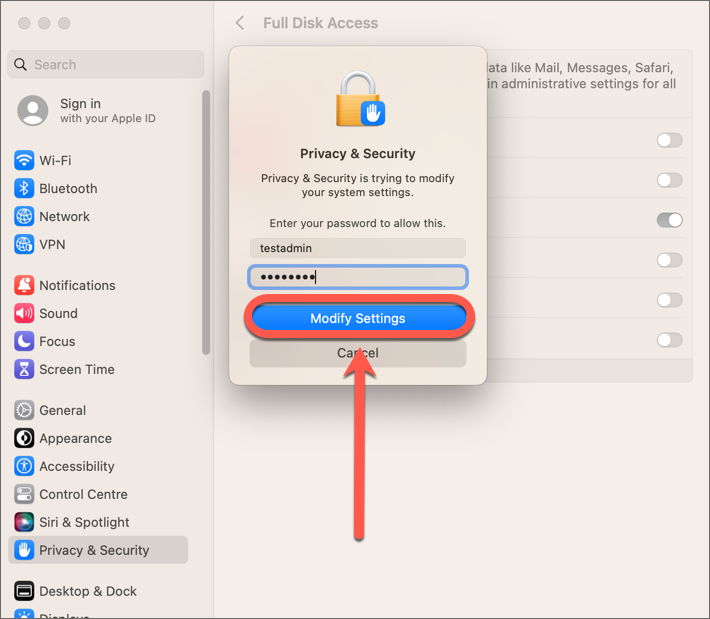
When prompted, input your macOS administrator name and password, then press the Modify Settings button.
After completing these steps, Bitdefender should be allowed and when you open the Antivirus for Mac interface it should no longer say “Grant Full Disk Access”.