This guide will show you how to download and install NETGEAR Armor by Bitdefender on macOS using your NETGEAR Armor account. Once the installation is complete, your product will be activated.
- System Requirements: macOS Ventura (13) or later
Video tutorial
- How to Install & Use NETGEAR Armor for macOS: Step-by-Step Guide
1. Open a web browser and visit https://armor.netgear.com/
2. Sign in with the NETGEAR account you used to activate NETGEAR Armor on your router.
3. Click Allow to give Bitdefender access to your profile information (needed for NETGEAR Armor).
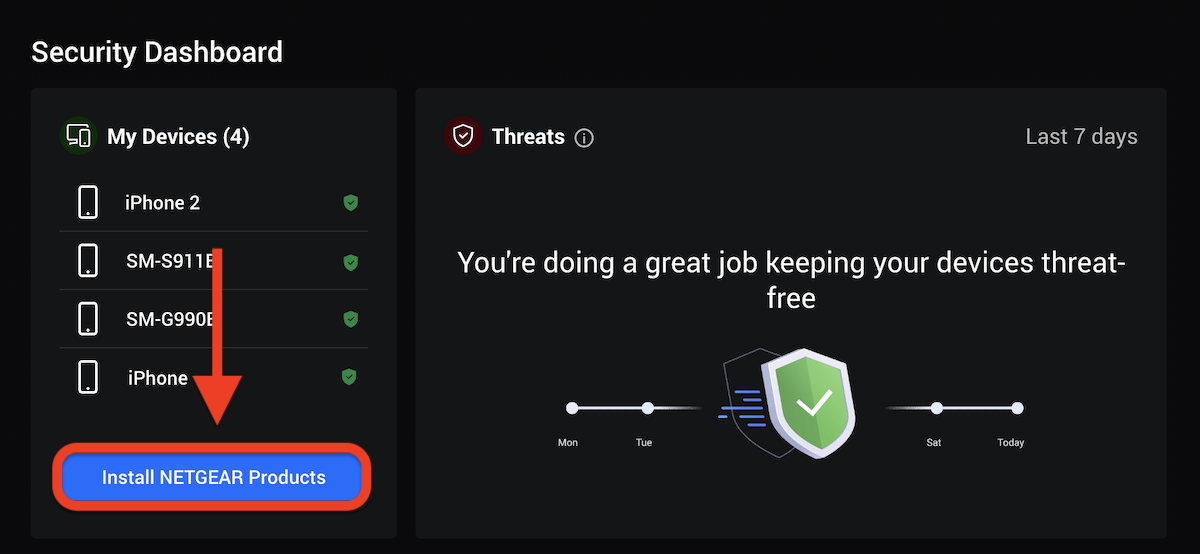
4. Once you enter the NETGEAR Armor portal, click the Install NETGEAR Products button.
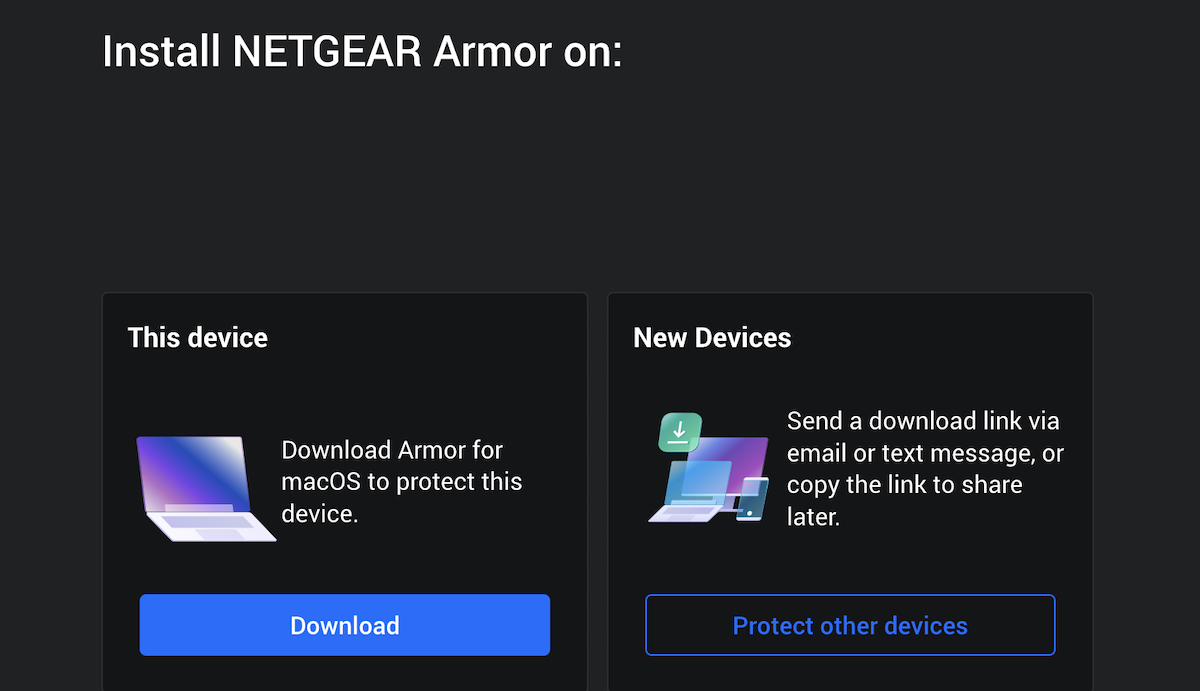
5. Choose to install the Security product.

6. Choose how you’d like to install:
- Download – Install directly on the current device.
- Protect other devices – Send a download link valid for 24h to the other device via email, QR code, or direct link.
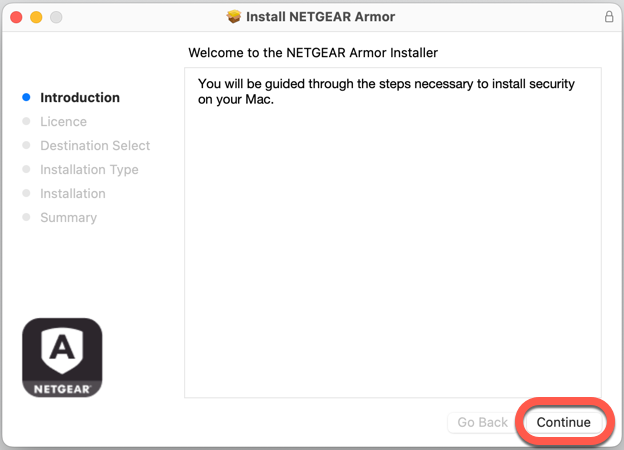
7. On the Mac you want to protect, double-click the downloaded file to start the installation.
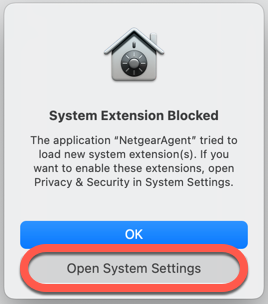
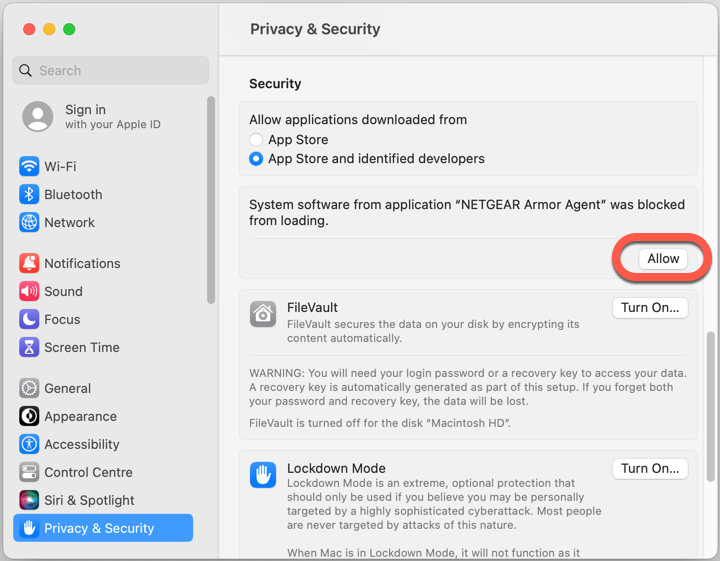
8. Follow the on-screen steps to install NETGEAR Armor on macOS. Click Allow if prompted, then Continue.
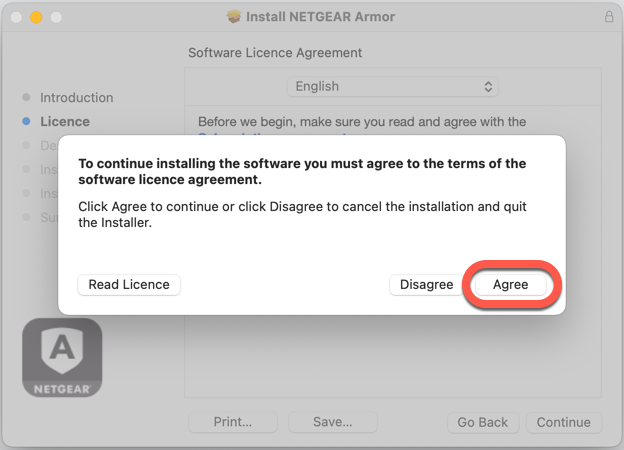
9. In order to continue the installation, you will have to agree to the terms of the software Subscription Agreement.
10. Click on Continue. After that, select Install.

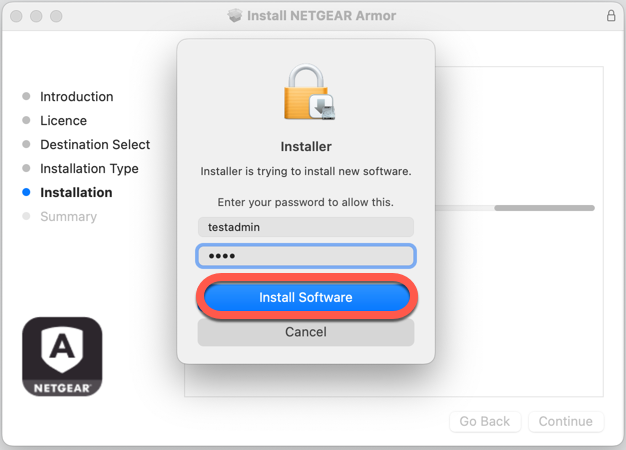
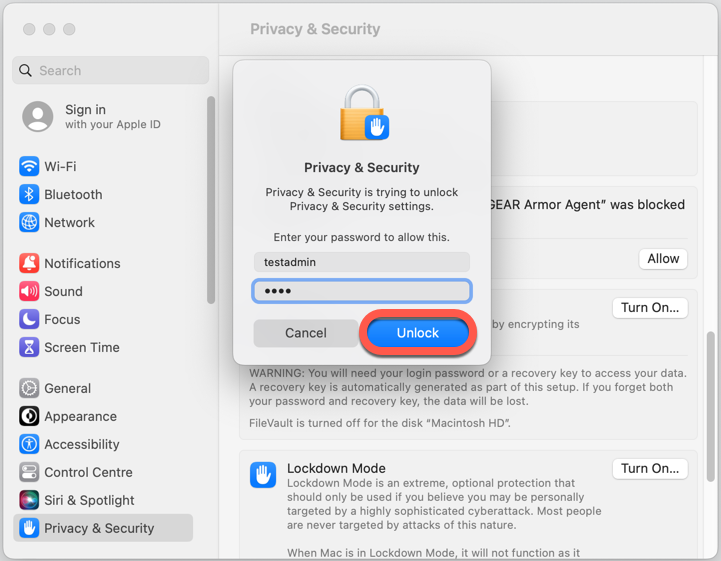
11. When prompted, input your administrator name and password, then press the Install Software button.
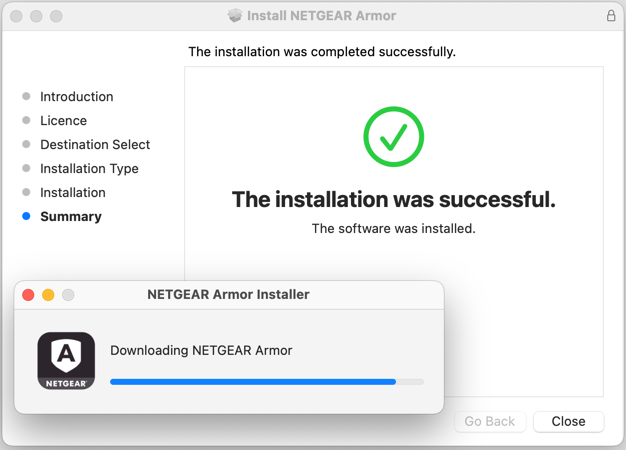
12. A small window will appear, and NETGEAR Armor will automatically download and install on your Mac.
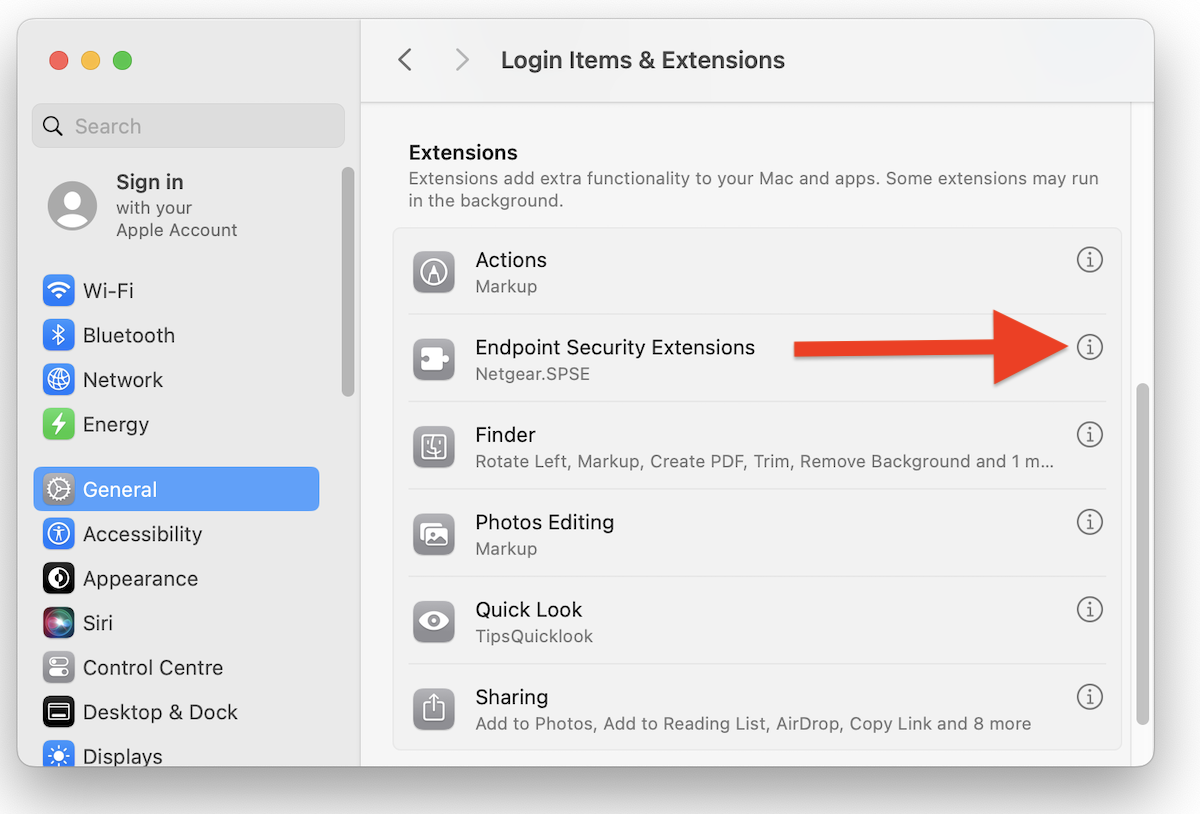
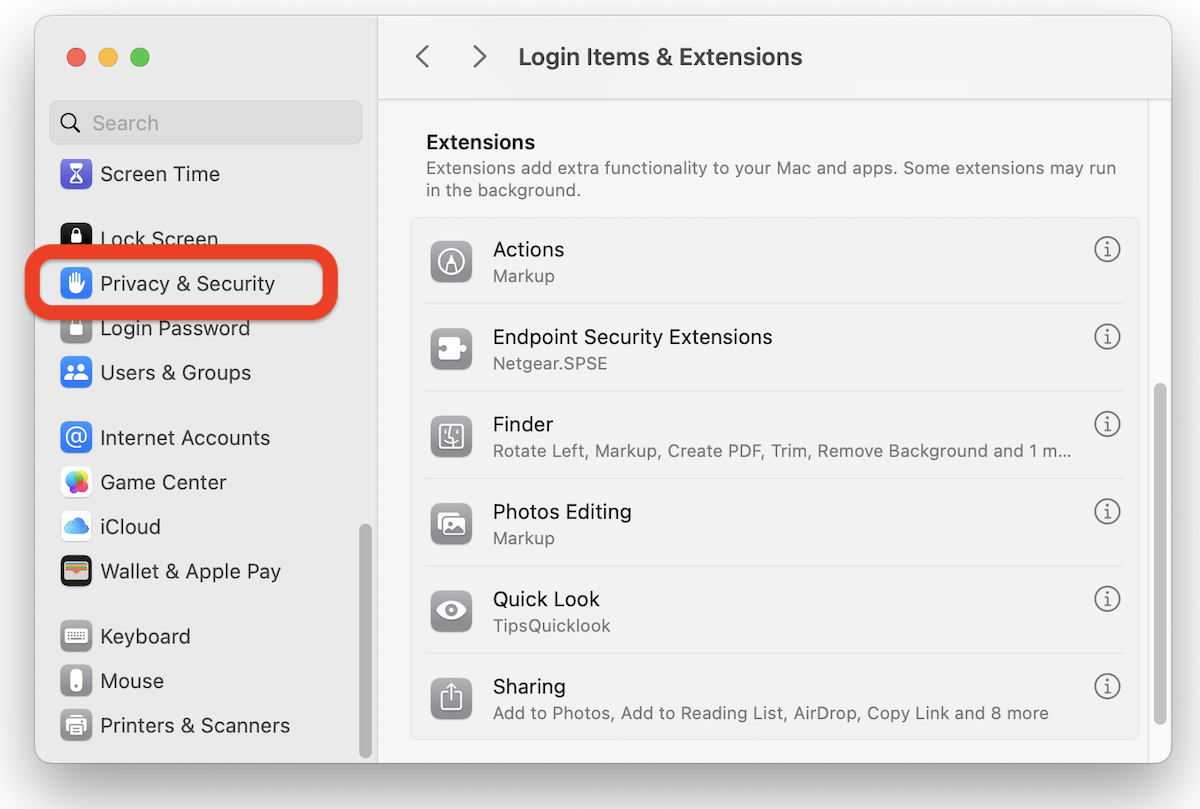
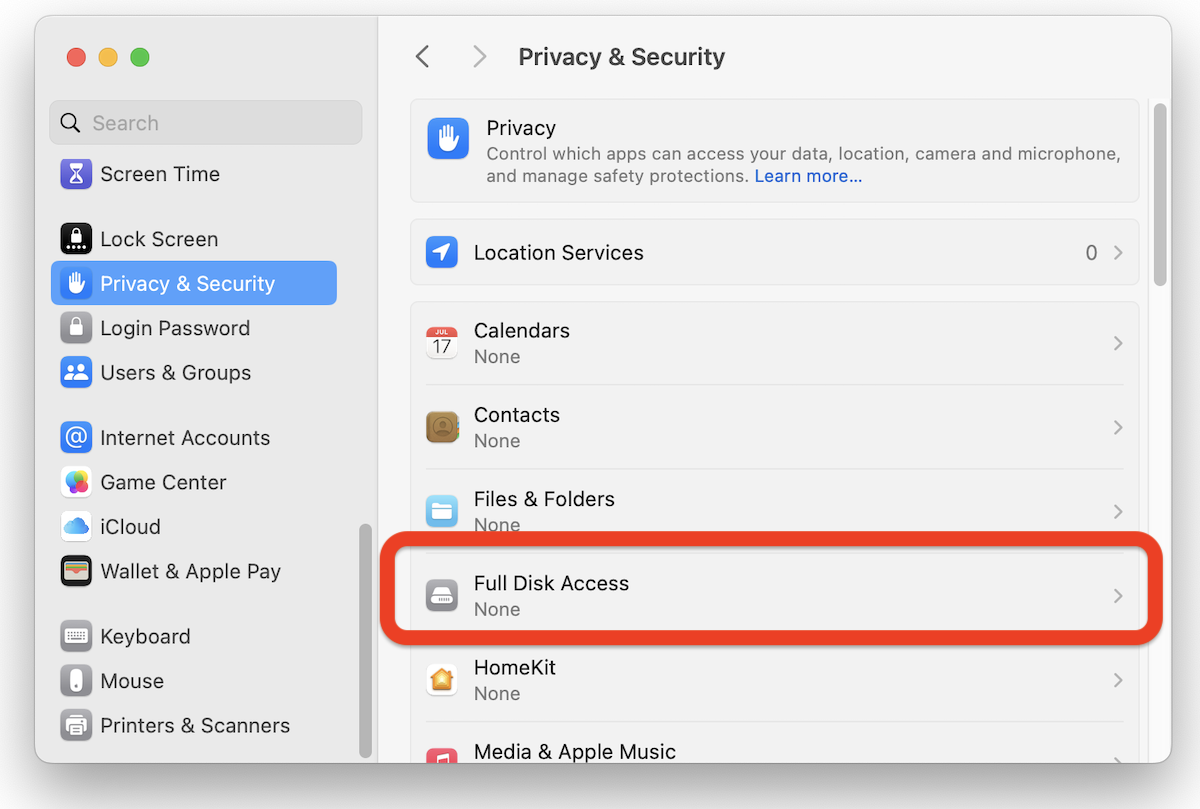
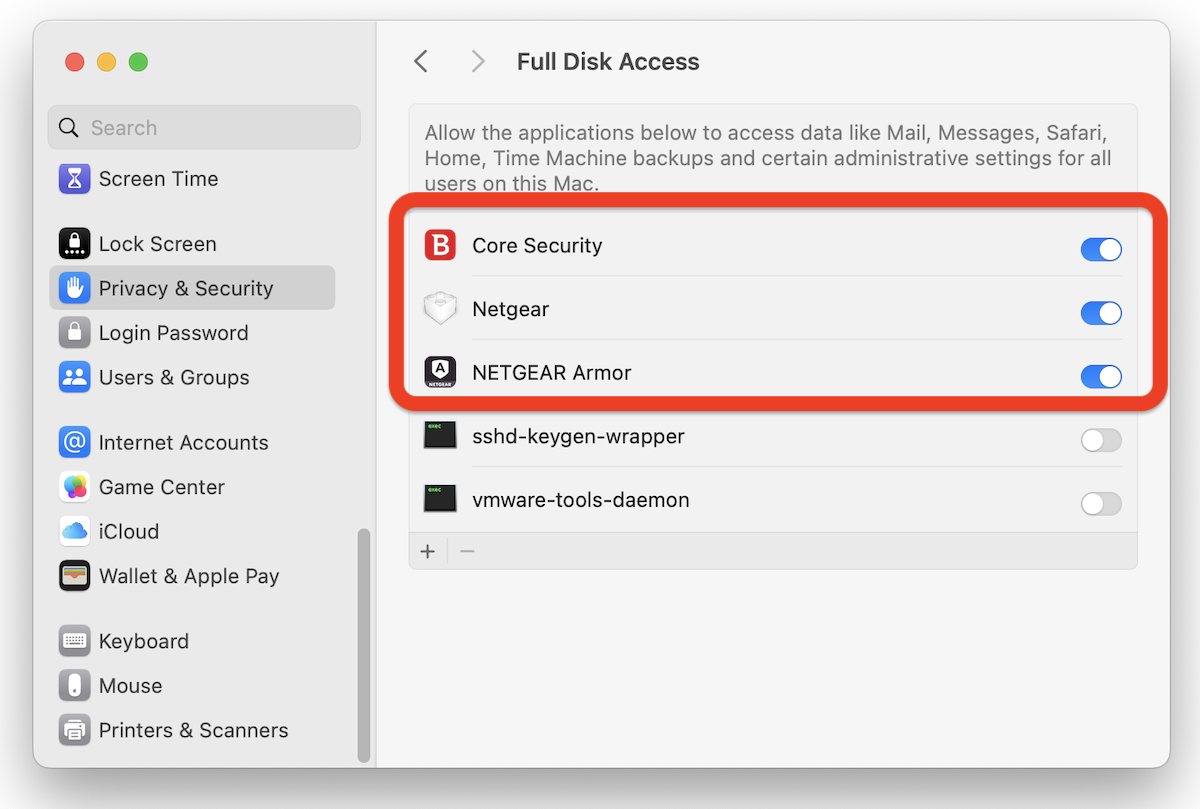
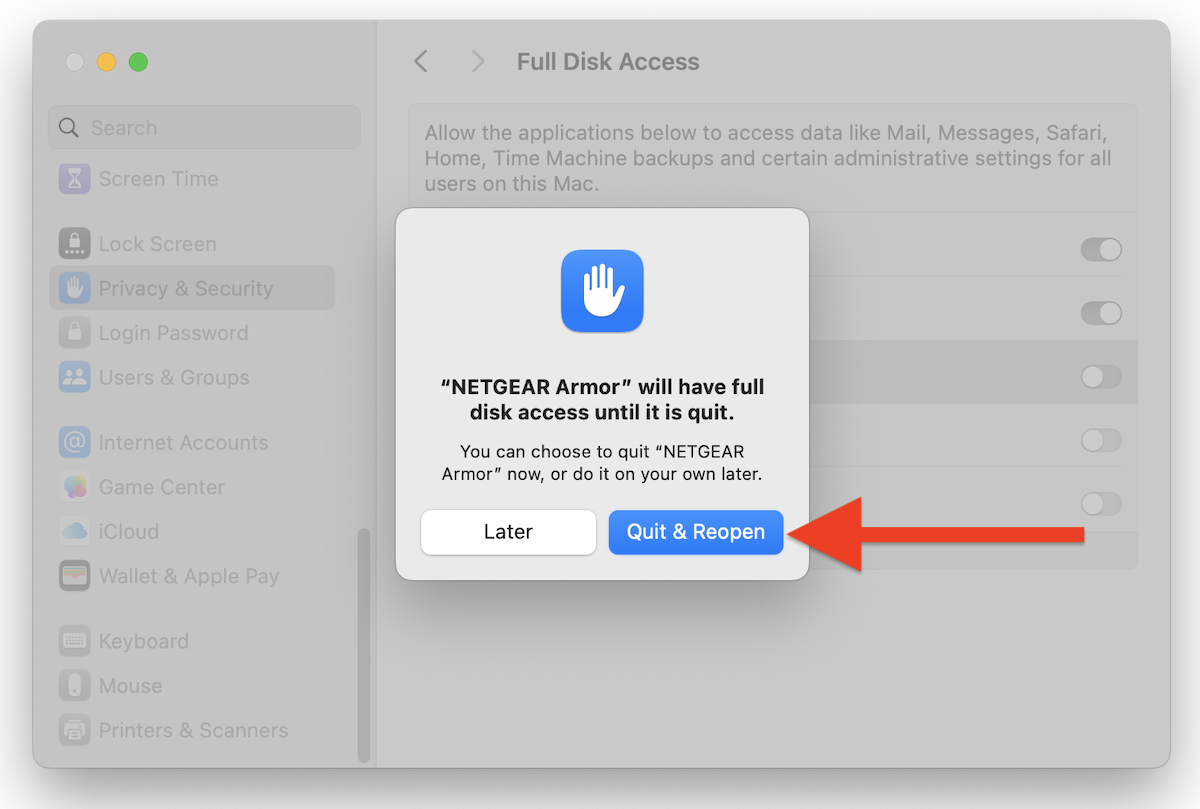
Next, set up NETGEAR Armor by following the instructions that correspond to your macOS version – Find out which macOS your Mac is using.
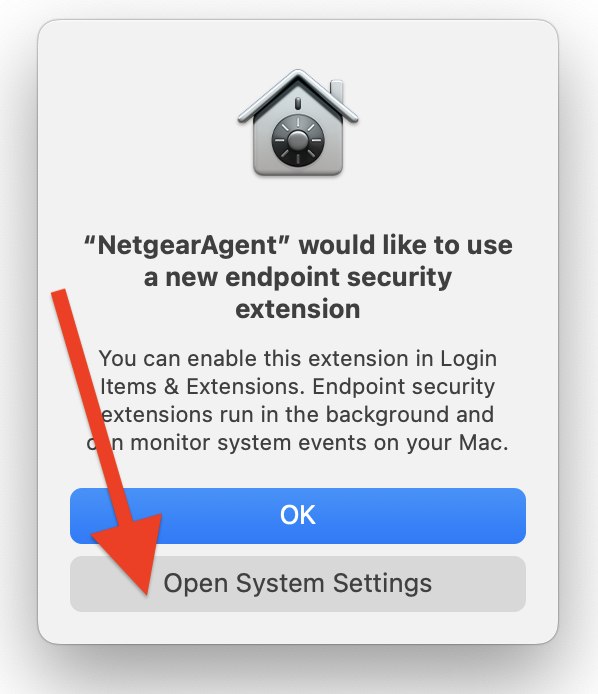
macOS Ventura (13) - Sonoma (14)
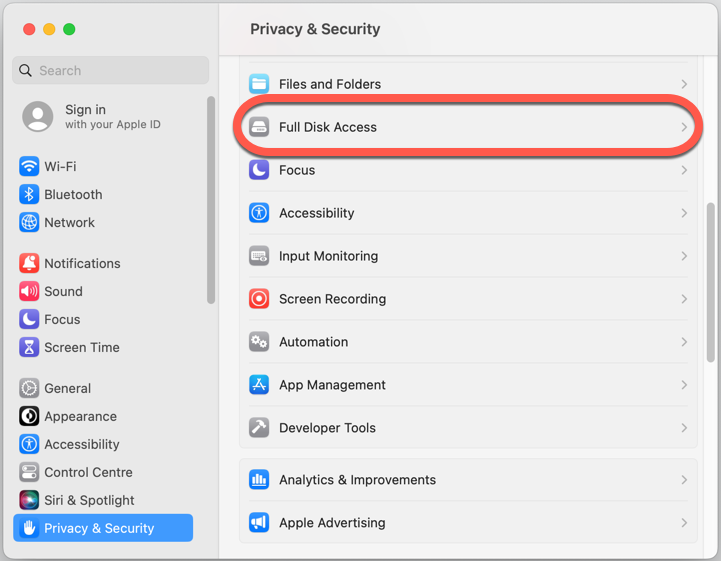
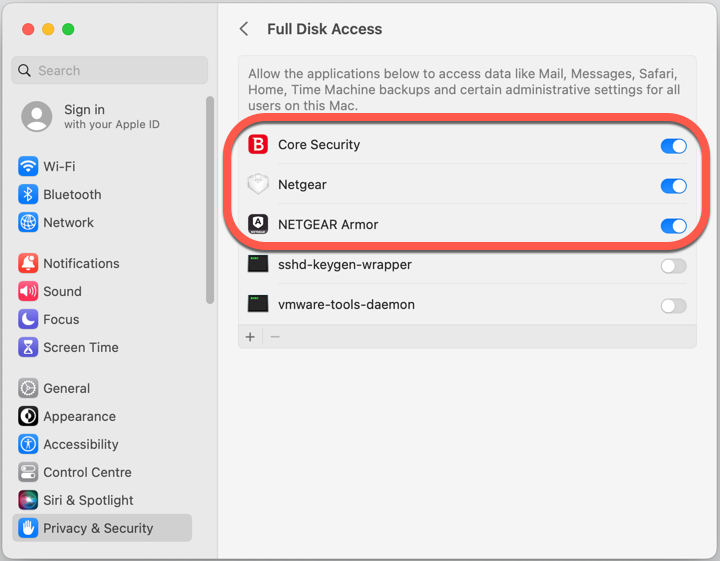

macOS Sequoia (15) - Tahoe (26)

Once NETGEAR Armor is installed and set up on macOS, you’ll also want to protect your browsers by enabling the Traffic Light browser extension, which blocks dangerous websites and flags unsafe links in your search results.
To protect other devices, see – How to Install NETGEAR Armor & VPN on All Devices.