In this tutorial, you will learn how to complete the initial activation process and set up Bitdefender Identity Theft Protection to ensure that your personal information is being securely monitored 24/7. Take a moment to review each of the topics below.
Activate & Set Up Bitdefender Identity Theft Protection to protect your identity
Before we can begin protecting your identity, you’ll need to fully and accurately complete your registration. Here are detailed instructions to ensure you don’t miss any important steps in becoming a Bitdefender Identity Theft Protection member.
Step 1
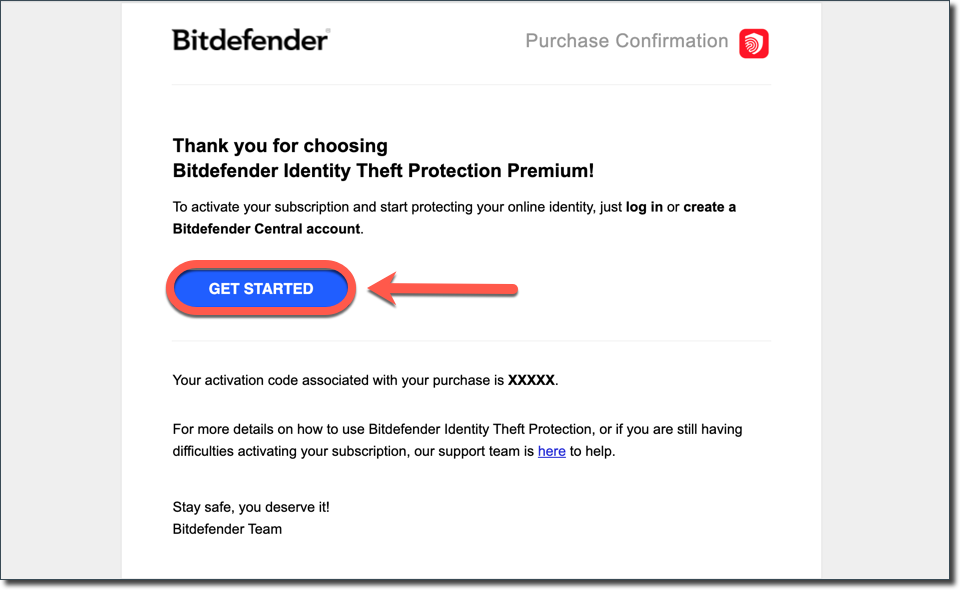
First, you will receive a confirmation email sent to the e-mail address you used when you initially signed up. Click on the GET STARTED button at the top of the welcome email to activate your subscription.
Step 2
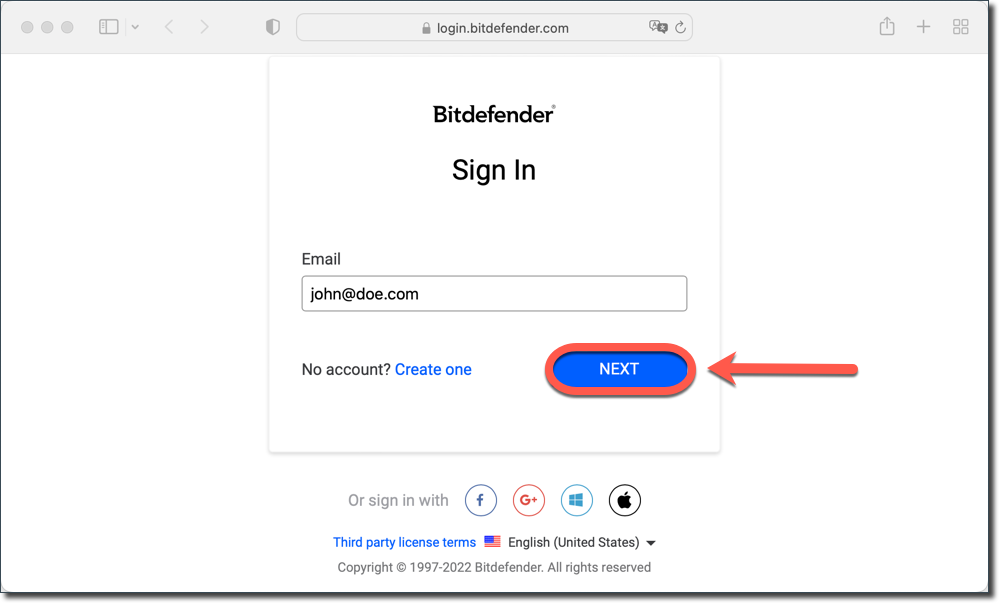
This will take you to https://central.bitdefender.com. Sign in with your Bitdefender Central account. If you don’t have an account, choose to create one.
Bitdefender Central is an online hub that facilitates the management of all your Bitdefender subscriptions, products, and services. From Central, you can control security for yourself and your entire family. You can install protection, track your lost devices, manage your subscriptions, and run remote scans and optimizations. All in one place. To learn more, see – What is Bitdefender Central & How do I use it?
Step 3
After signing in, the subscription is automatically activated and attached to your Bitdefender Central account.
Next, you must accept the terms & conditions before you can continue. Be sure to thoroughly review before proceeding. Check the box and then click Agree & Continue.

Step 4
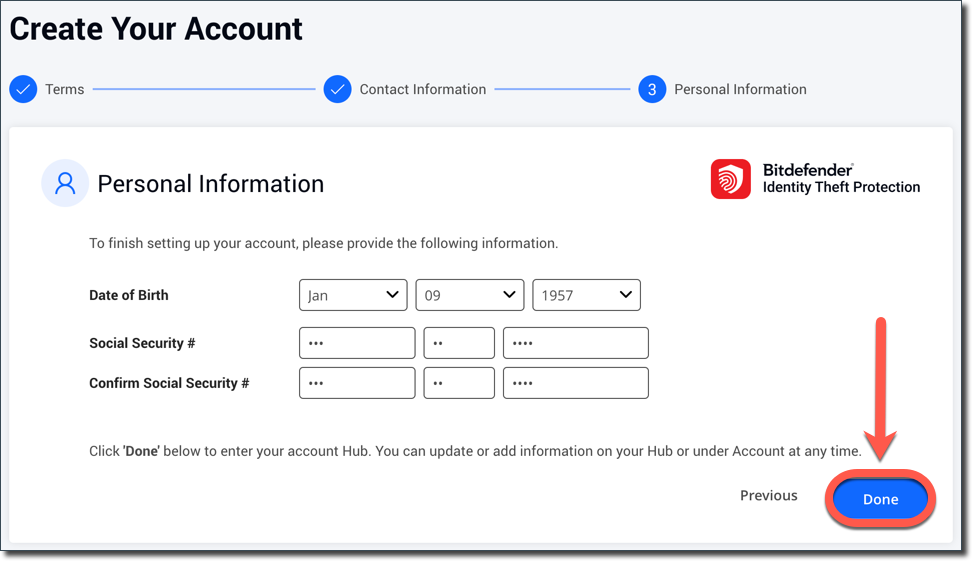
You will then be guided to set up Bitdefender Identity Theft Protection.
Get started by completing your personal information. Add your:
- name
- date of birth
- primary phone number
- social security number
- address
Click Done and Bitdefender Identity Theft Protection will start monitoring your information immediately!
Take a moment to read the next section of this article that features a step-by-step tutorial of the top 3 actions you should take to set up Bitdefender Identity Theft Protection to best protect yourself.
Ensure your identity is fully protected by Bitdefender Identity Theft Protection
Once setup is complete, you will be taken to your Bitdefender Central account dashboard. Here you can further customize your protection settings, see alerts and manage your account. We’re going to show you a couple of actions for ensuring your identity is being fully protected by Bitdefender Identity Theft Protection. We will review how to authenticate your credit file & how to set up account number monitoring.
Step 1 – Authenticate Card
First, you’ll need to verify your identity to grant access to your credit reports. Here’s how:
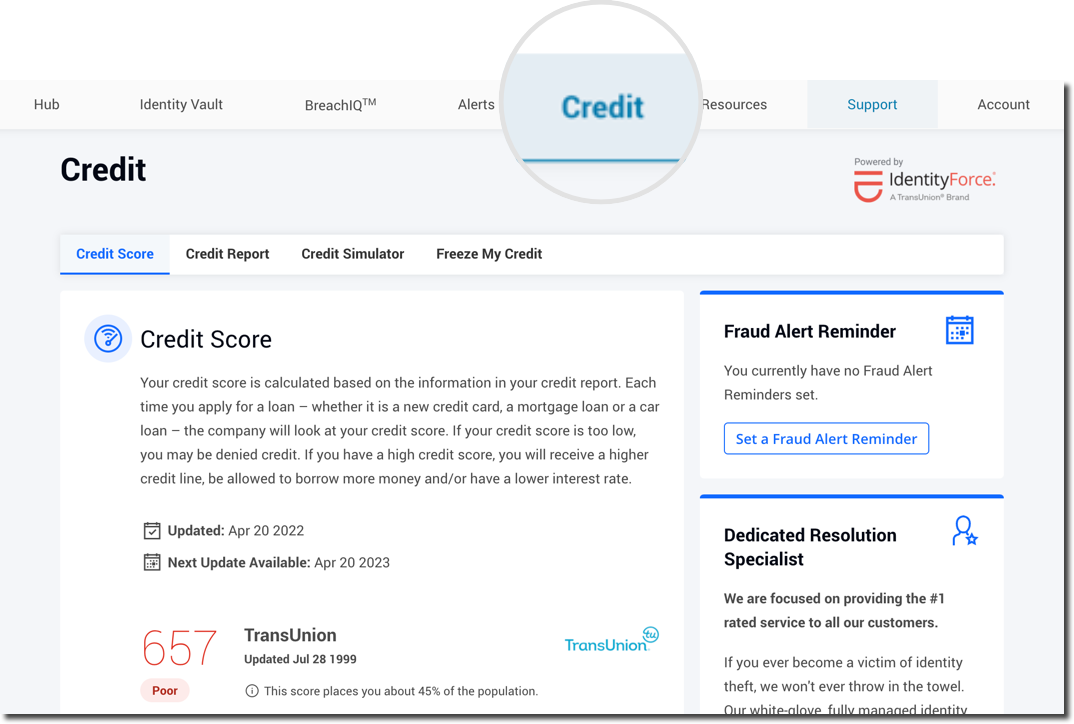
- Start by clicking the CREDIT tab on the Bitdefender Identity Theft Protection dashboard. You’ll now see the Credit Score in the reports area.
- Next, click on Authenticate.
- Read through the disclosure agreement and click I Agree.
- Next, type in your Social Security number twice and click on Activate.
- You’ll now be asked to answer the security questions with the responses that best match your credit history.
- Click Submit when you’re done.
Upon successful verification, Bitdefender Identity Theft Protection will constantly monitor your credit files every day. You will have full access to your credit scores and reports within your Bitdefender Identity Theft Protection dashboard. And you will receive alerts by email should any changes be detected.
Step 2 – Account Number Monitoring
Up next is setting up your account number monitoring. As you do this, Bitdefender Identity Theft Protection does not grant unauthorized access to any of your sensitive personal information. This functionality is critical as it detects the illegal trading and selling of your bank accounts and credit cards on the Dark Web and other data sites.
- First, click the IDENTITY VAULT tab on the Bitdefender Identity Theft Protection dashboard.
- Then scroll down to Financial Accounts.
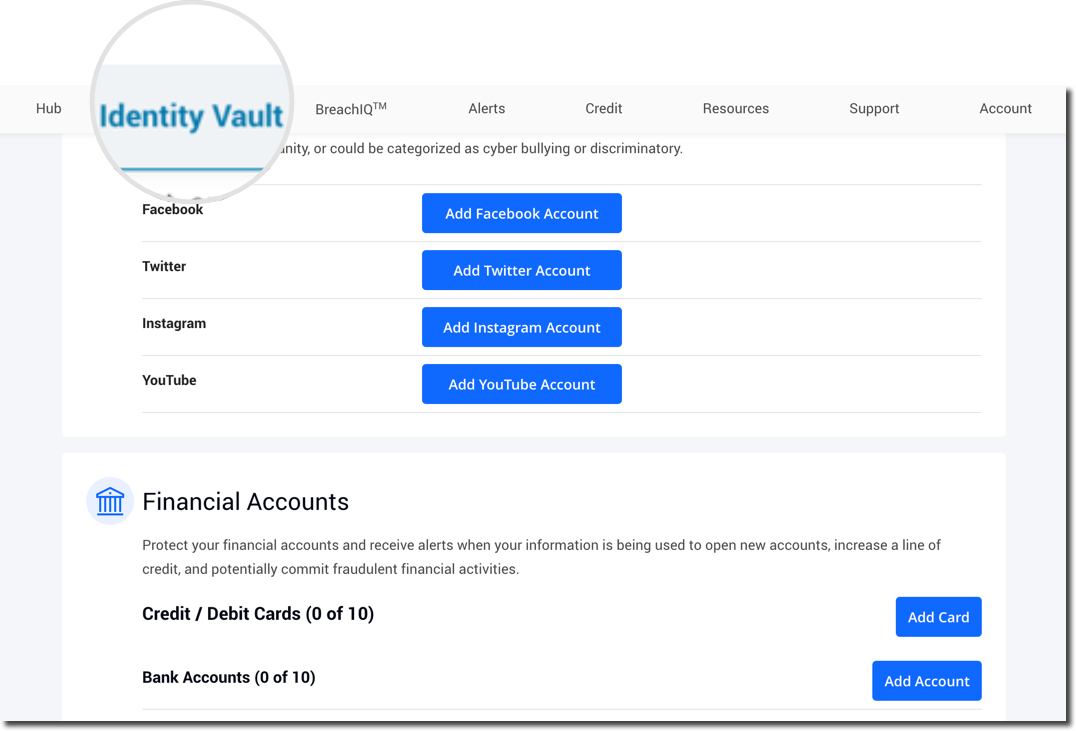
- Click Add Card for credit and debit cards, or Add Account for bank accounts.
- Enter your card or your bank account details, then click Save. Once your first card/bank account has been added, you can go ahead and add more accounts or update your alert preferences.
Congratulations! Bitdefender Identity Theft Protection will now monitor your financial information across the Dark Web, sending you proactive alerts if any incidents are discovered.
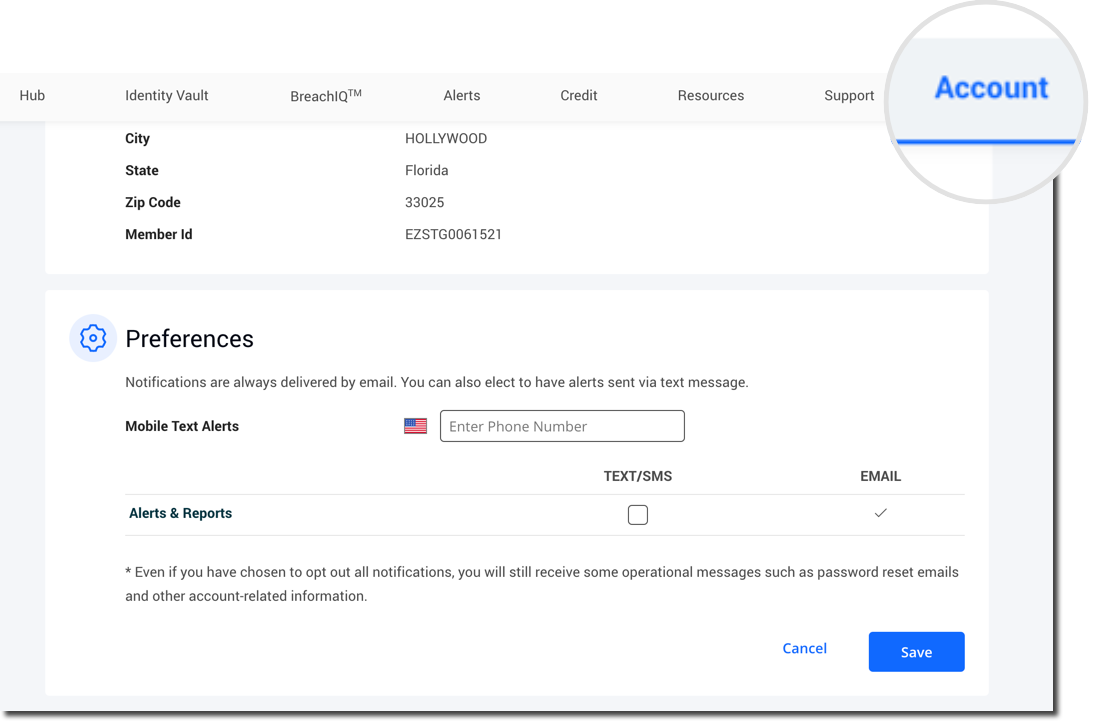
You will receive alerts from Bitdefender based on your selected preferences. To take a look at your notification preferences, open the ACCOUNT tab on the Bitdefender Identity Theft Protection dashboard. Your alerts are sent to the email address shown. And you can also add your mobile number for alerts via text message.
To learn more about navigating your Bitdefender Identity Theft Protection dashboard, see – How to Navigate & Use your Bitdefender Identity Theft Protection dashboard. This step-by-step tutorial walks you through each section of the dashboard to show you all the features available.