Follow the steps below to uninstall the NETGEAR Armor app from your Windows computer. If you decide to reinstall it later, you can easily do so by following our guide – Install NETGEAR Armor by Bitdefender on Windows.
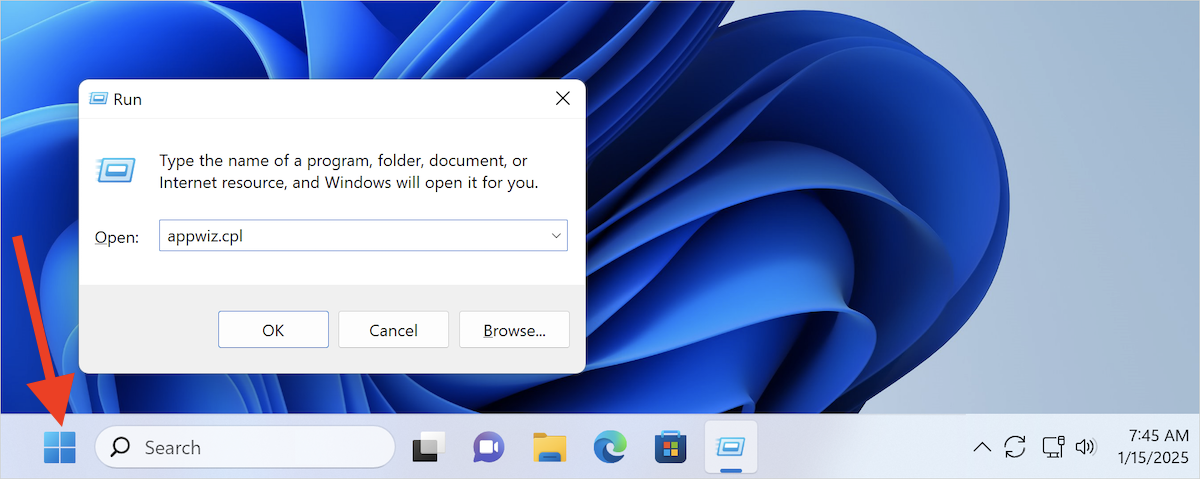
Step 1. Open Control Panel
- Click the Start button (Windows logo) in the bottom-left corner.
- Alternatively, press Win + R on your keyboard to open the Run dialog box.
- Type appwiz.cpl and press Enter. The “Programs and Features” window in Control Panel will open.
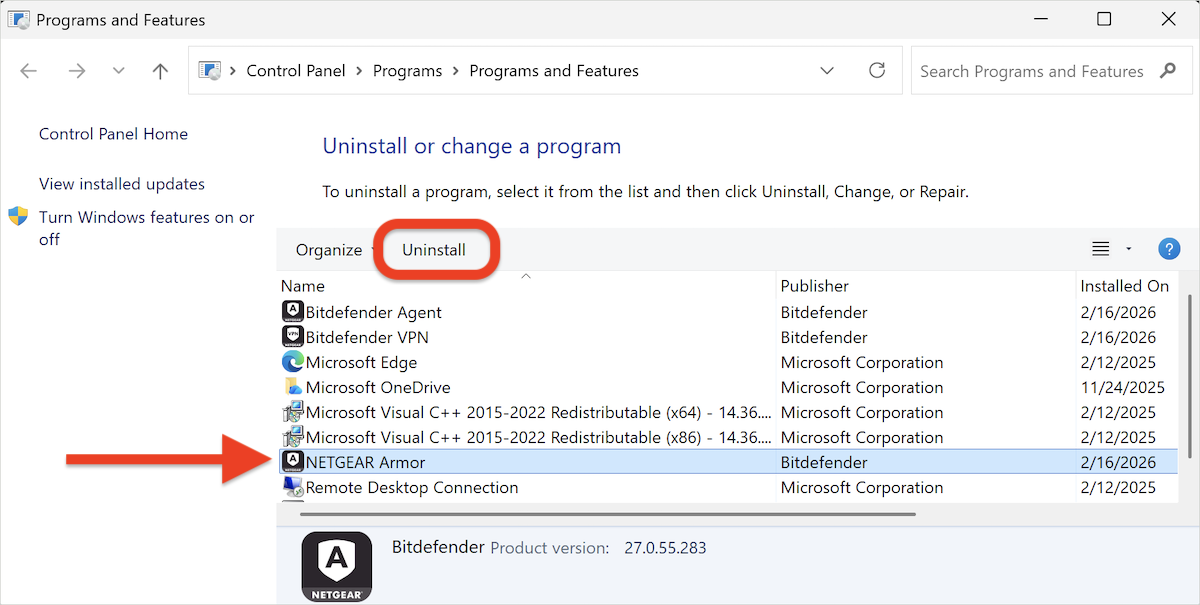
Step 2. Uninstall NETGEAR Armor
- Right-click NETGEAR Armor and choose Uninstall, or select it and click the Uninstall button at the top of the list of installed programs.
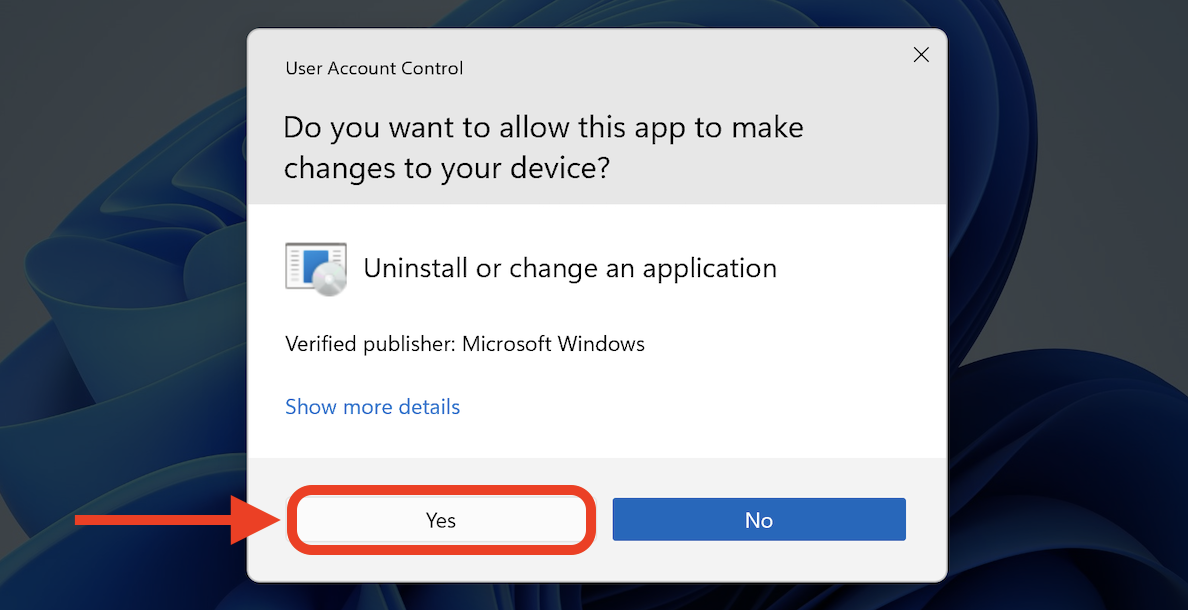
Step 3. Confirm the Uninstallation
- If prompted by User Account Control, click Yes to proceed.
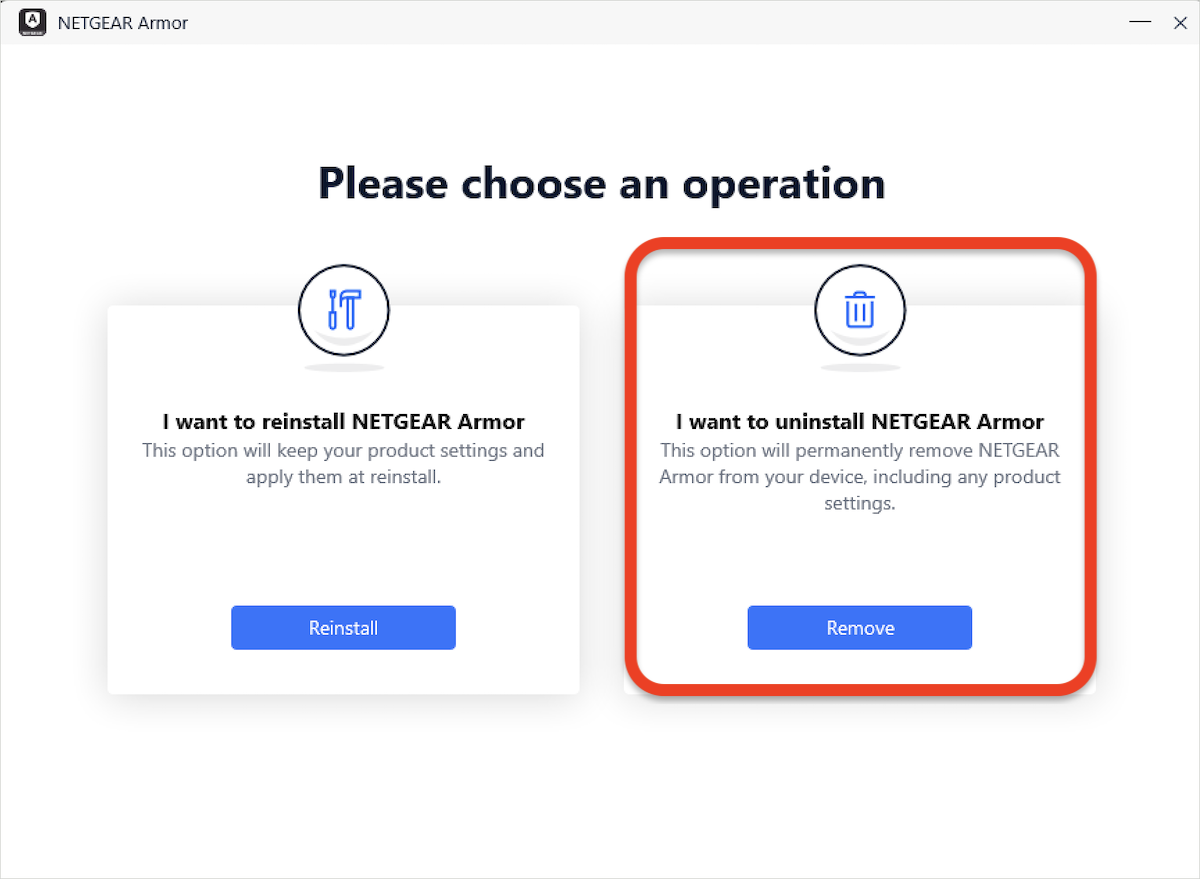
Step 4. Choose Removal Option
- In the window that appears, click the Remove button to uninstall NETGEAR Armor.
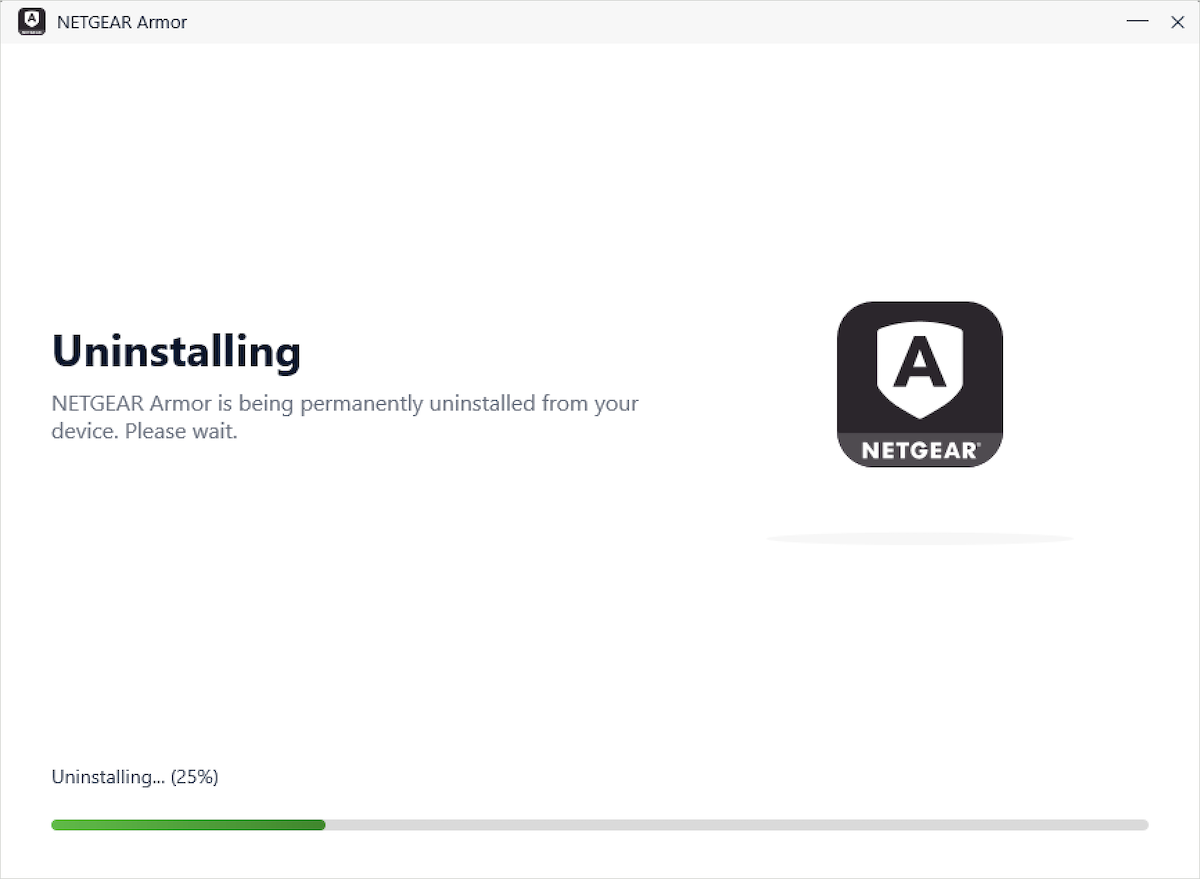
Step 5. Wait for the Process to Complete
- Allow the uninstallation process to finish. A progress bar will indicate the completion status.
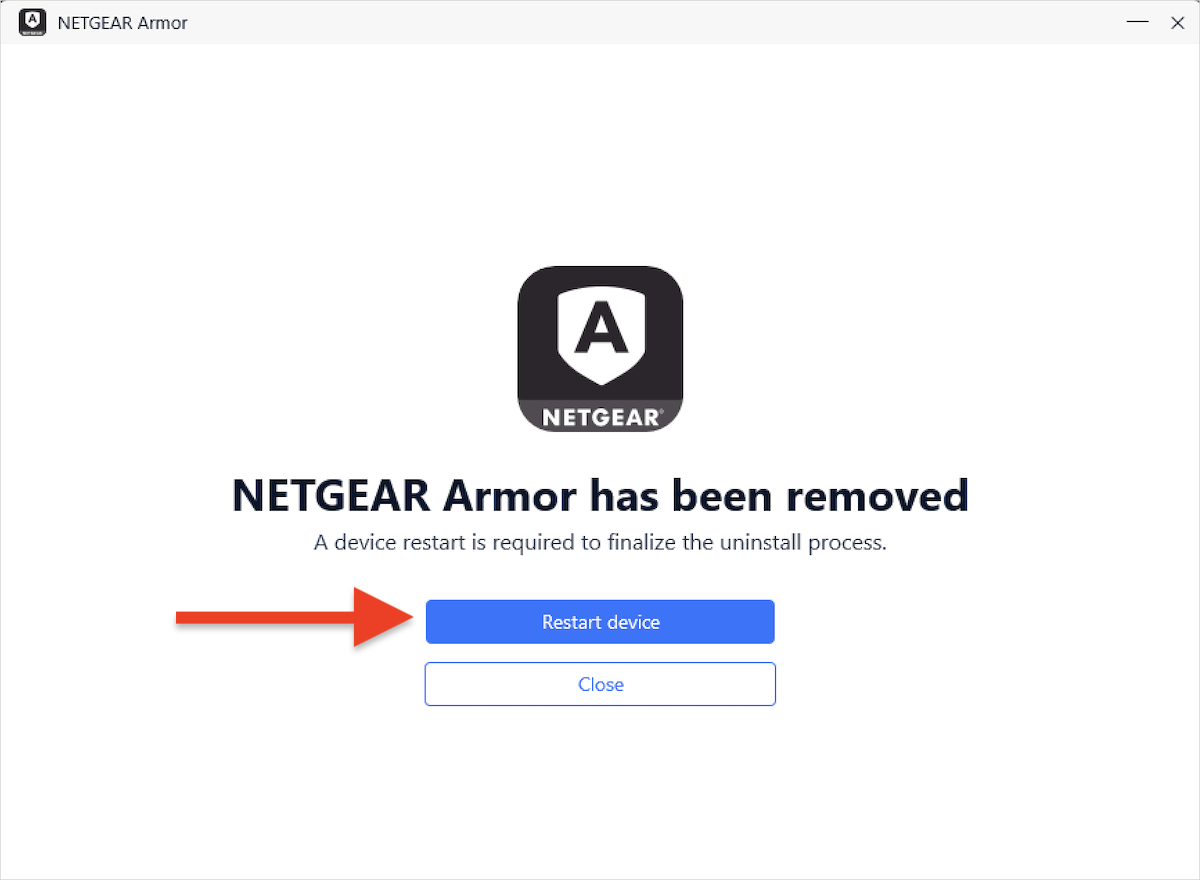
Step 6. Restart Your Device
- After NETGEAR Armor is removed, restart your PC to complete the process.
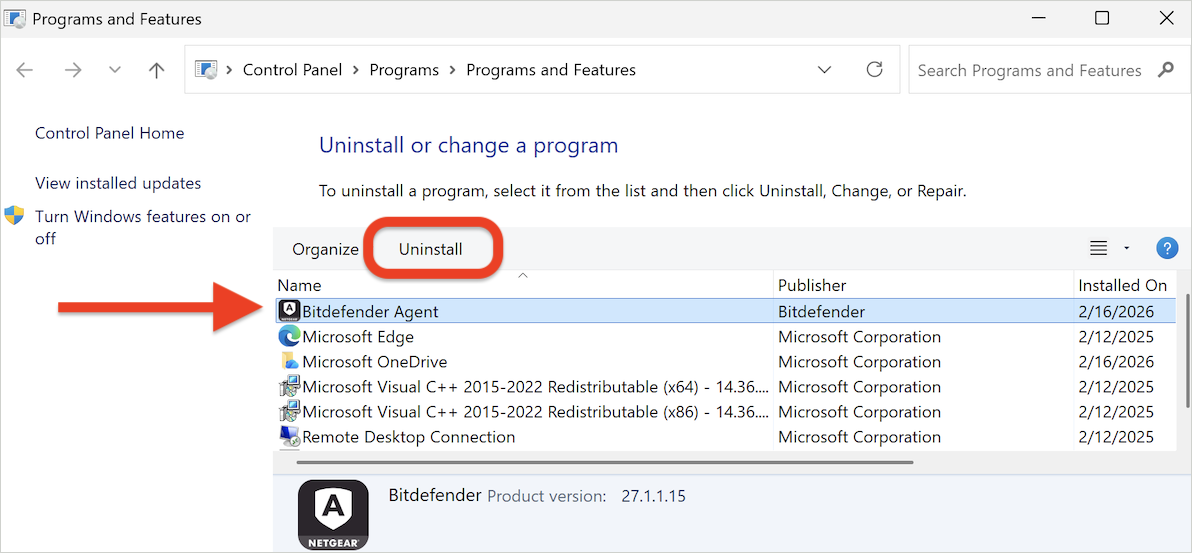
Step 7. Uninstall Bitdefender Agent (optional)
If you have no other NETGEAR Armor products (such as NETGEAR VPN) installed, remove Bitdefender Agent as well:
- Repeat step 1 of this tutorial to open the “Programs and Features” window in Control Panel.
- Right-click on Bitdefender Agent and select Uninstall, or click the Uninstall button at the top.
After completing these steps, the NETGEAR Armor app will be uninstalled from your Windows computer.