Follow these steps to install and set up the NETGEAR Armor Password Manager extension on Windows and macOS web browsers. NETGEAR Armor Password Manager is a multi-platform service that helps you store and organize all your online passwords.
Installation
- Sign In to NETGEAR Armor:
- Go to https://armor.netgear.com/ in your web browser.
- Sign in with your NETGEAR Armor account.
- Click Allow to give Bitdefender access to your profile info for NETGEAR Armor subscription verification.
- Access Password Manager:
- On the left-hand side menu of your NETGEAR Armor account, select Password Manager.
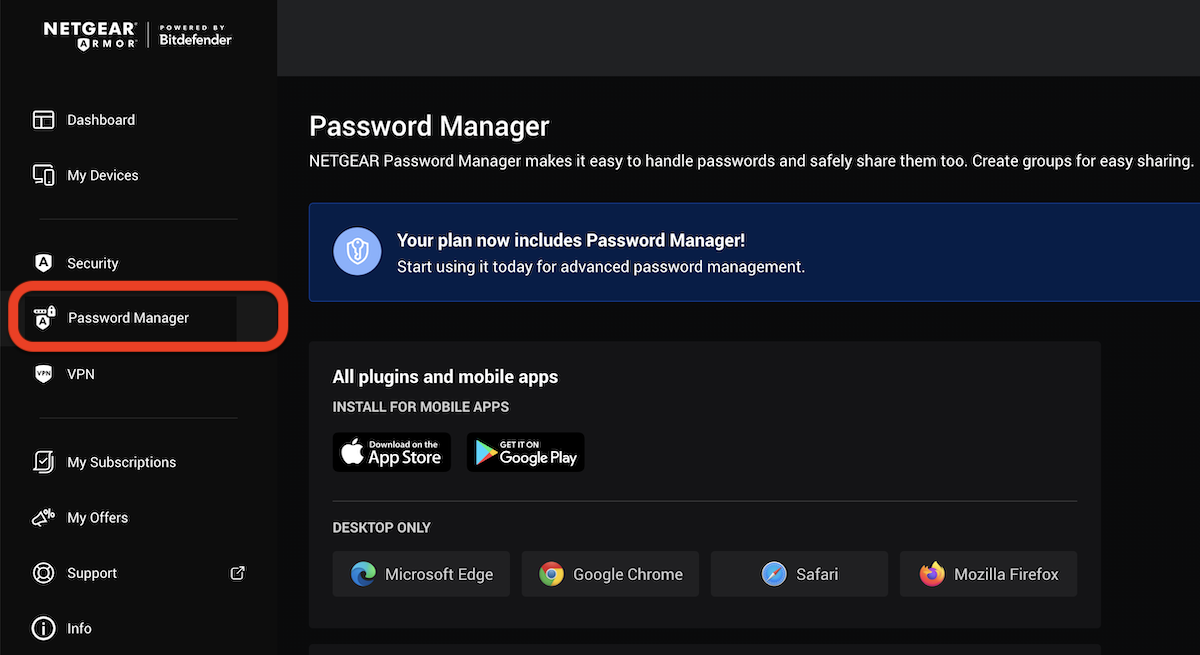
- On the left-hand side menu of your NETGEAR Armor account, select Password Manager.
- Choose Your Browser:
- Click the name of the web browser you are using (Microsoft Edge, Google Chrome, Safari, or Mozilla Firefox).
- Install the Browser Extension:
- You will be redirected to your browser’s extension store. Follow the on-screen instructions to add the NETGEAR Armor Password Manager extension to your web browser.
Microsoft Edge ![]()
-
-
- Click the Get
 button.
 - Click Add extension in the prompt that appears.
- Click the Get
-
Google Chrome ![]()
-
-
- Click the Add to Chrome
 button.
 - In the confirmation box, click Add extension.
- Click the Add to Chrome
-
Mozilla Firefox ![]()
-
-
- Click the Add to Firefox
 button.
 - Click the Install button in the upper right corner of the screen.
- Click the Add to Firefox
-
Safari ![]()
-
-
- The installer will be downloaded on your Mac.
- Double-click the downloaded file and follow the on-screen instructions to install NETGEAR Armor Password Manager.
- At the end of the installation, open Safari and select Settings (Preferences on earlier versions) in the top menu bar.
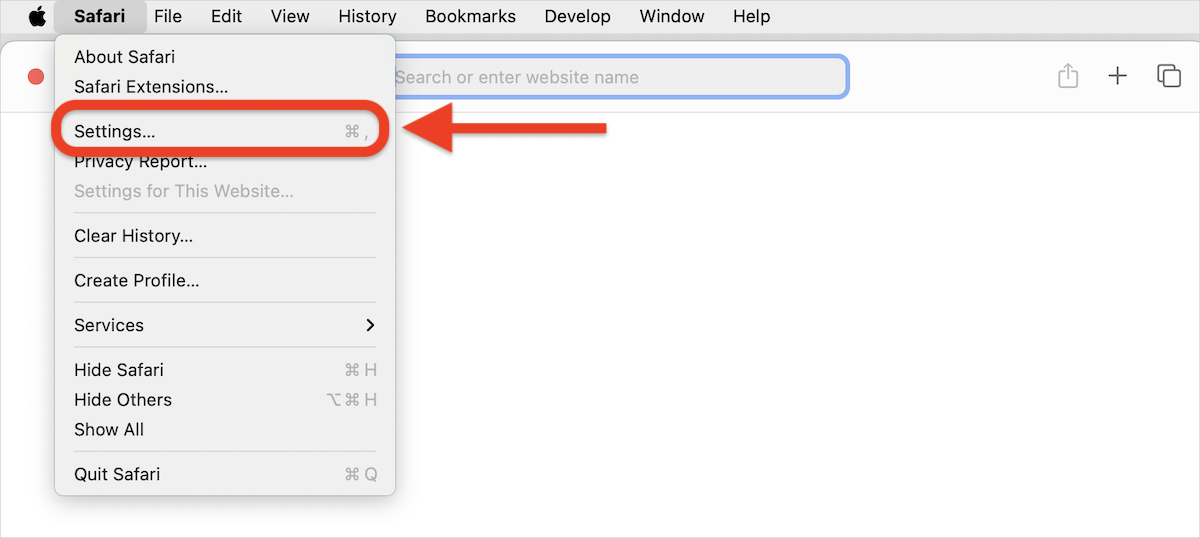
- In the window that appears, click the Extensions tab.
- Select the NETGEAR Armor Password Manager checkbox to enable it.
-
Once the browser extension is installed, you can proceed to the setup process.
Setup
- Sign In:
- After installation, open the NETGEAR Armor Password Manager extension and log in with your NETGEAR account.
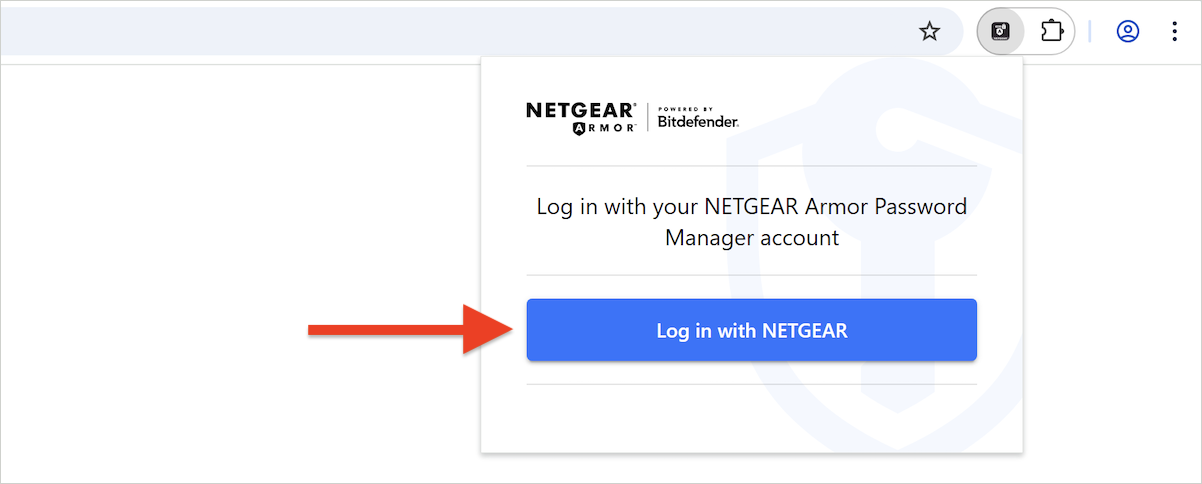
- After installation, open the NETGEAR Armor Password Manager extension and log in with your NETGEAR account.
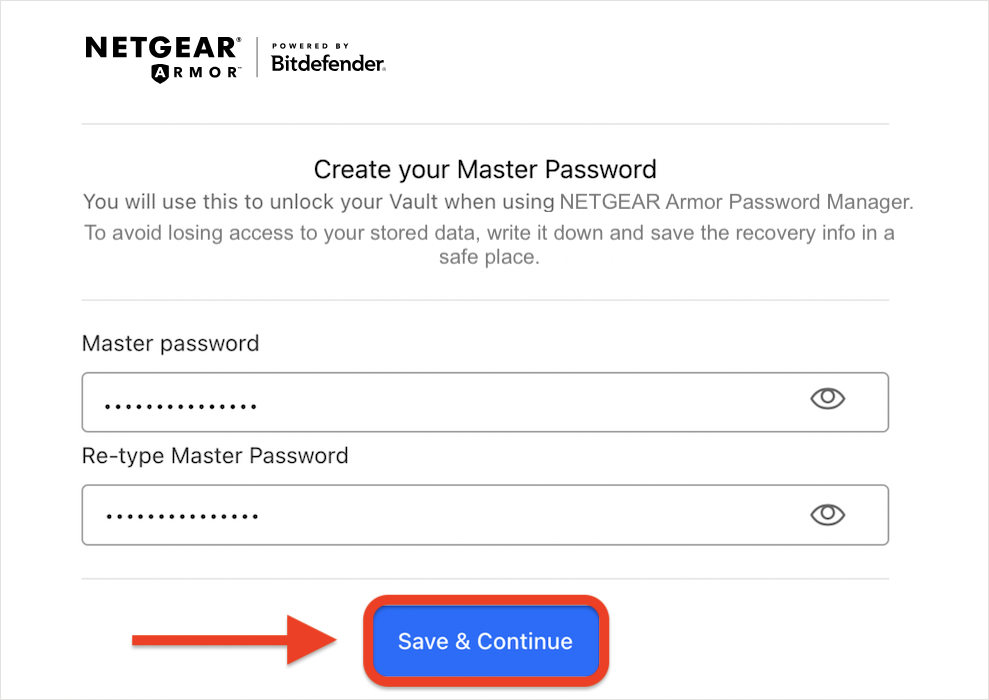
- Set Up Master Password:
- Upon signing in, you will be prompted to create a master password. This password will unlock your NETGEAR Armor Password Manager vault and encrypt your stored data.
- Enter a strong and unique master password, then click Save & Continue.
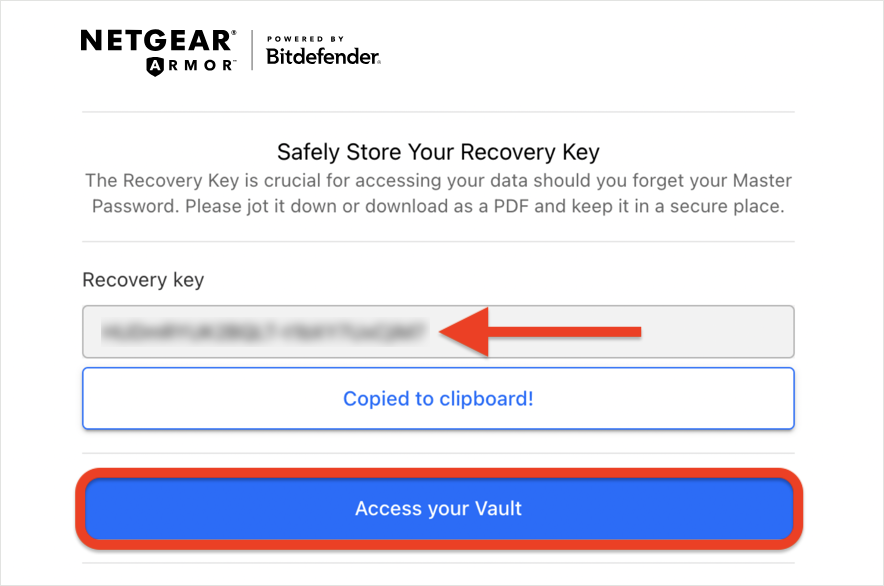
- Save Your Recovery Key:
- Next, you will be provided with a recovery key. This key will allow you to recover access to your vault if you forget your master password.
- Save the recovery key by copying it to your clipboard or downloading it as a PDF.
- Access Your Vault:
- Once the recovery key is saved, press the Access your Vault button to complete the setup and begin using NETGEAR Armor Password Manager.
- Once the recovery key is saved, press the Access your Vault button to complete the setup and begin using NETGEAR Armor Password Manager.
Additional Tips
After installing NETGEAR Armor Password Manager on your Windows or Mac computer, follow these steps to disable the browser’s built-in password manager, to prevent duplicate prompts and enhance security: