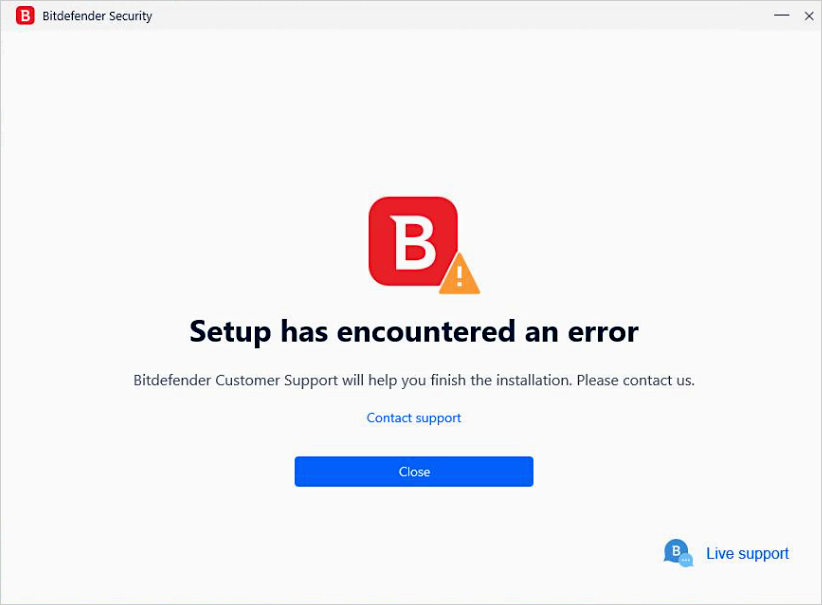
If you receive one of the error messages “Bitdefender Installation failed” or “Setup has encountered an error” while trying to install Bitdefender on a Windows computer, follow the troubleshooting steps below.
Step 1
Remove any previous versions of Bitdefender from your system by using one of the uninstall tools available here.
Step 2
Remove all other security solutions installed and then restart the computer. To uninstall them from the Control Panel, use the instructions provided here. You will also find a list of uninstall tools for common antivirus software here.
Step 3
Next, run Disk Cleanup to erase the remains of previous security software.
Step 4
After that, try again to install Bitdefender from your Bitdefender Central account – How to install Bitdefender on Windows.
Step 5
If the setup error persists, we recommend using the Microsoft System File Checker tool (SFC) to repair missing or corrupted files, as specified in this Microsoft article.
Step 6
Use the Check Disk tool to check the integrity of disks and correct certain types of common errors. To use the tool from an elevated command prompt, you will have to:
-
- Click ⊞ the Windows Start menu, then type in cmd
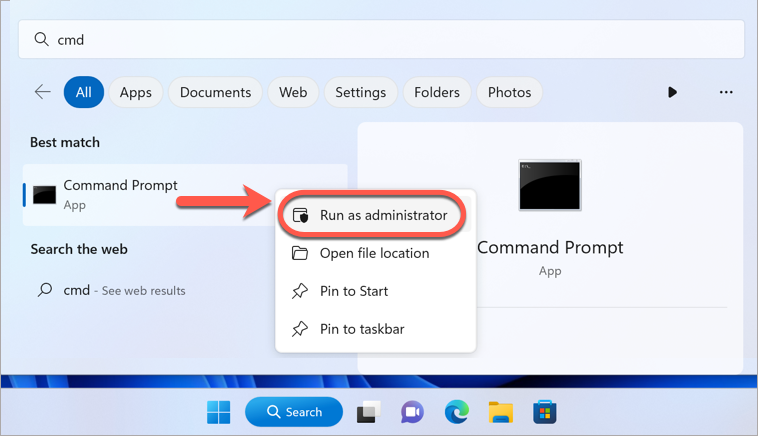
-
- Right-click on Command Prompt in the results and select Run as administrator.
- Click Yes on the User Account Control prompt.
- To find and repair errors on drive C input the command chkdsk /f C:
- If you want to scan a different drive, just replace C with the corresponding letter of your drive.
Step 7
Perform all the Windows updates (make sure you have the latest Service Pack installed). Find out more about Windows Update by accessing this Microsoft link.
Note: If you use Windows 8, Windows 10, or a newer Windows version such as Windows 11, also run the DISM command:
-
- Click the Windows Start menu in the lower-left corner of the screen and type in Command Prompt
- Right-click on Command Prompt and then click Run as administrator.
- Click Yes on the User Account Control Prompt.
- Input the command DISM.exe /Online /Cleanup-image /Restorehealth and then press Enter on your keyboard.
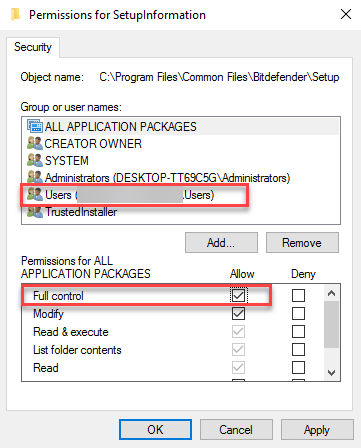
Step 8
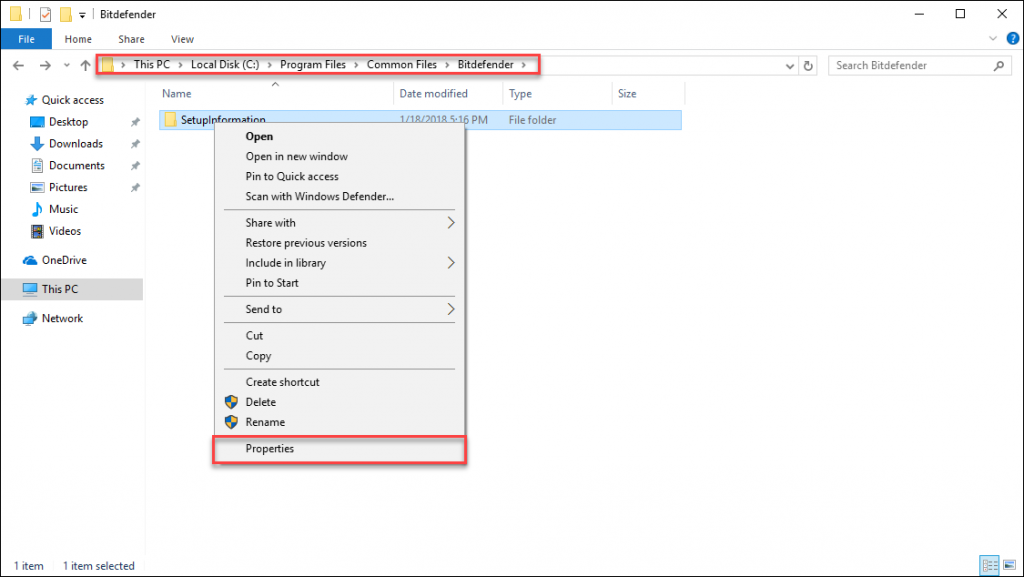
Manually add permissions to the Bitdefender installation folders. To do this, you will have to:
-
- Manually create the folder C:\Program Files\Common Files\Bitdefender\SetupInformation\
- Then right-click on SetupInformation folder and then select Properties.
-
- Click on the Security tab then click on the Edit button.
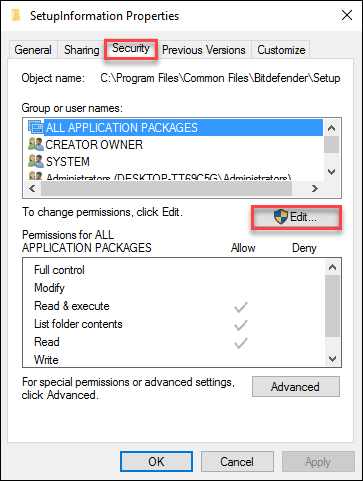
-
- Select your Windows username. After selecting your username, check the box next to Full Control. This will set the correct Windows permissions for the C:\Program Files\Common Files\Bitdefender\SetupInformation folder.
-
- Also set full permissions for these two folders below by repeating step 4 above:
C:\Program Files\Bitdefender (create this folder manually if it doesn’t exist)
C:\Program Files\Common Files\Bitdefender
After setting full permissions on the above folders, restart Windows and install Bitdefender from your Central account.